 5 min read
 Feature
Columns are one of the main building blocks of your board which allow you to display and customize the data from your workflows in any way that you wish! We offer many types of columns so that you can build your board exactly the way you want it to be.
You can add a new column by taking the following steps:
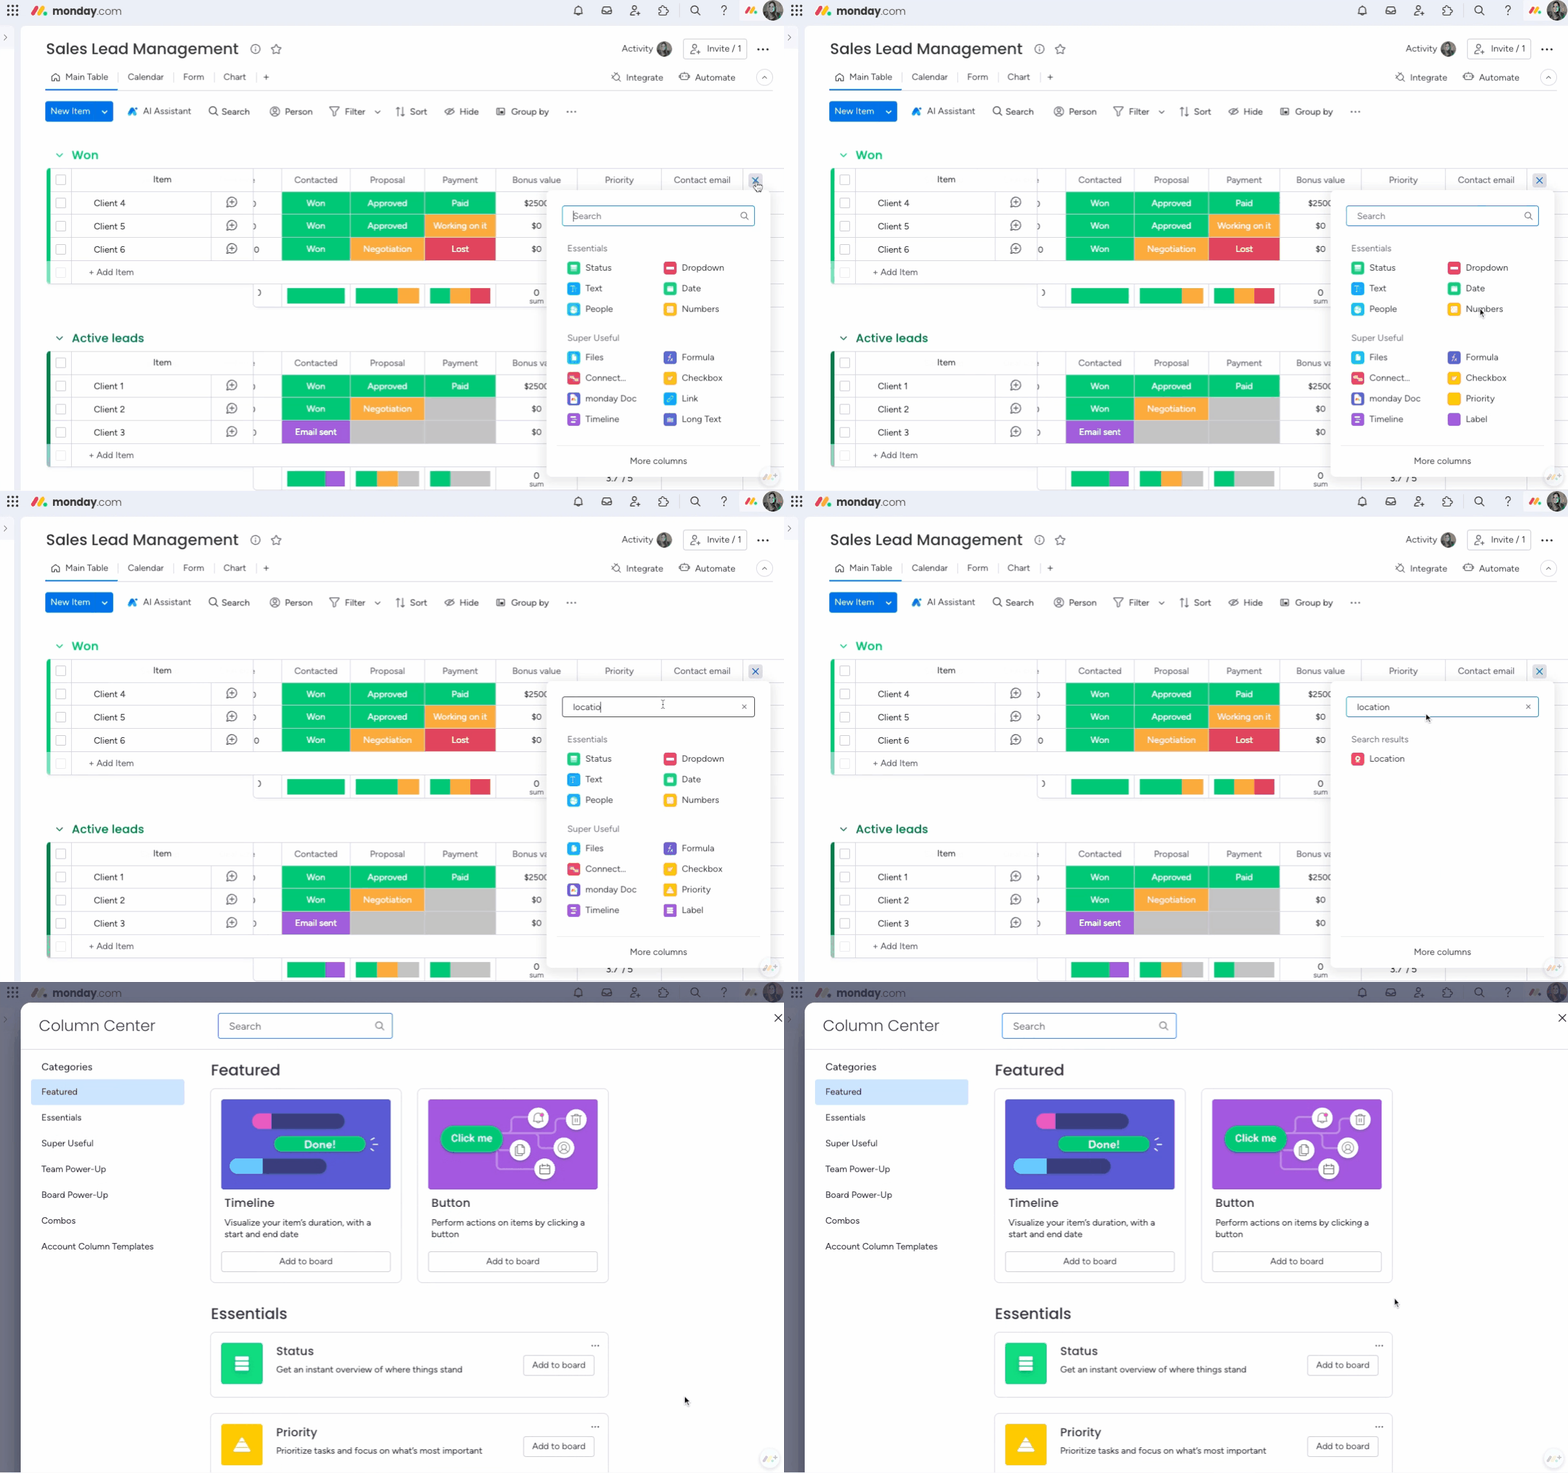
- Click on the + button on the far right side of the board.
- Select the column you would like to add either from the drop-down menu, by using the search bar, or by clicking to the full column center.
Note: There is a limit of 500 columns per board.
You can also add a column directly to the right of another one! Just open an existing column menu and click on "Add column to the right" and then select your column of choice.

To learn more about the different types of columns that we offer, check out this article.
Note: When adding a column to your board, it will be added across your entire board. It is not possible to add a column solely to a specific item or group on your board.
You can add a column description by clicking on the column menu and then "add description" as shown below:
Certain column types, such as the Status Column, People and Numbers, and more, will allow you to reflect a summary of the column data at the bottom of the group. To enable it, simply click on "Show Column Summary" from the column settings as shown below.
Tip: To learn more about group and board summaries, check out this article.
To delete a column, click into the column menu and select "delete column" and here you go!
You can set permissions on your columns to restrict who can edit or see it. This is really helpful when you want your team members and guests to be able to collaborate and update a board with the exception of only certain details. For more details about how it works, check out this article.
You can pin, or "freeze" certain columns to the left side of your board so that you can scroll smoothly, keeping all relevant information in your view at all times. To select which exact columns you'd like to pin, click on the three-dot icon at the top of your board, then click on the pin icon and mark off the relevant columns.
Use the sorting option found above each column in each group of items. Clicking on the sort button once will sort your items one way. Clicking it again will sort them the opposite way.
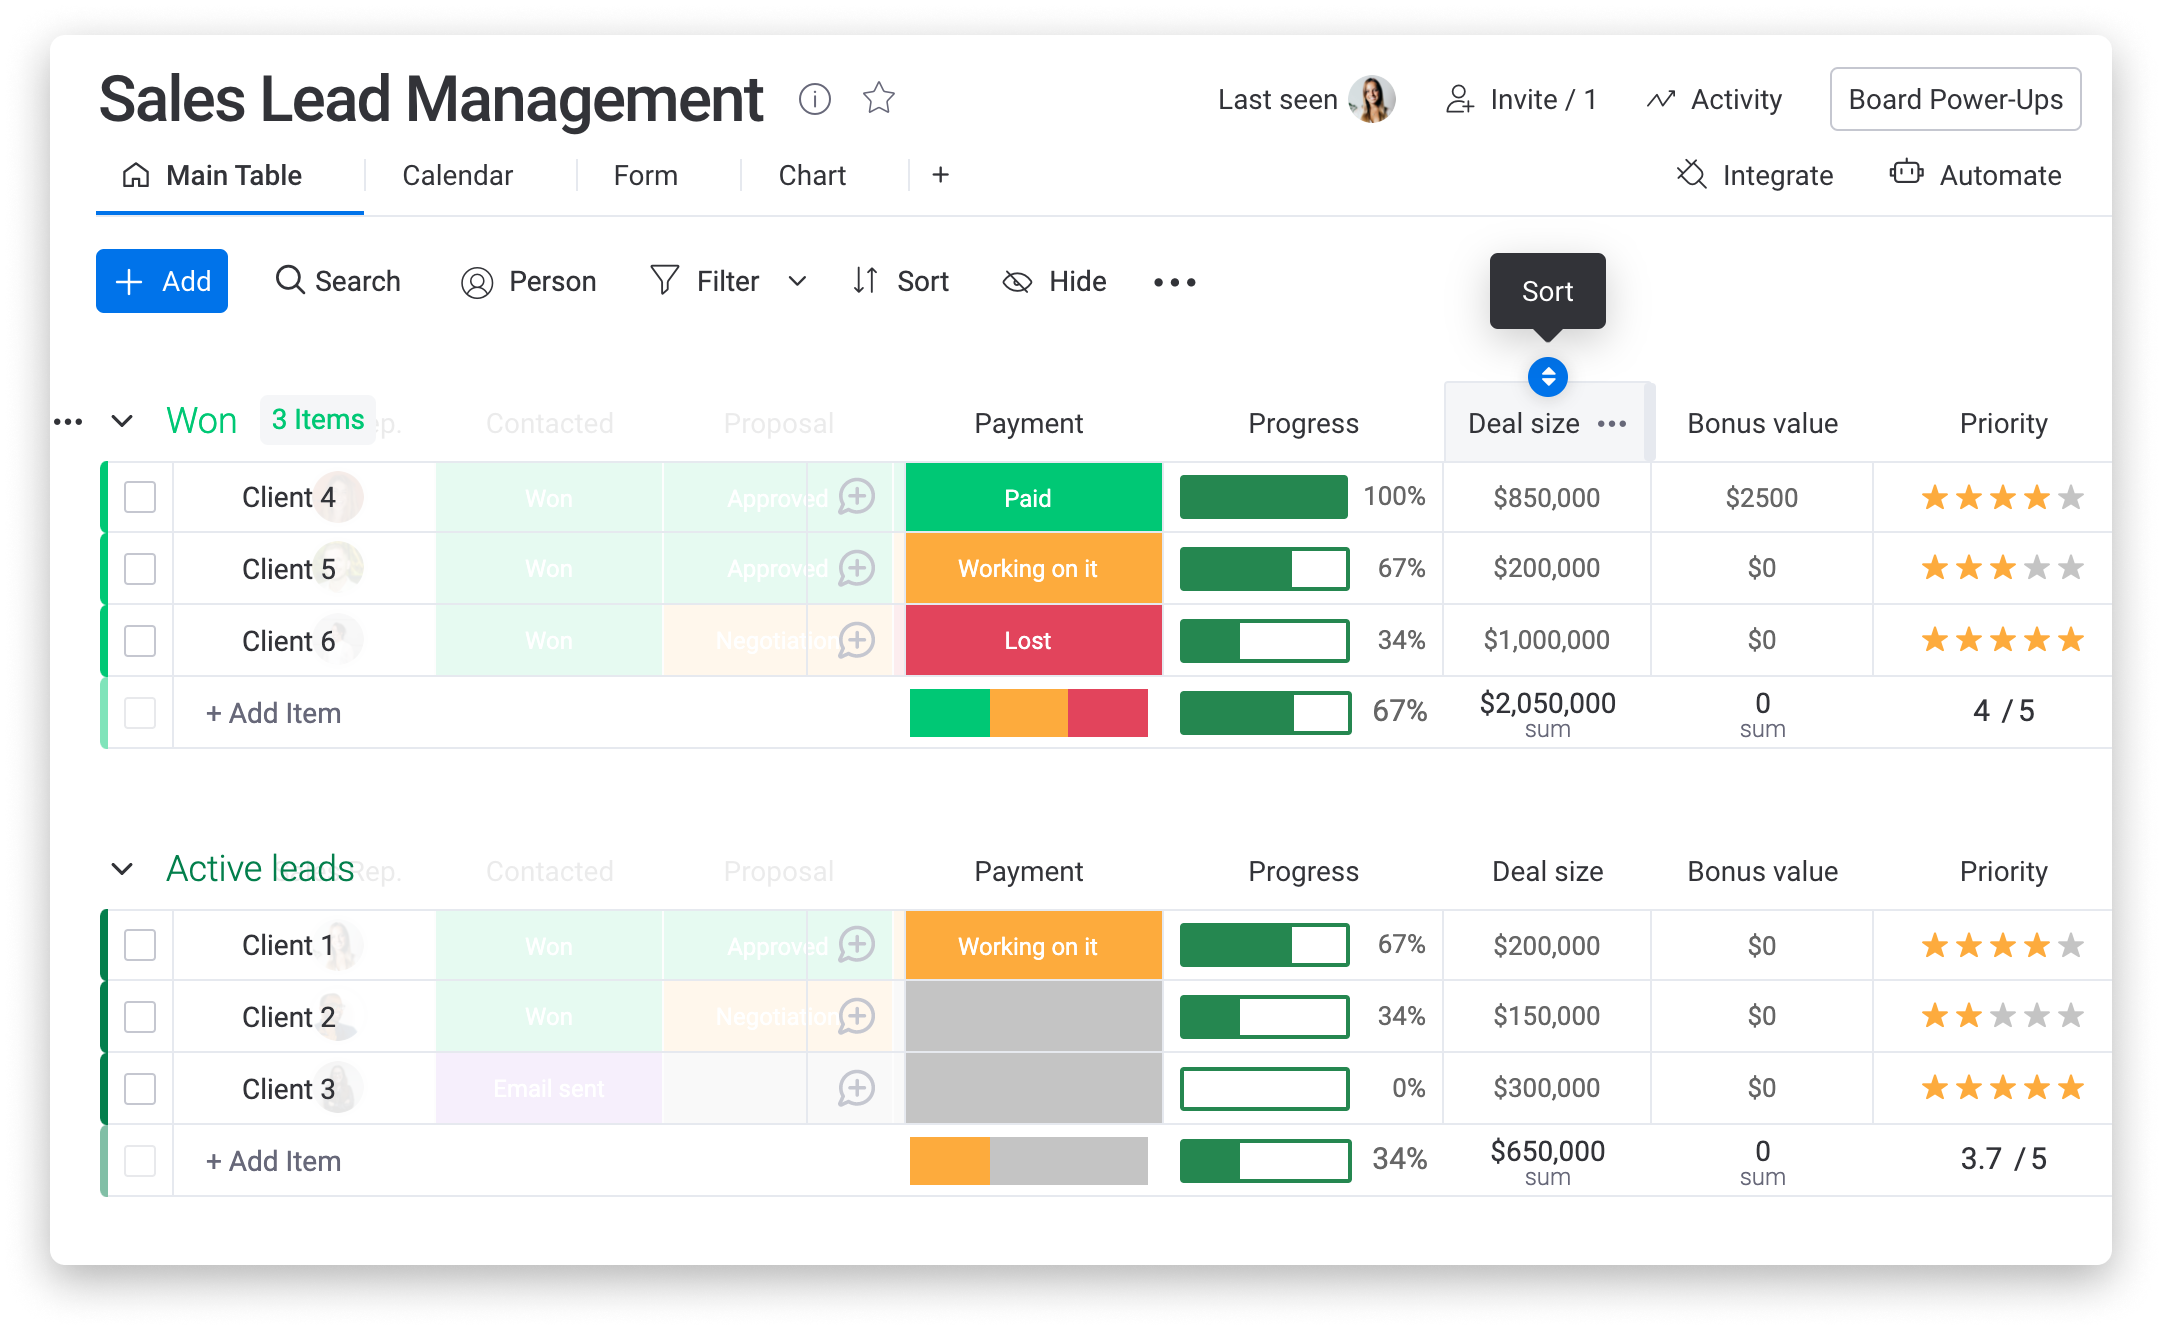
Once you have sorted a column, if you want the sort to save, you can click on the tick button to the left of the sort button.

Tip: To sort according to the opposite order, i.e. Z-A instead of A-Z, click the sort button twice. To undo the sort, click on "clear".
You can also sort multiple columns at once. Check out this article to learn more about it.
To duplicate a column, click into a column menu and choose "Duplicate". You can then choose to duplicate the column without its content or with all of its values.
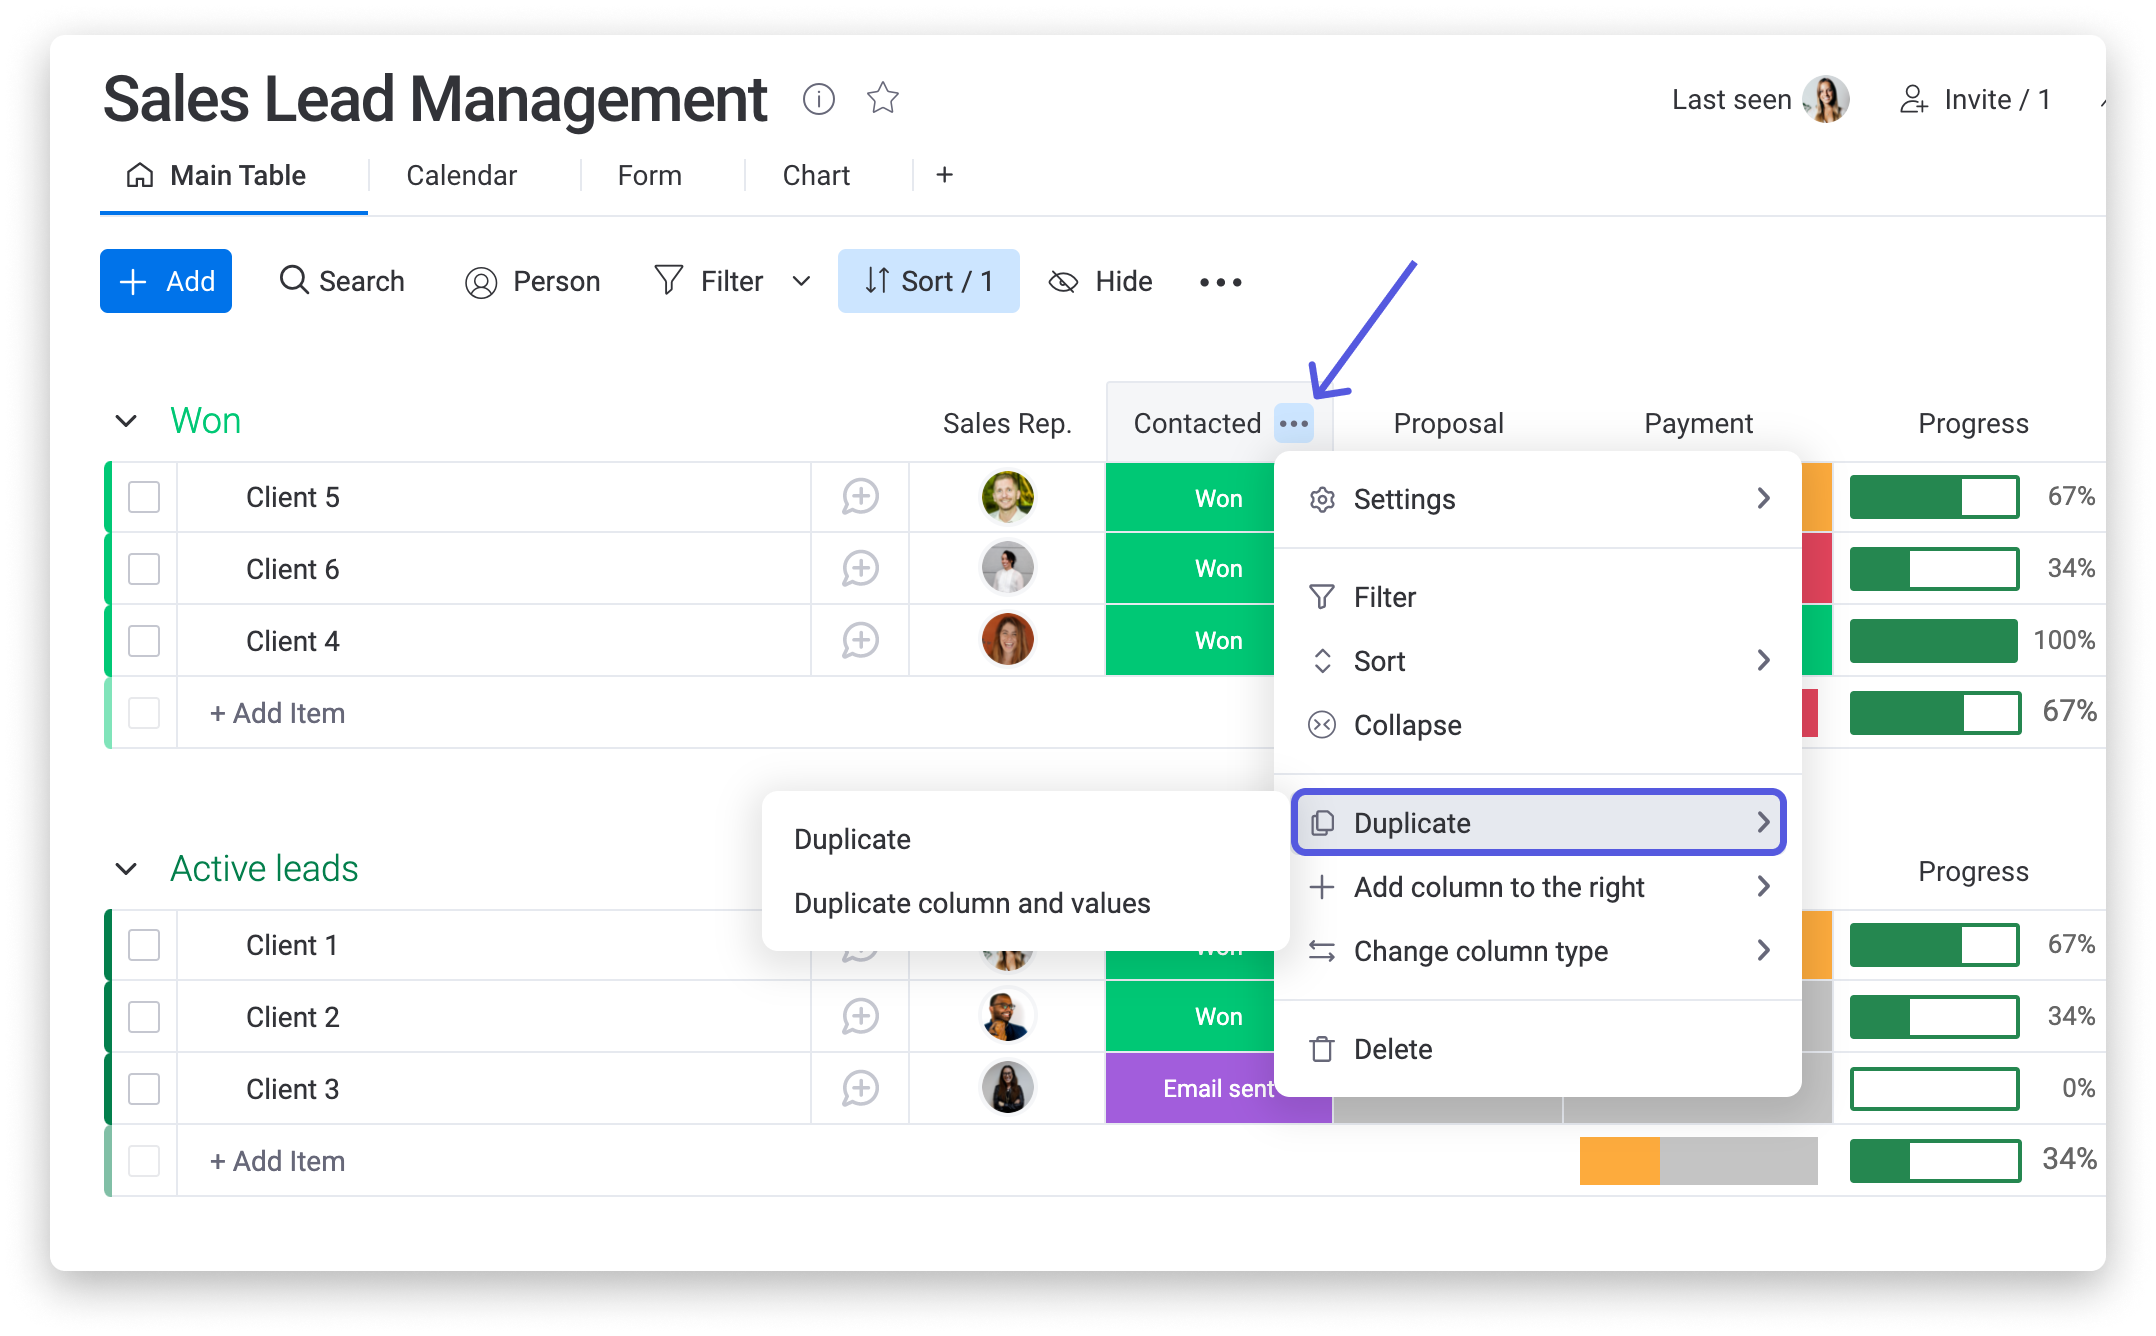
Note: When duplicating a column any set column permissions will also be duplicated.
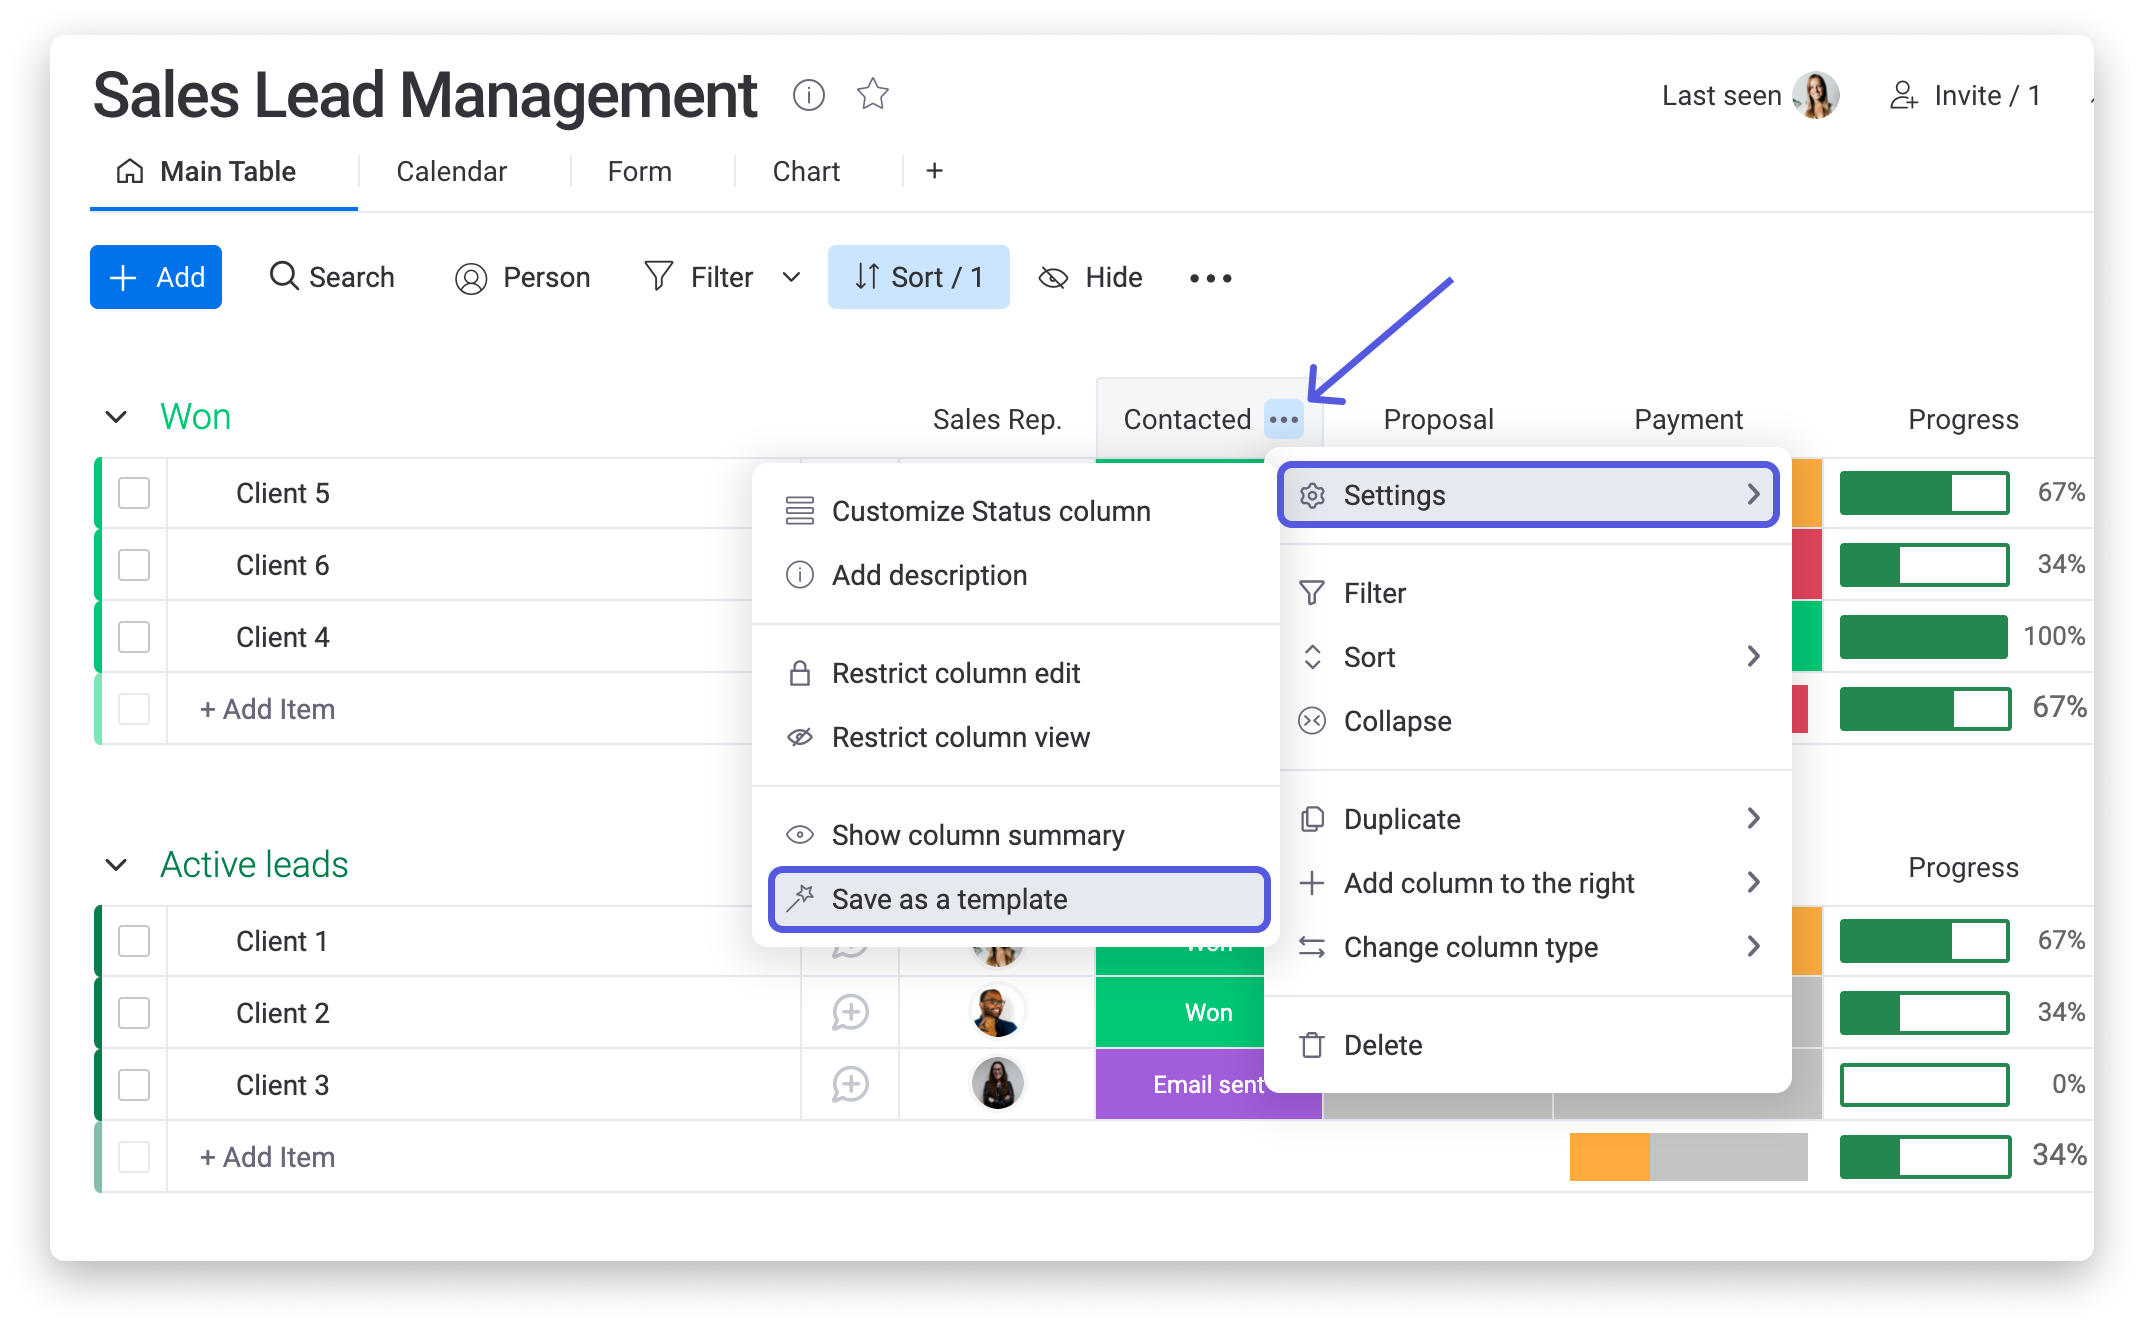
You can save and reuse your favorite customized columns with the click of a few buttons by saving your column as a template! You can then access this templated column from the columns center to easily add it to any of your workflows.
You can collapse any of the columns of your board. This option works the same as the existing group collapse option, so when you're collapsing a column it'll only affect your view. This way, you'll be able to keep your boards nice and tidy. To collapse a column, click on the column menu, select "Collapse" and you are done!
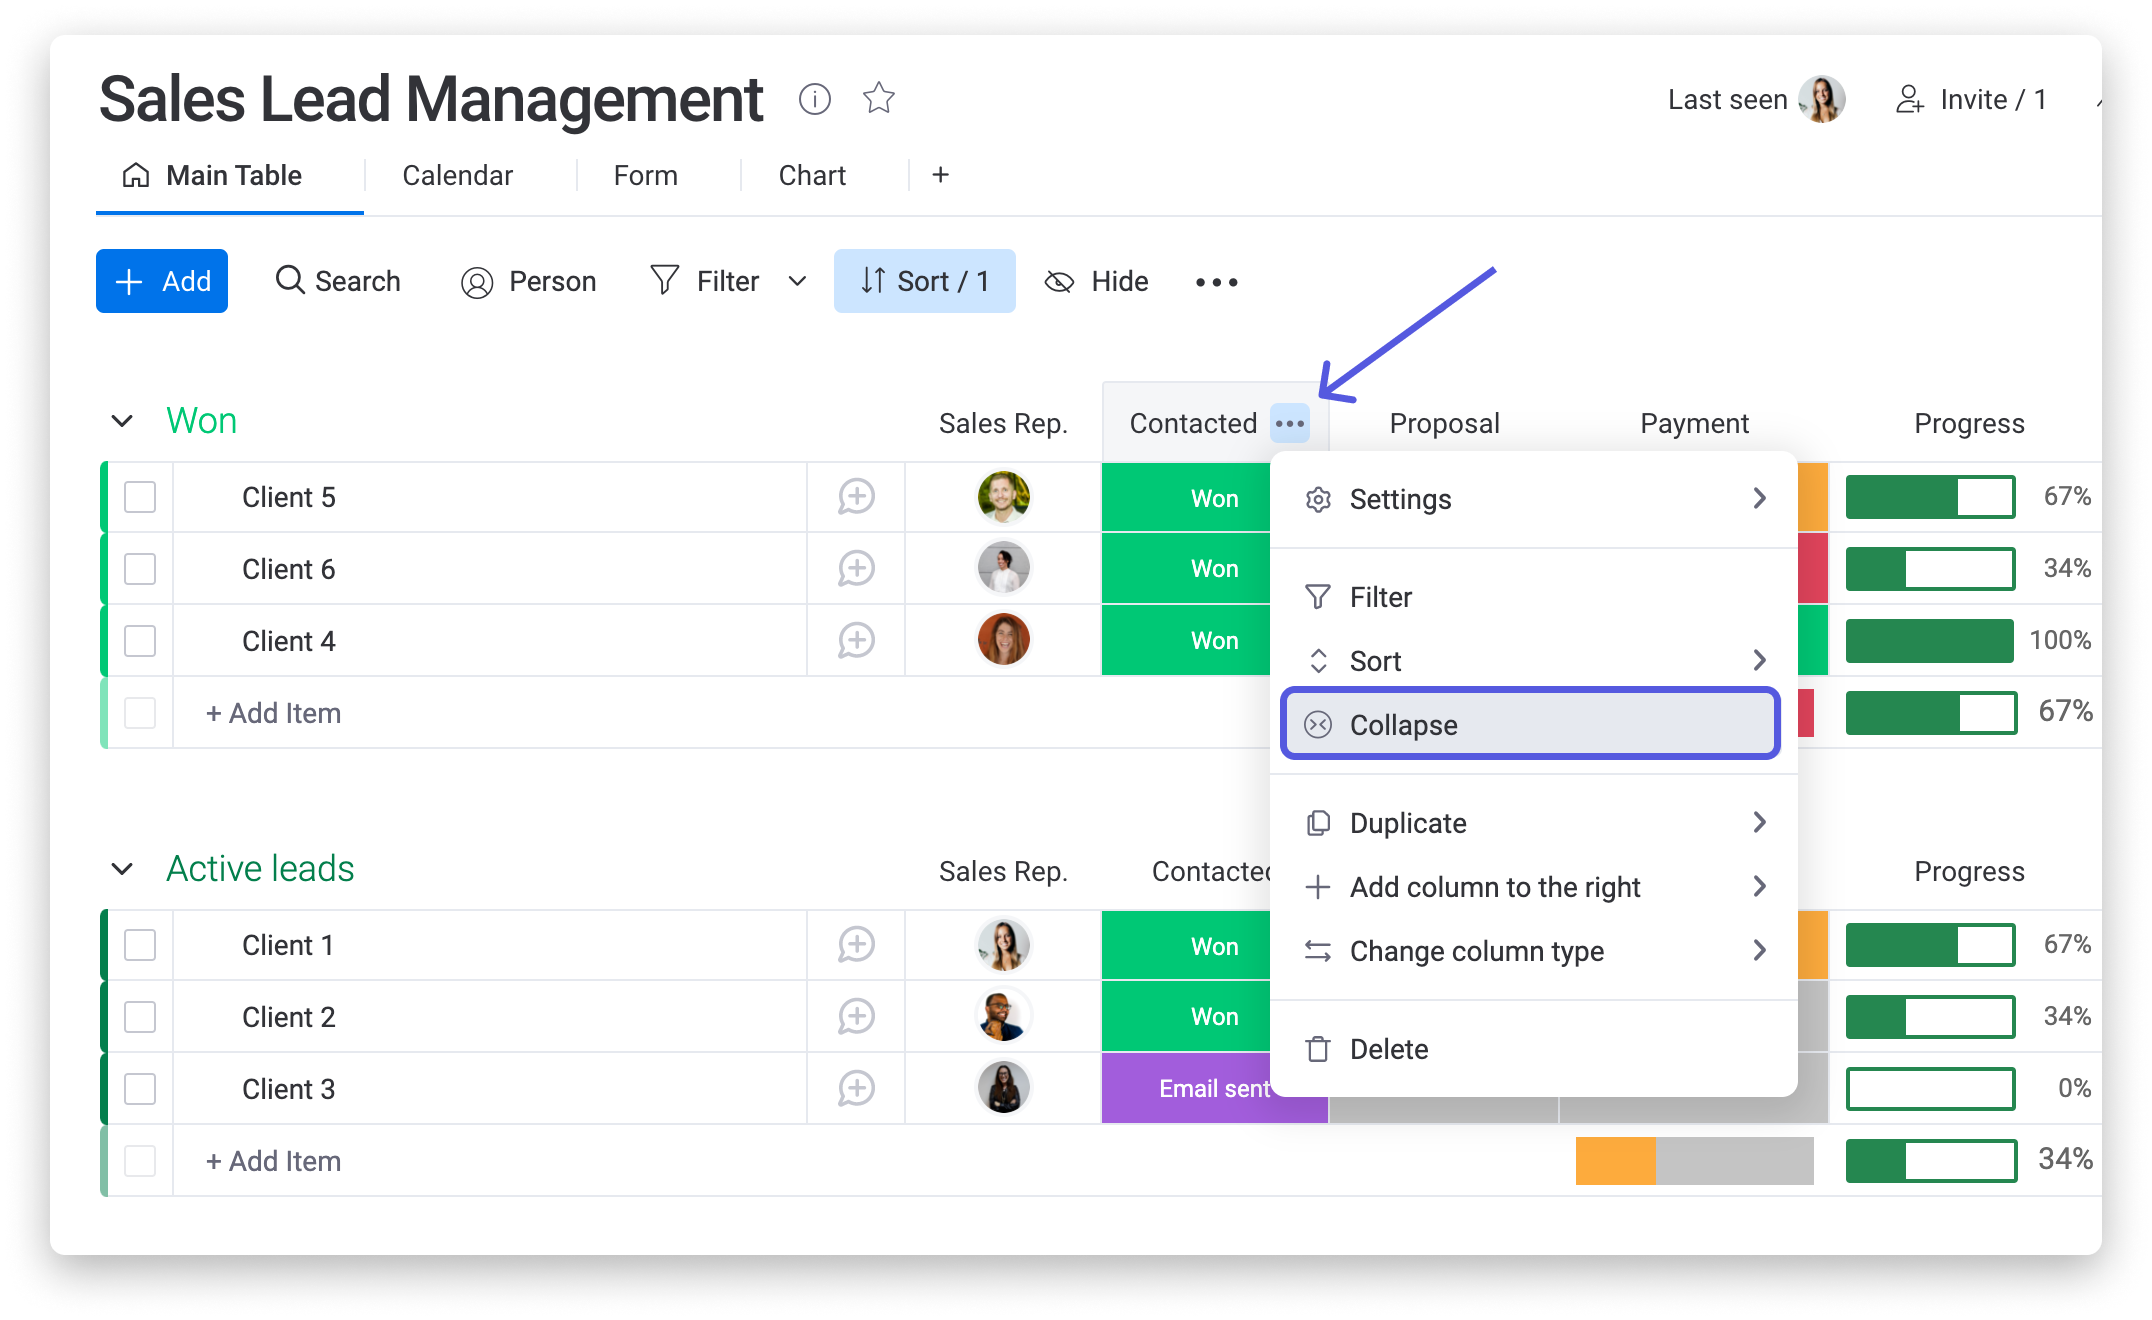
Note: Collapsing a column on the Main Table, will collapse the same column on any other
saved views you have on that board. For instance, if you are using the
item card view, the collapsed column will not be displayed on that view.
If you need to make your column width smaller or larger so you are able to see what is in the cell, these simple steps will show you how! Click on your cursor in the middle of any two columns (right in between the column title) that you'd like to resize and glide it along to change the column width. 😊
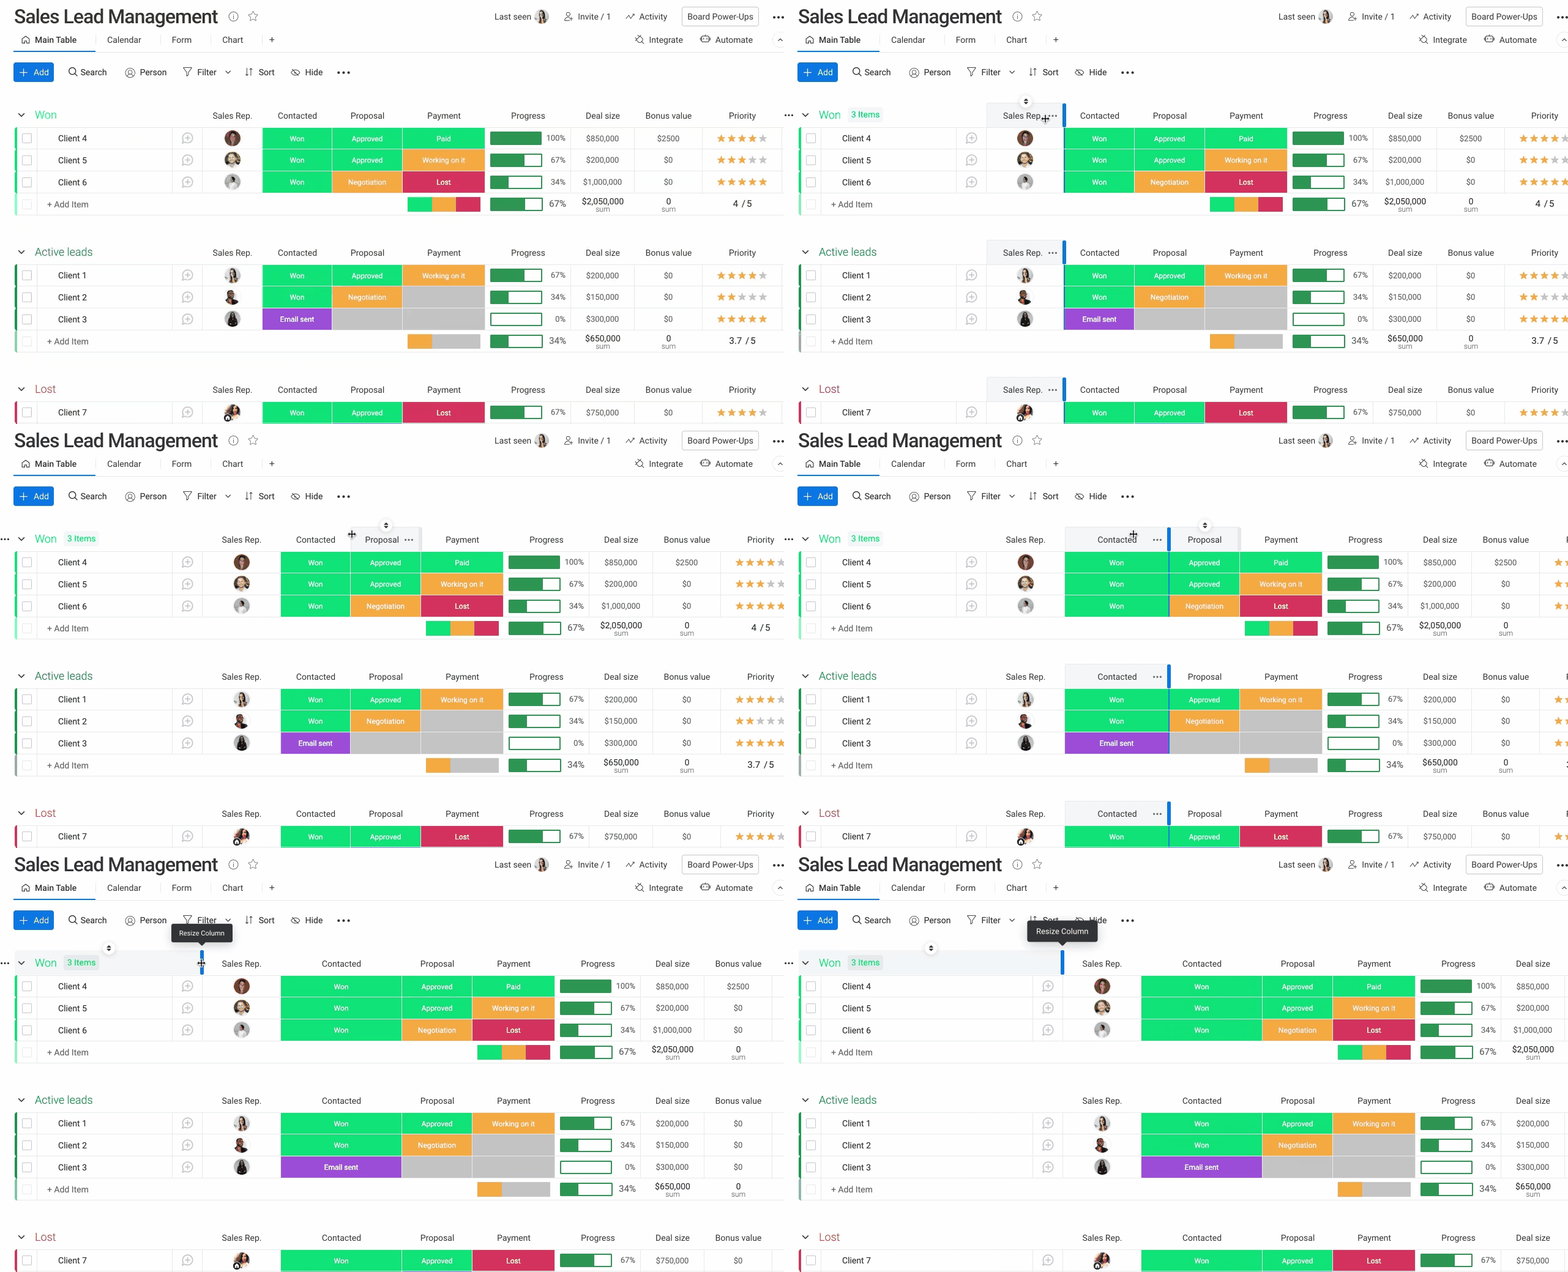
To move a column click to the left or right of a column's name, take your cursor and simply drag and drop it to another area on the board.
If you have any questions, please reach out to our team right here. We’re available 24/7 and happy to help.
Comments