


What is Zapier?
Zapier is a popular third-party integration platform that allows monday.com users to build custom integrations between monday.com and the various platforms available within the Zapier system. It's especially useful if monday.com doesn't currently host a native integration with a platform that you use!
Every connection you make within Zapier is called a Zap. This article will show you how to create one. But first, to get started, you can view the list of platforms that Zapier can connect with here!
How to create a new zap
Step 1: Pick the apps you want to integrate with monday.com
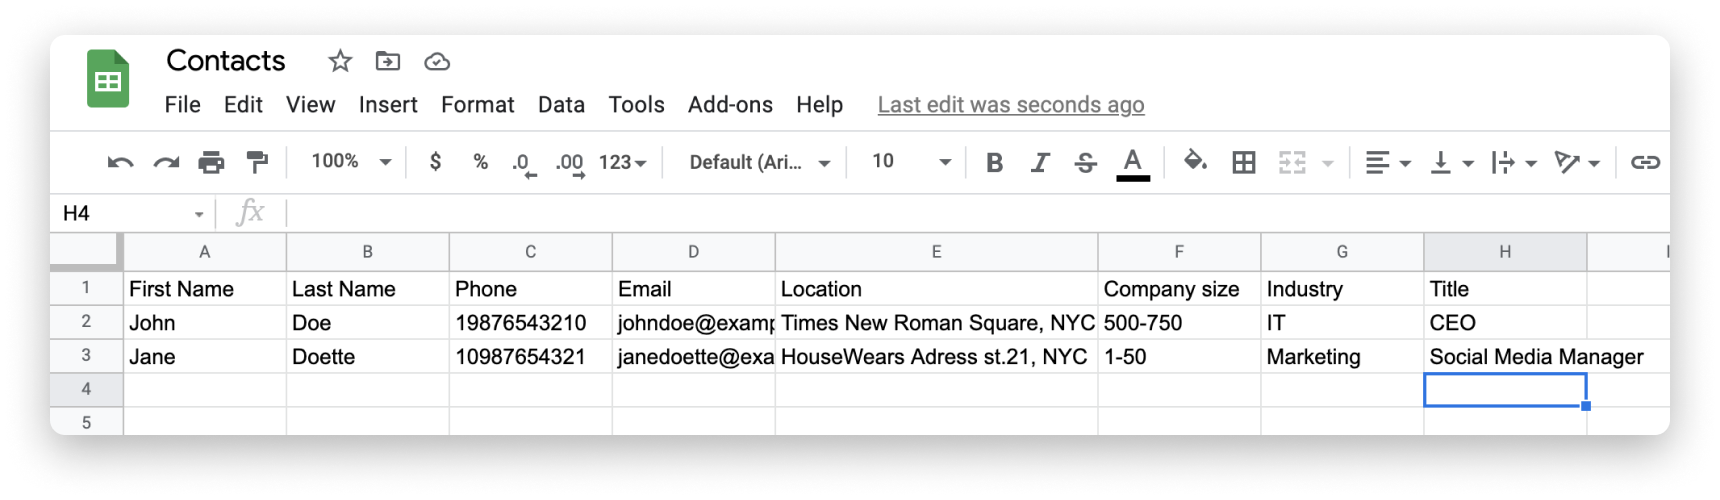
In this example, we want to turn the first row on the following Google Sheet into an item on monday.com:
To get started, navigate to this page. Once there, select which app you want to use with monday.com. You can use the search to do this. Selecting an app from the search will take you to that app's page. Once you navigate to the Google Sheets page, you'll select the trigger and action you want to use.
In the following example, the trigger is every time a row is created in Google Sheets. When a new row is created in Google Sheets, a new item will be created in monday.com. This, in turn, will be the action.
Here's how to get started in Zapier:
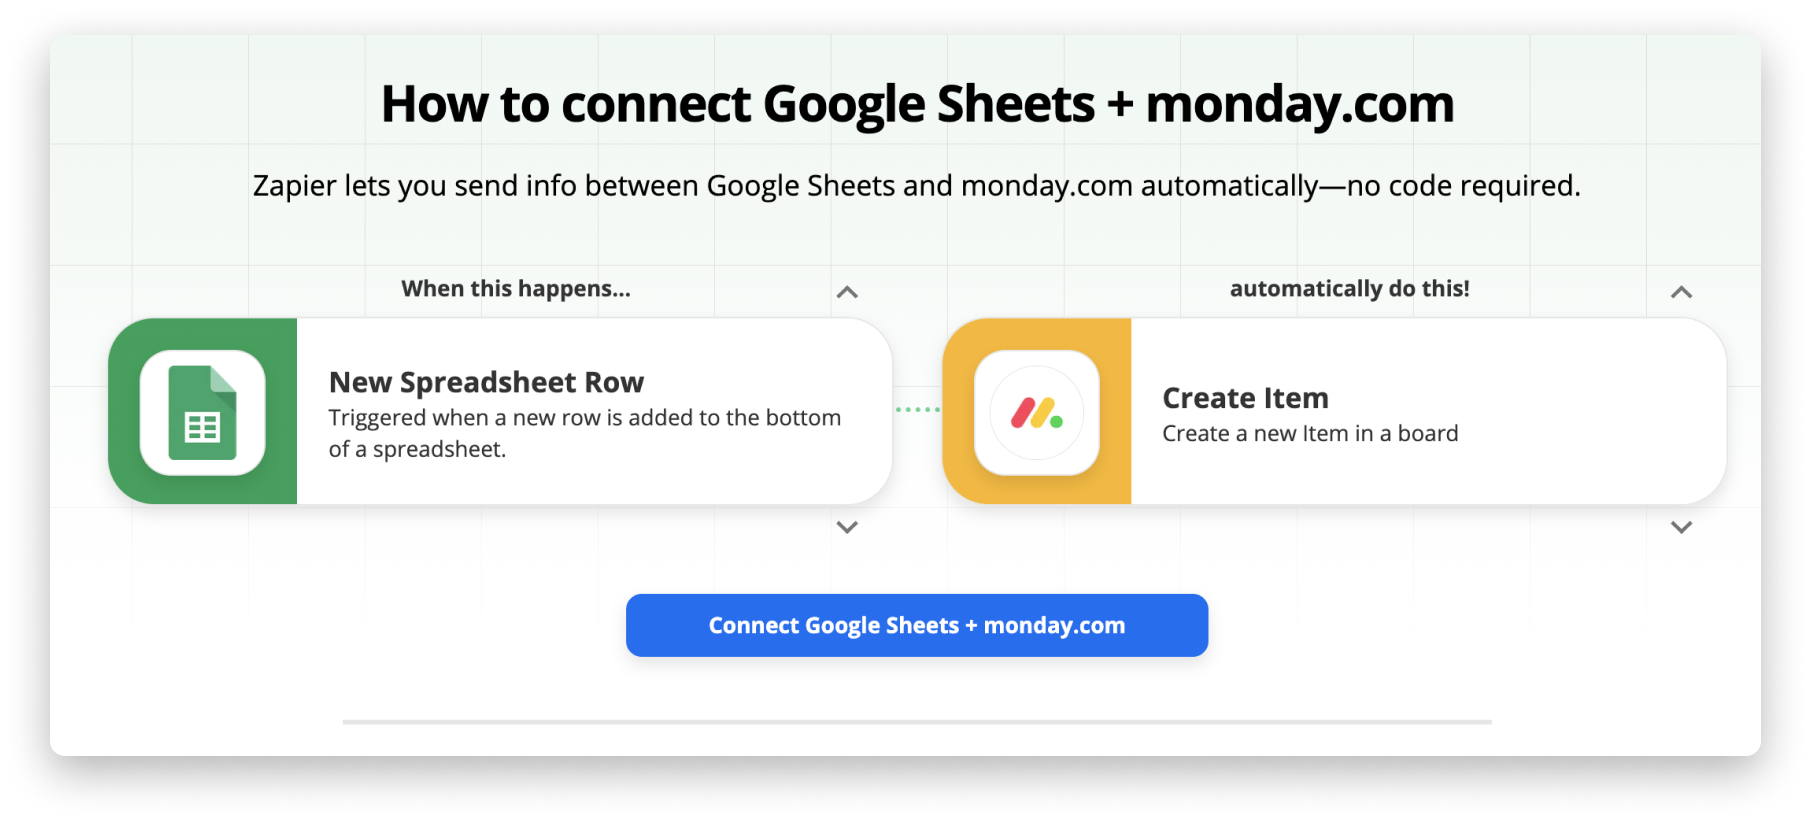
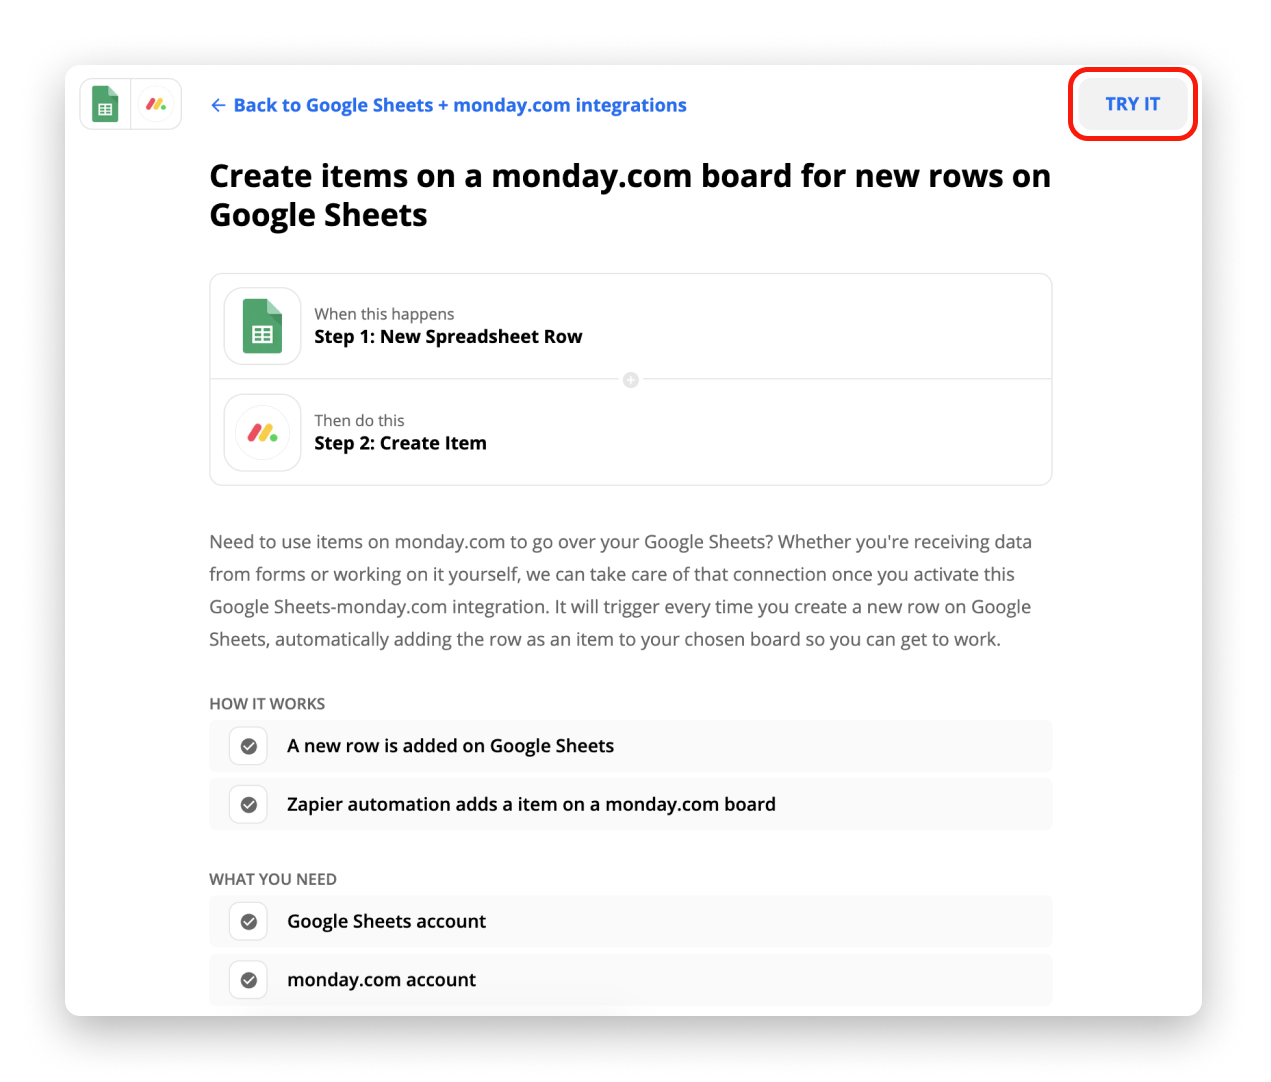
After you select "Connect monday.com + Google Sheets" you'll land on a page that outlines exactly what you've selected. On this page, select the button that says "TRY IT":
You're well on your way to setting up your first Zap!
Step 2: Authorize Zapier to connect to the platform of your choice
Now that we have a workflow in mind for Zapier to execute for us, we'll need to take a couple of steps to set up the way our custom integration will run.
It's time to connect this Zap to the relevant Google Sheets account. If you've used Zapier in the past, select your Google Sheets account from the dropdown menu or select the "Add a New Account" option.
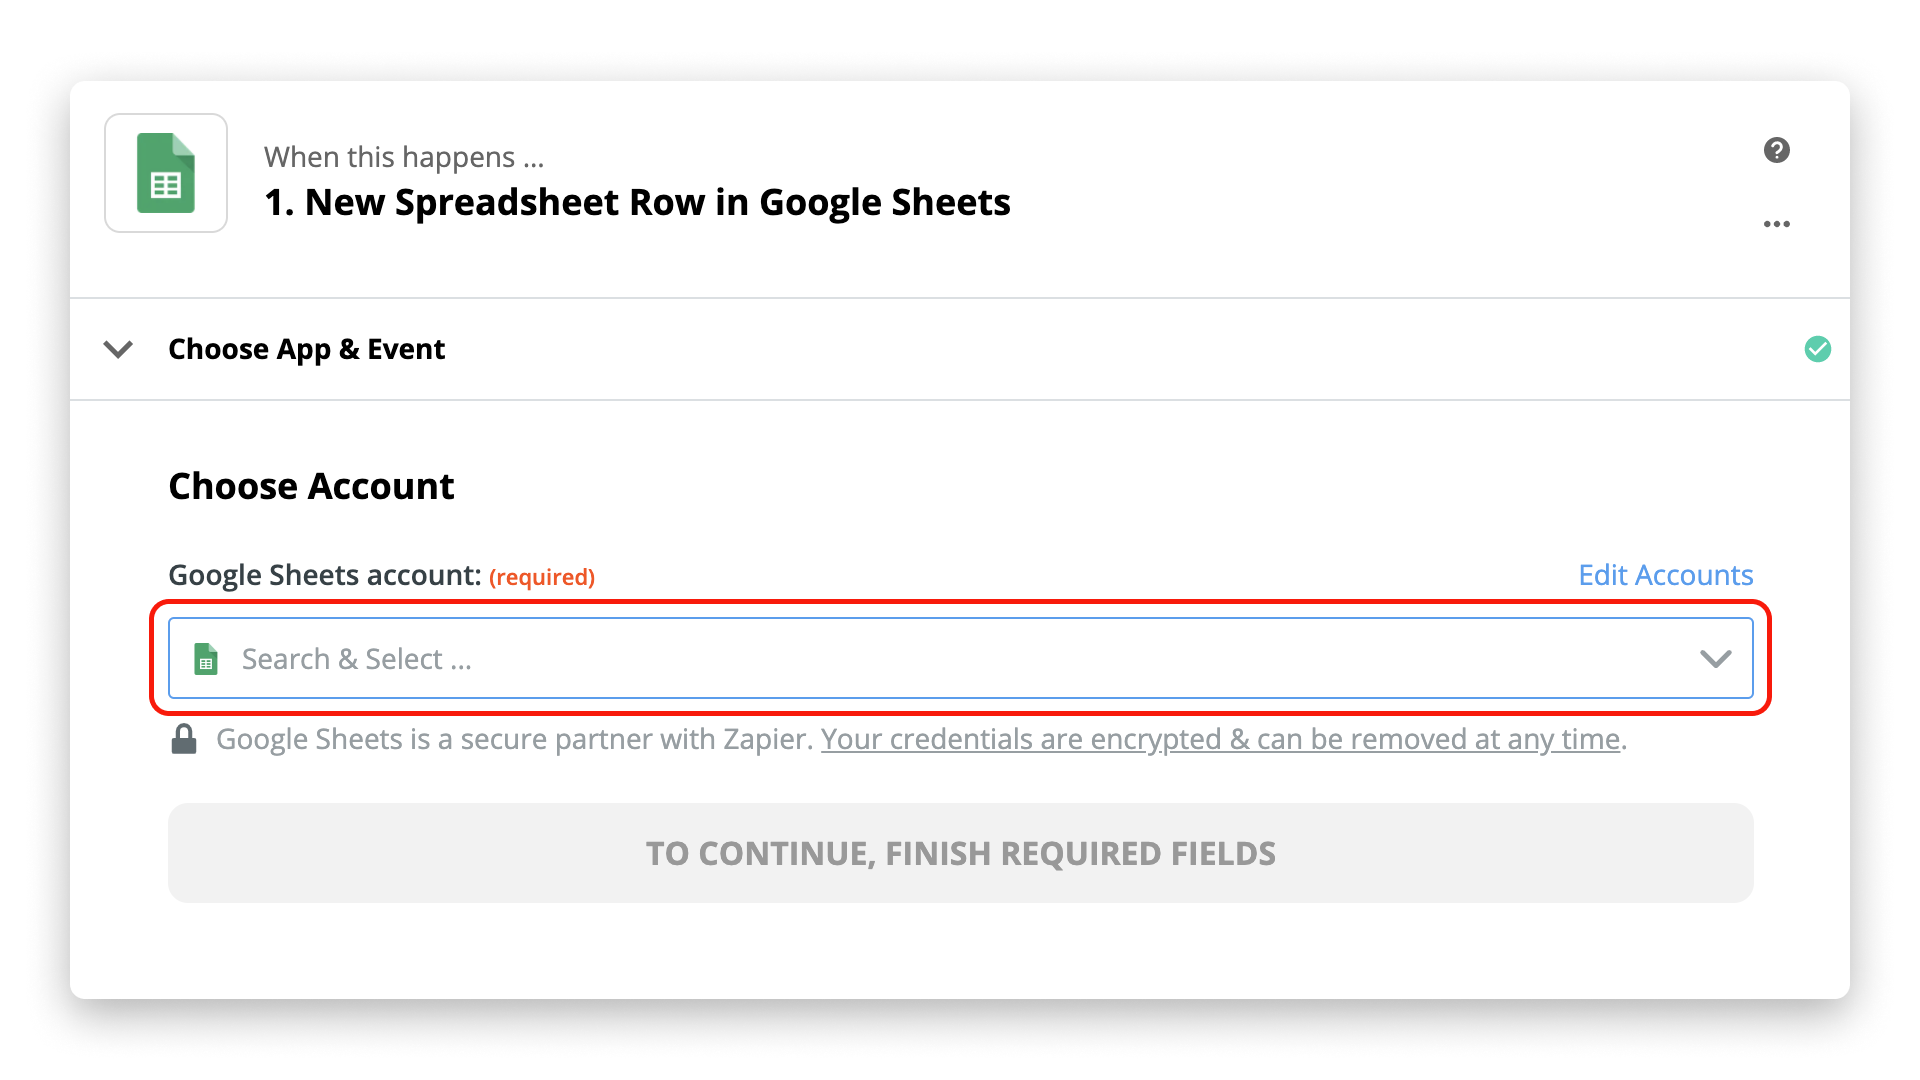
When adding a new account, follow the on-screen instructions to login to your Google account.
After selecting or adding your account, select the blue "Continue" button. This will then prompt you to select the spreadsheet and worksheet that you want to use with this Zap. After choosing your spreadsheet and worksheet from the dropdown menus, select the blue "Continue" button again.
Zapier will then allow you to test the trigger by selecting the blue "Test trigger" button. This ensures that you're working with the appropriate data within your Google Sheets account:
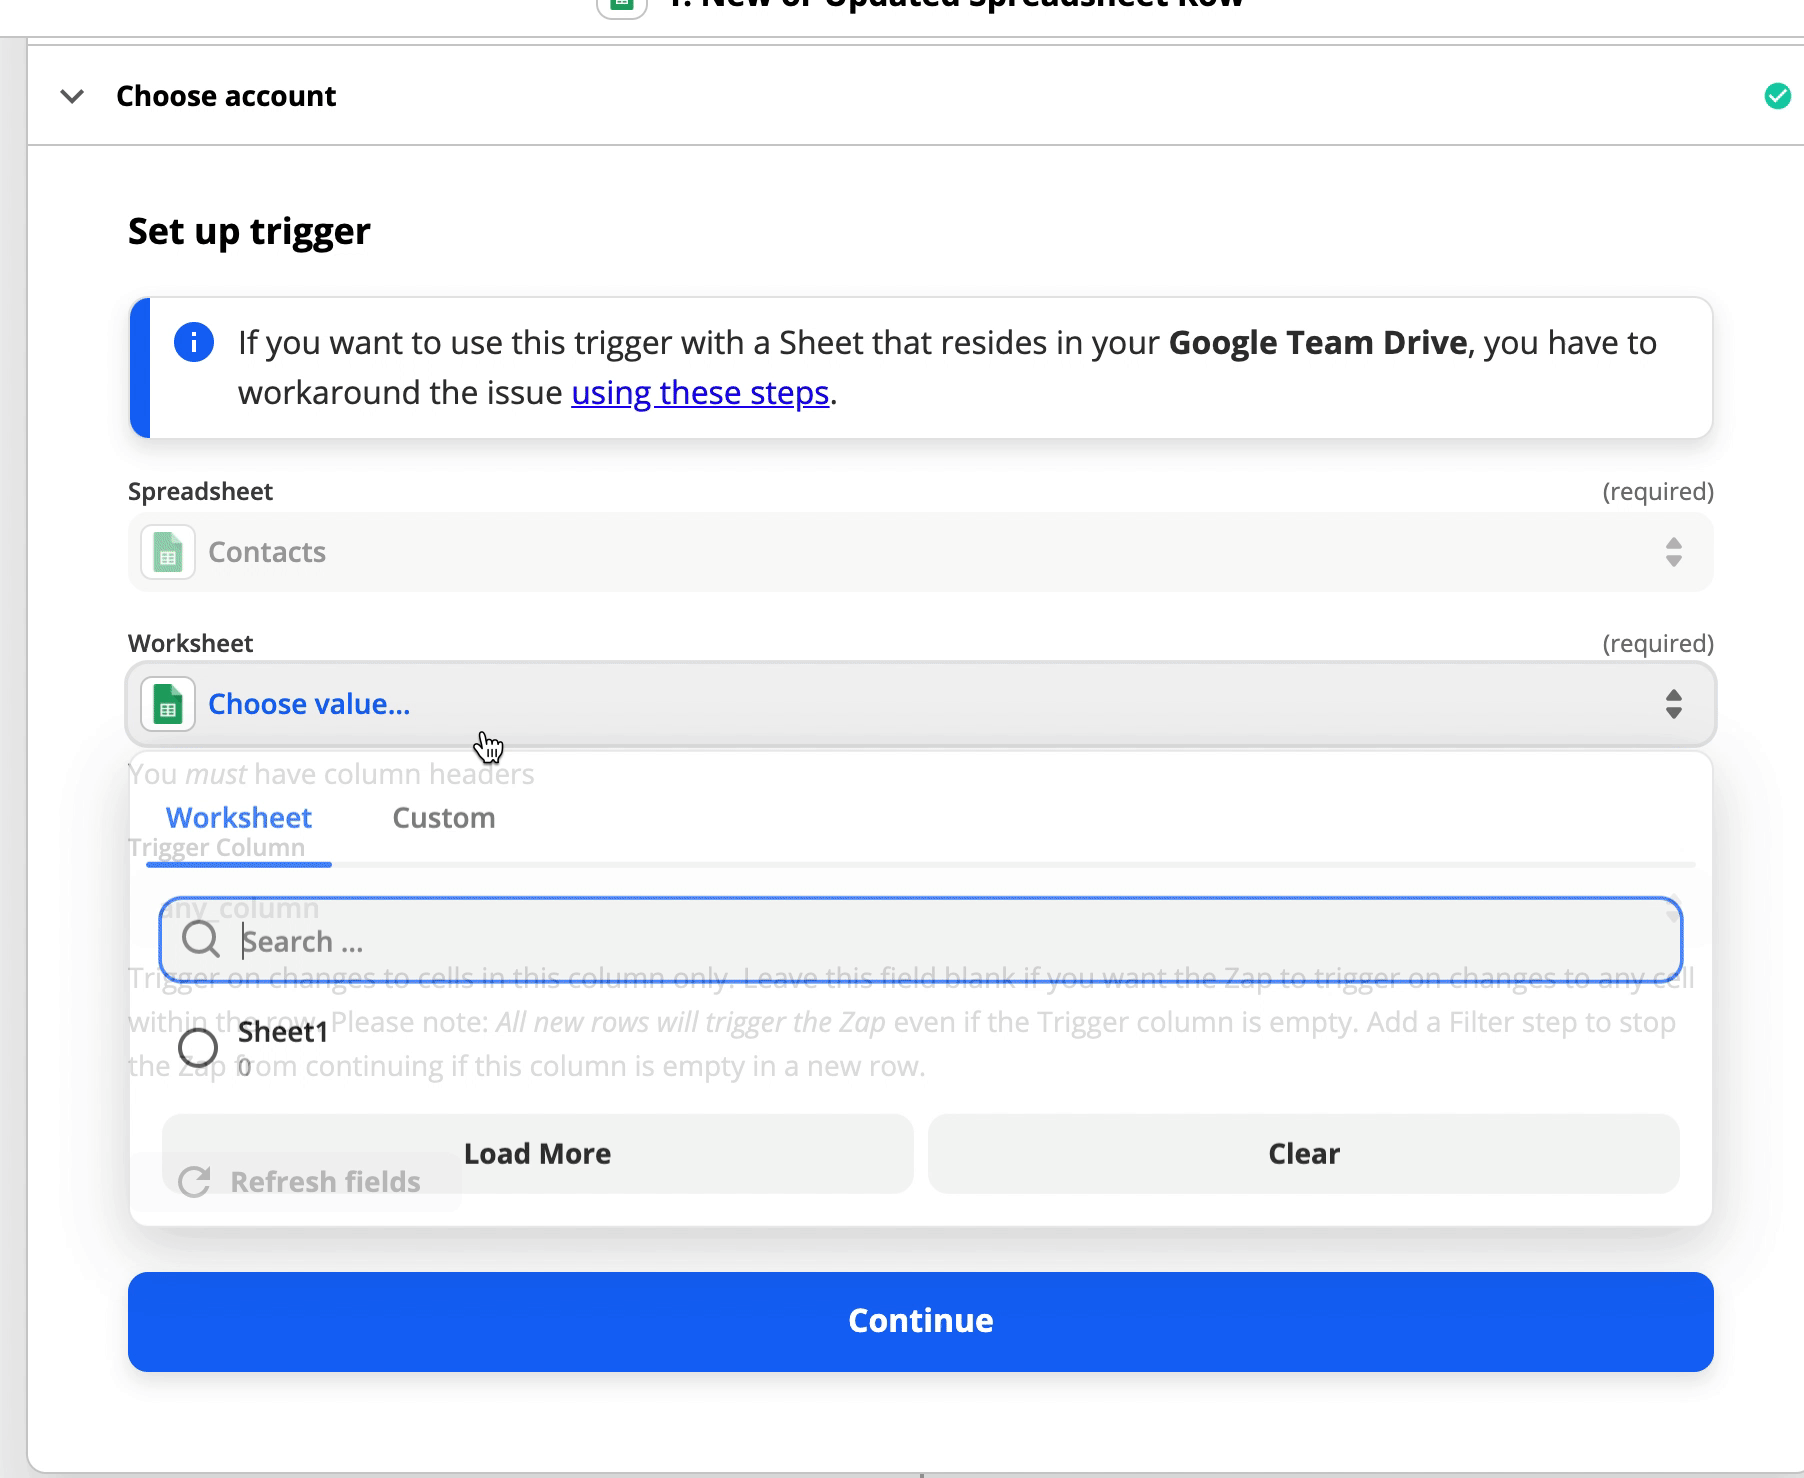
Once you've confirmed that the correct data was pulled for your trigger, you can select the blue "Continue" button.
We can now move on to setting up our monday.com action! How exciting.
Setting up your action
Step 1: Select the action of your choice
After selecting "Continue" at the end of the last step, the first screen you'll see confirms that you want to work with the selected app for your action. In this case, the app we're working with is monday.com! 🎉 And the action event that we want is to create an item in a monday.com board:
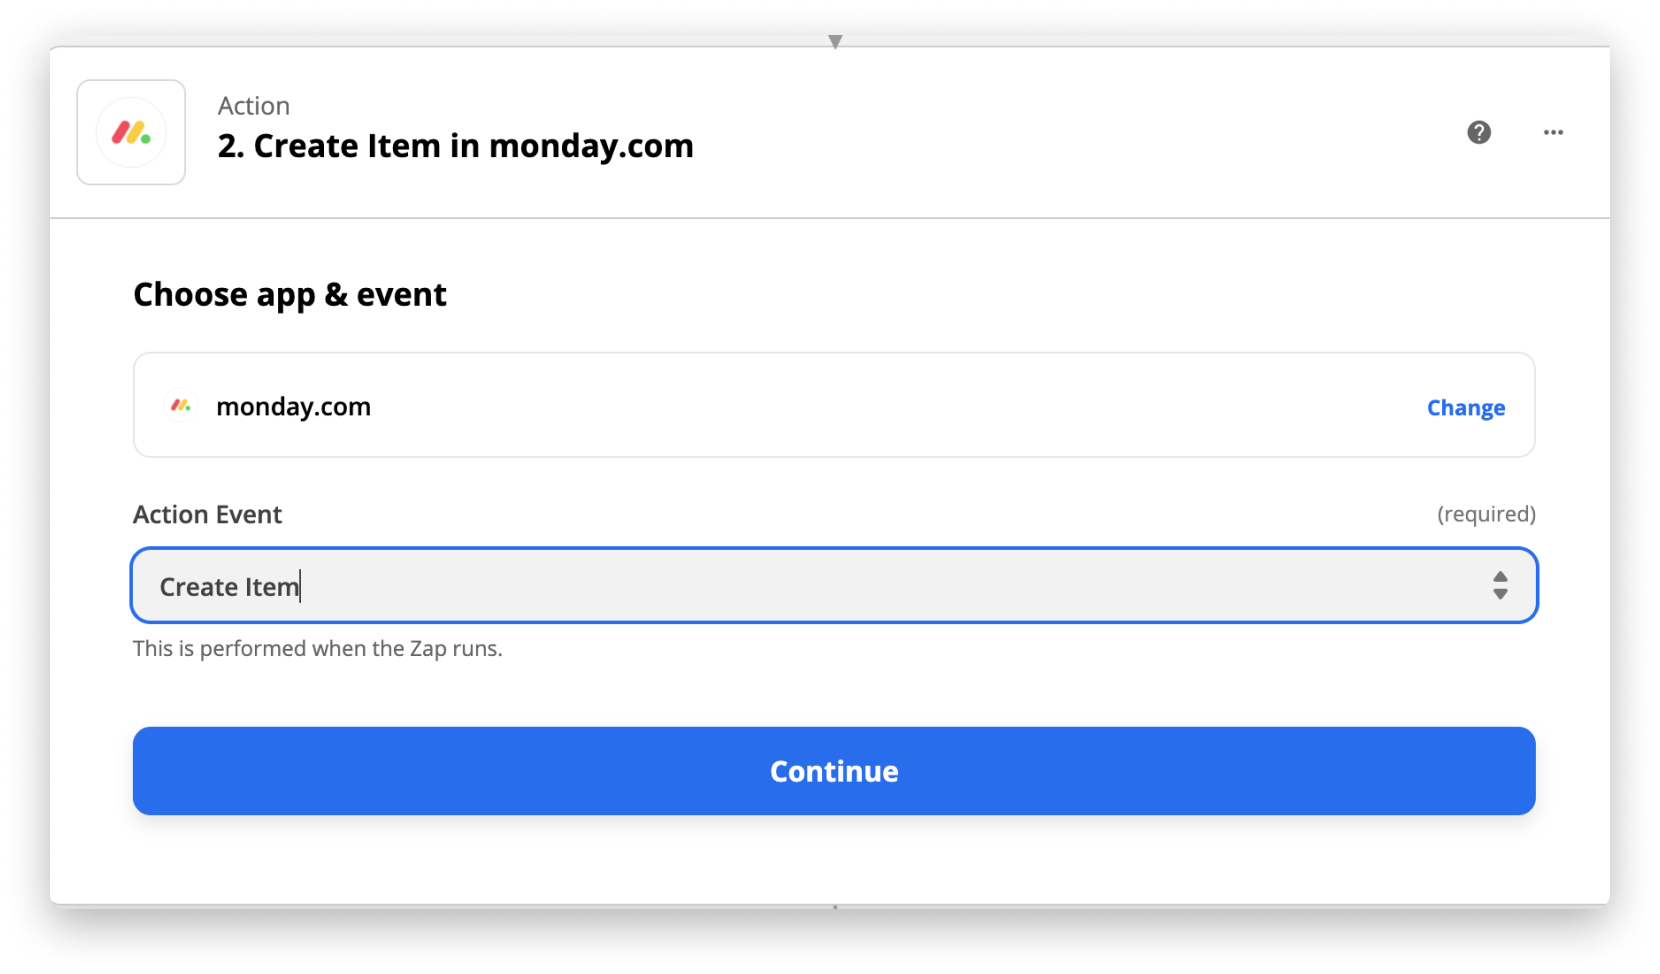
Click the blue "Continue" button once you're satisfied with the selected app and action.
Step 2: Authorize Zapier to connect to your monday.com account
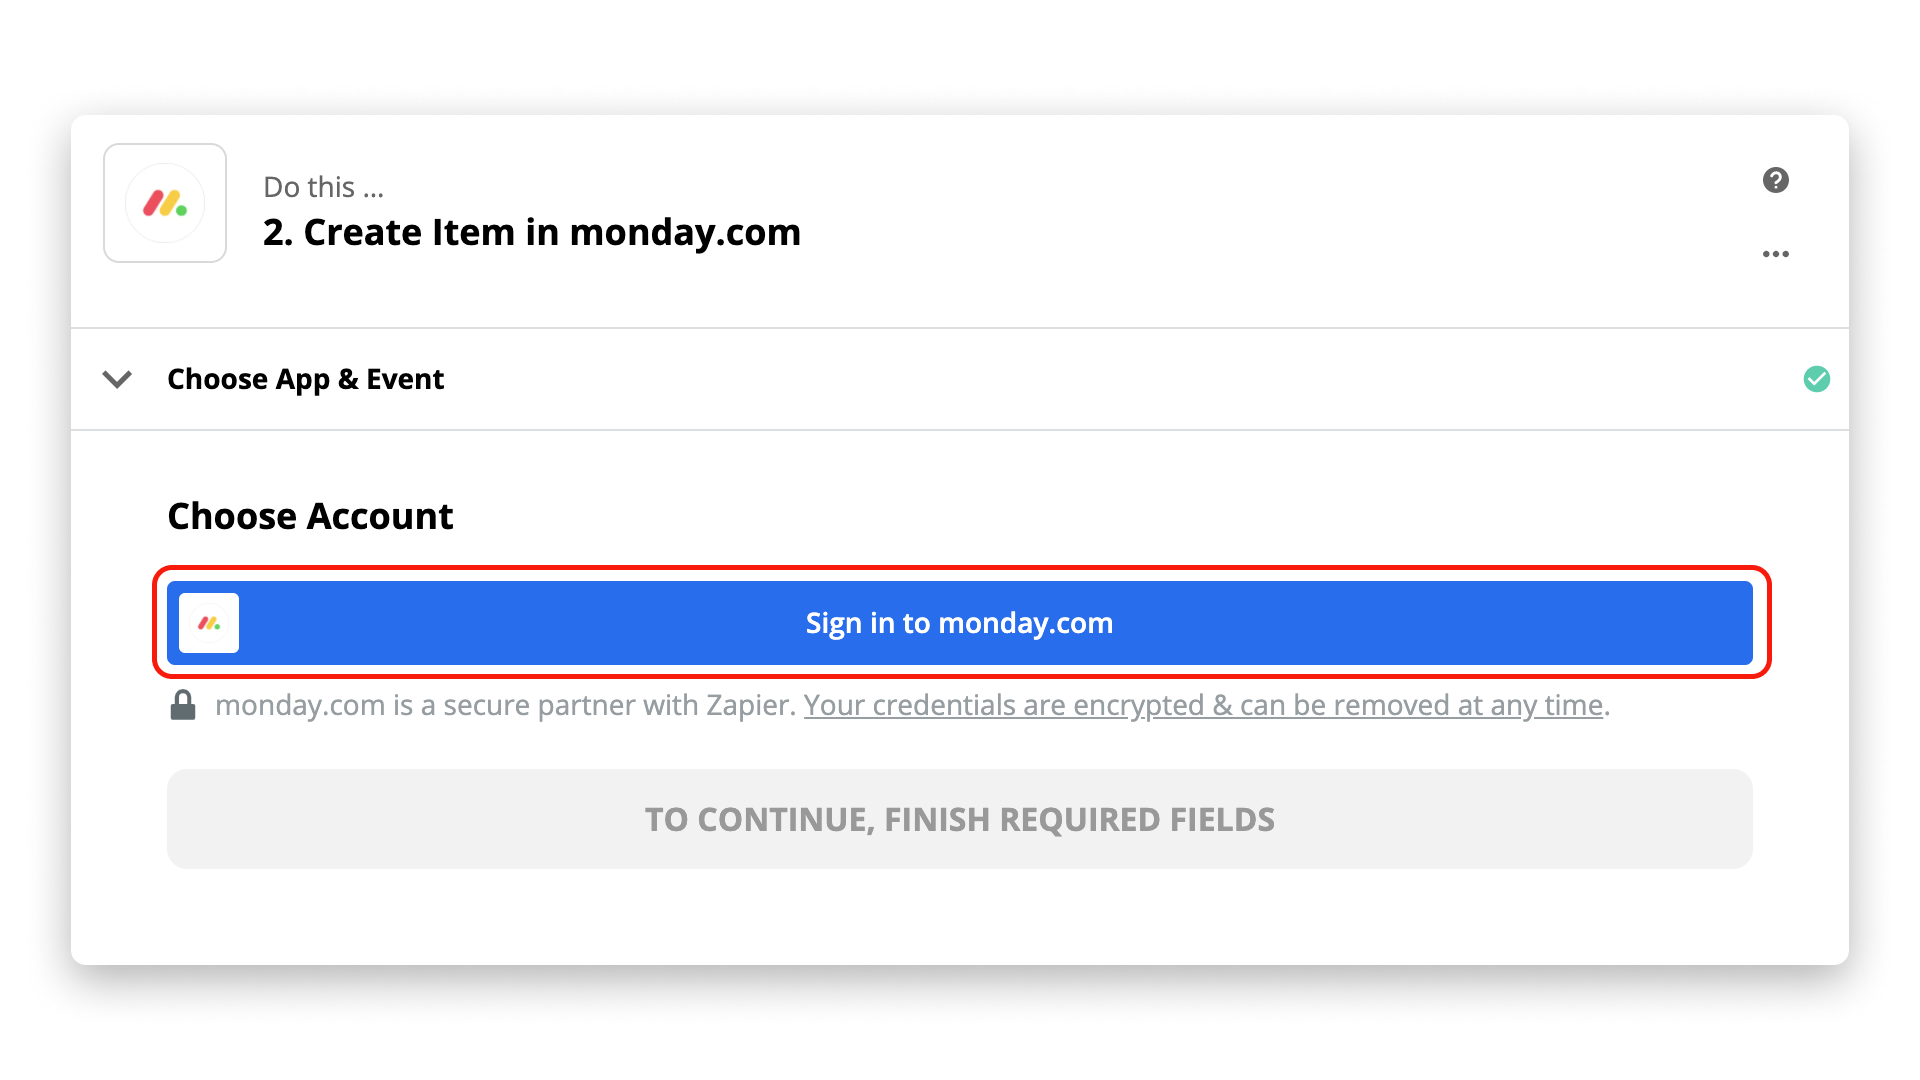
We've set up the action! However, before Zapier is allowed to access your monday.com board data, you will need to authorize it first by providing your API key. Let's get to work!
Now, you will need to connect your monday.com account to Zapier. If you haven't already, select "Sign in to monday.com":
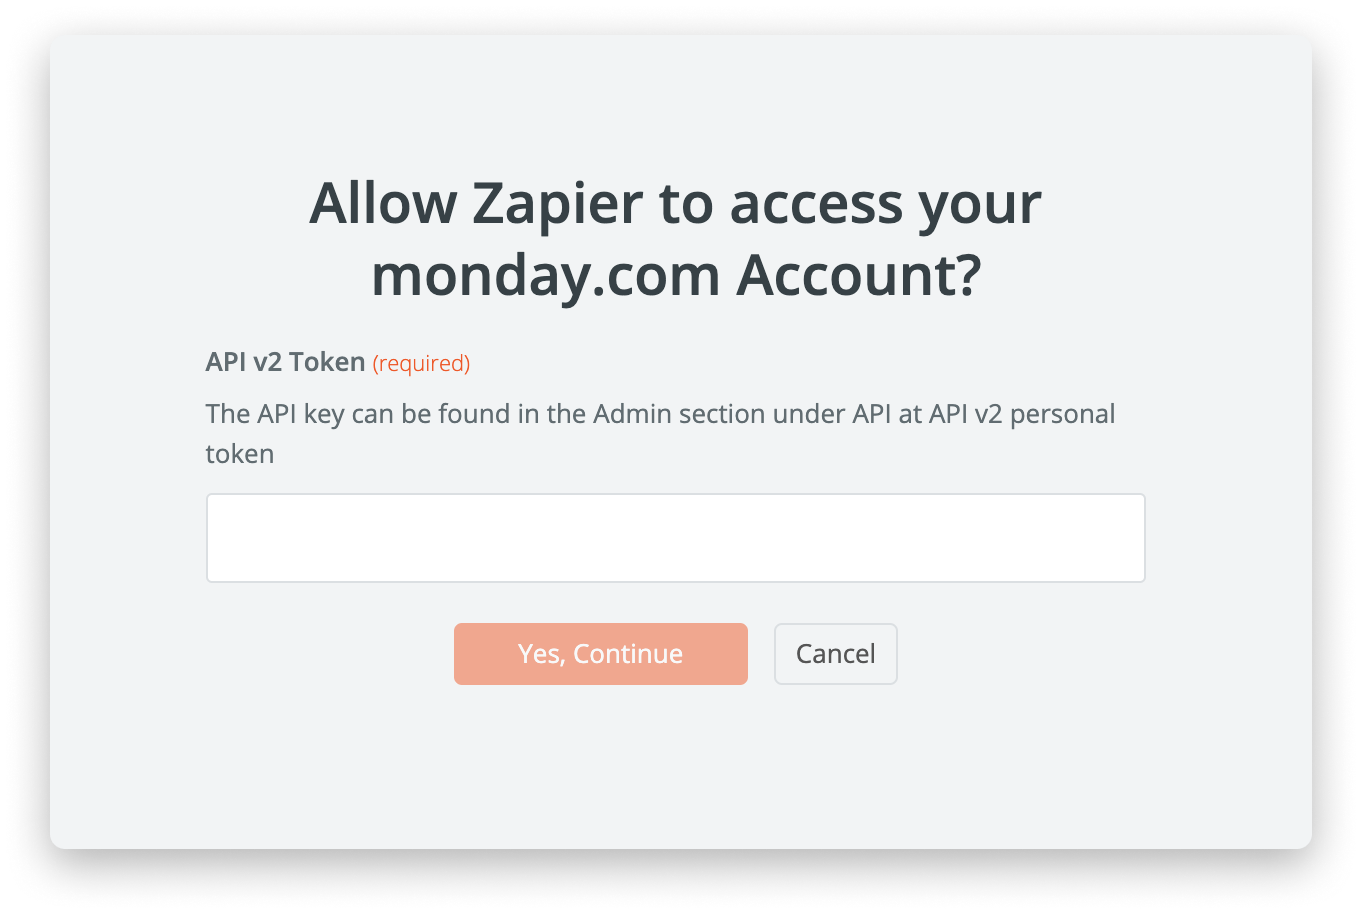
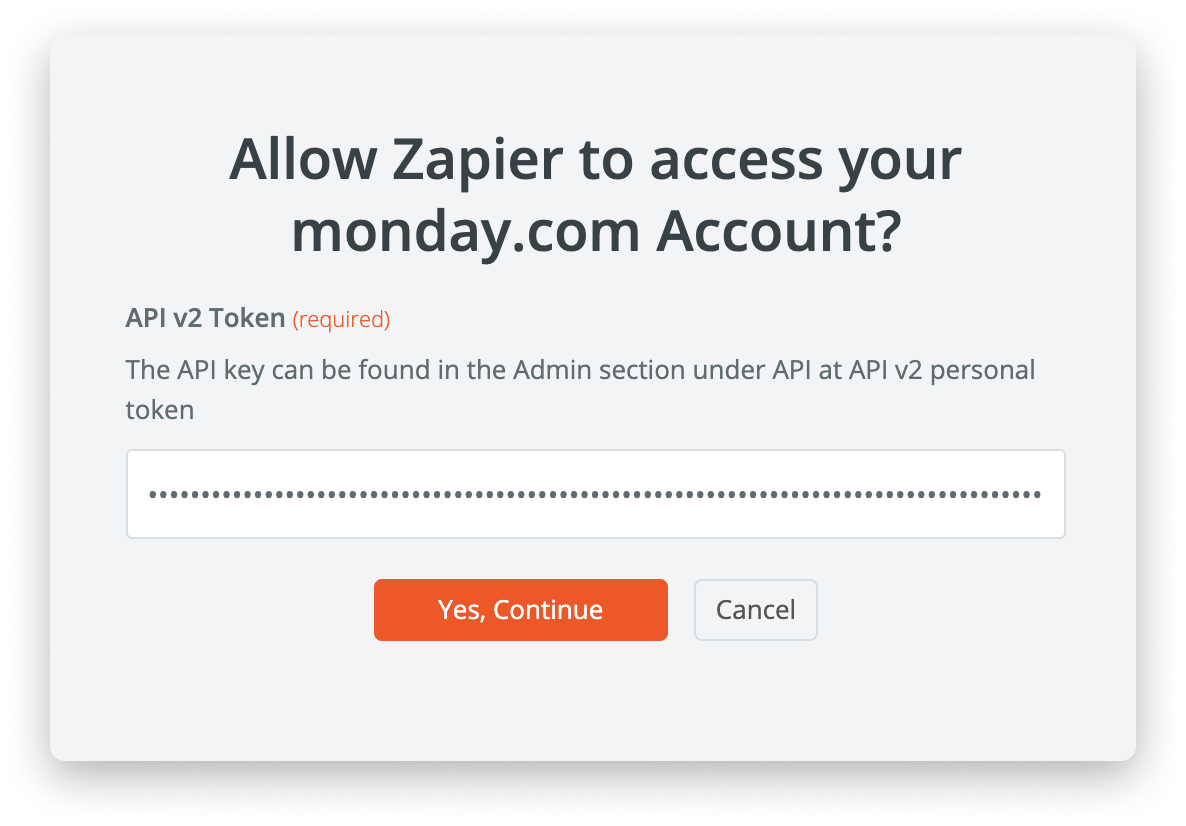
You'll then get a pop up window asking for your monday.com API v2 Token:
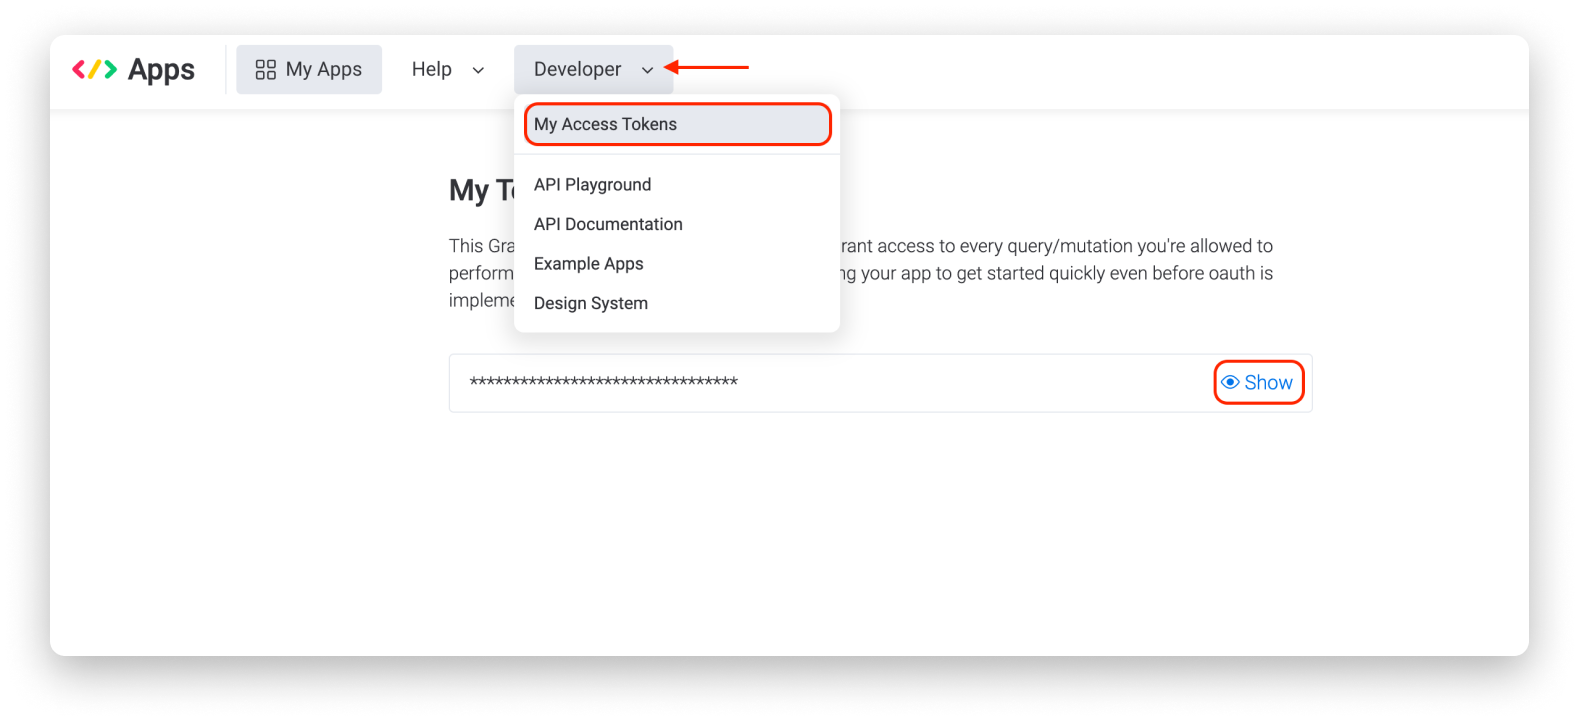
To access this token, log in to your monday.com account, click on your profile picture in the bottom left corner of your screen, and select "Developers":
 Then, click on the Developers menu in the top header. Once there, select "My Access Tokens", then click "Show" and right after, you can also click the "Copy" button. This will copy your API v2 token to your computer's clipboard:
Paste this token into the Zapier pop-up window, and select the orange "Yes, Continue" button:
Step 3: Configure your action
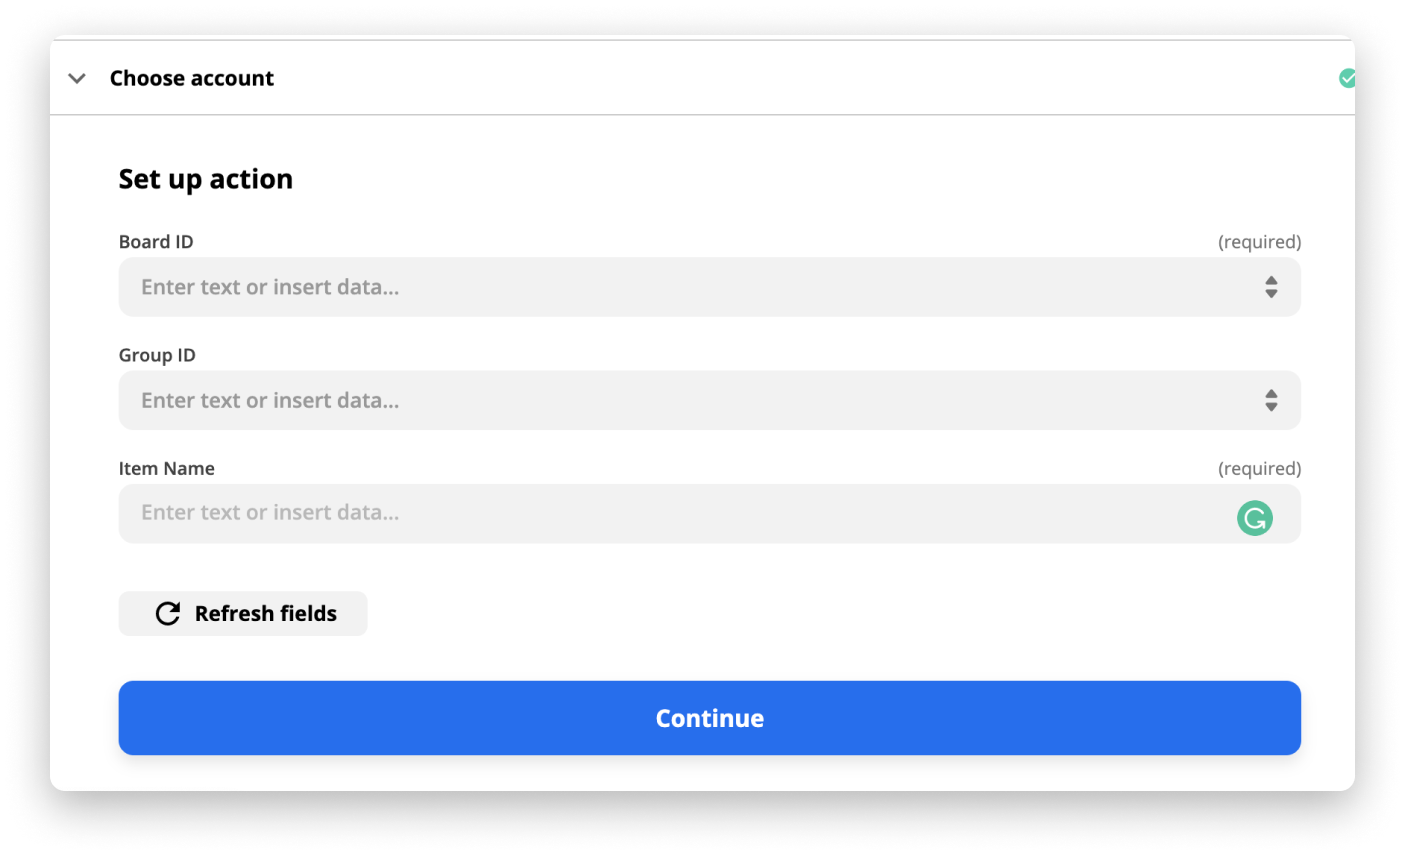
So far, we've selected the action we want Zapier to do for us and allowed Zapier to connect to your monday.com account to access your board data. At this point, we'll just need to set up the action further and configure the following:
- Where the item will be created
- The group that the item will be created in
- What the Item Name will be
- The column values of the new item
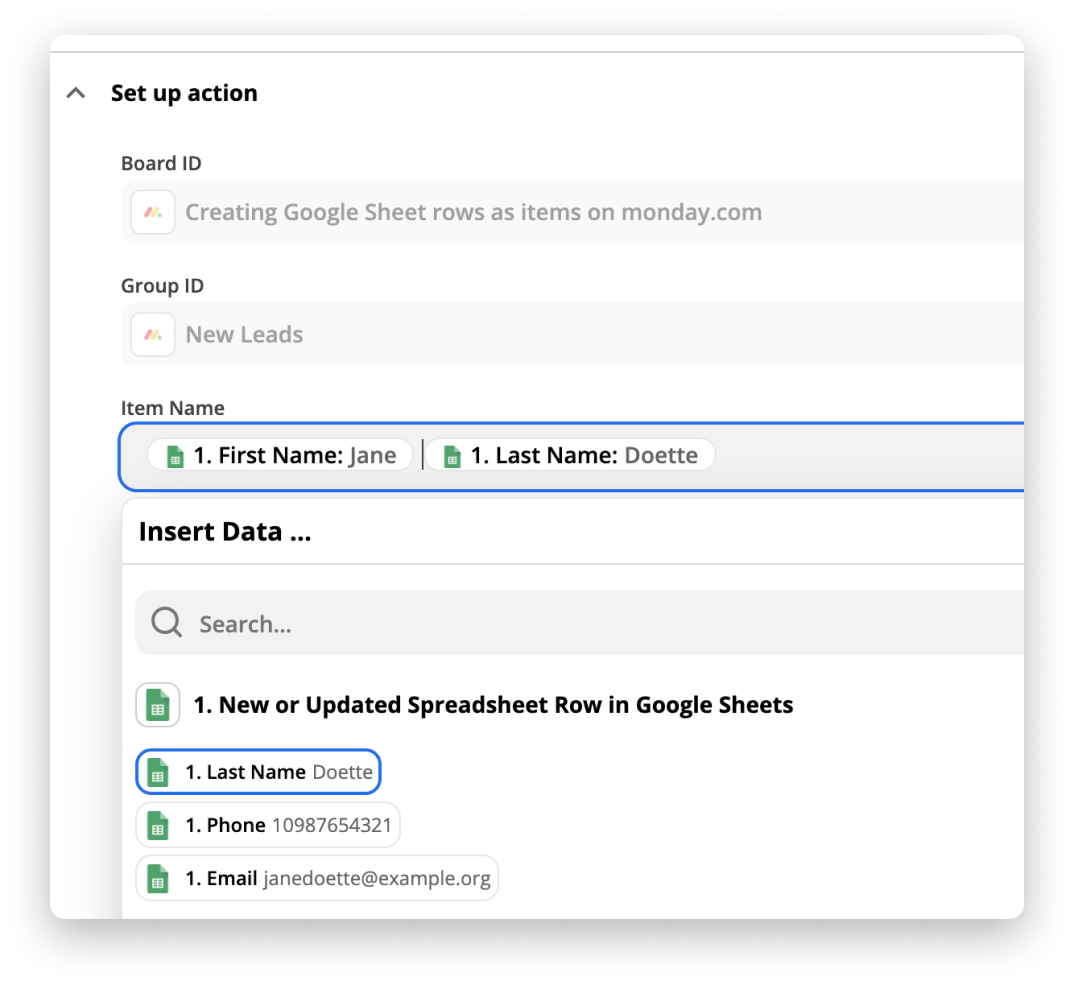
With those goals in mind, let's continue to further finalise our custom integration. You'll be instructed to select which board you want to create these new items in, as well as what to name the item:
Once you select a monday.com board, Zapier will display the columns from that board that you can use to populate with data from the previous step:
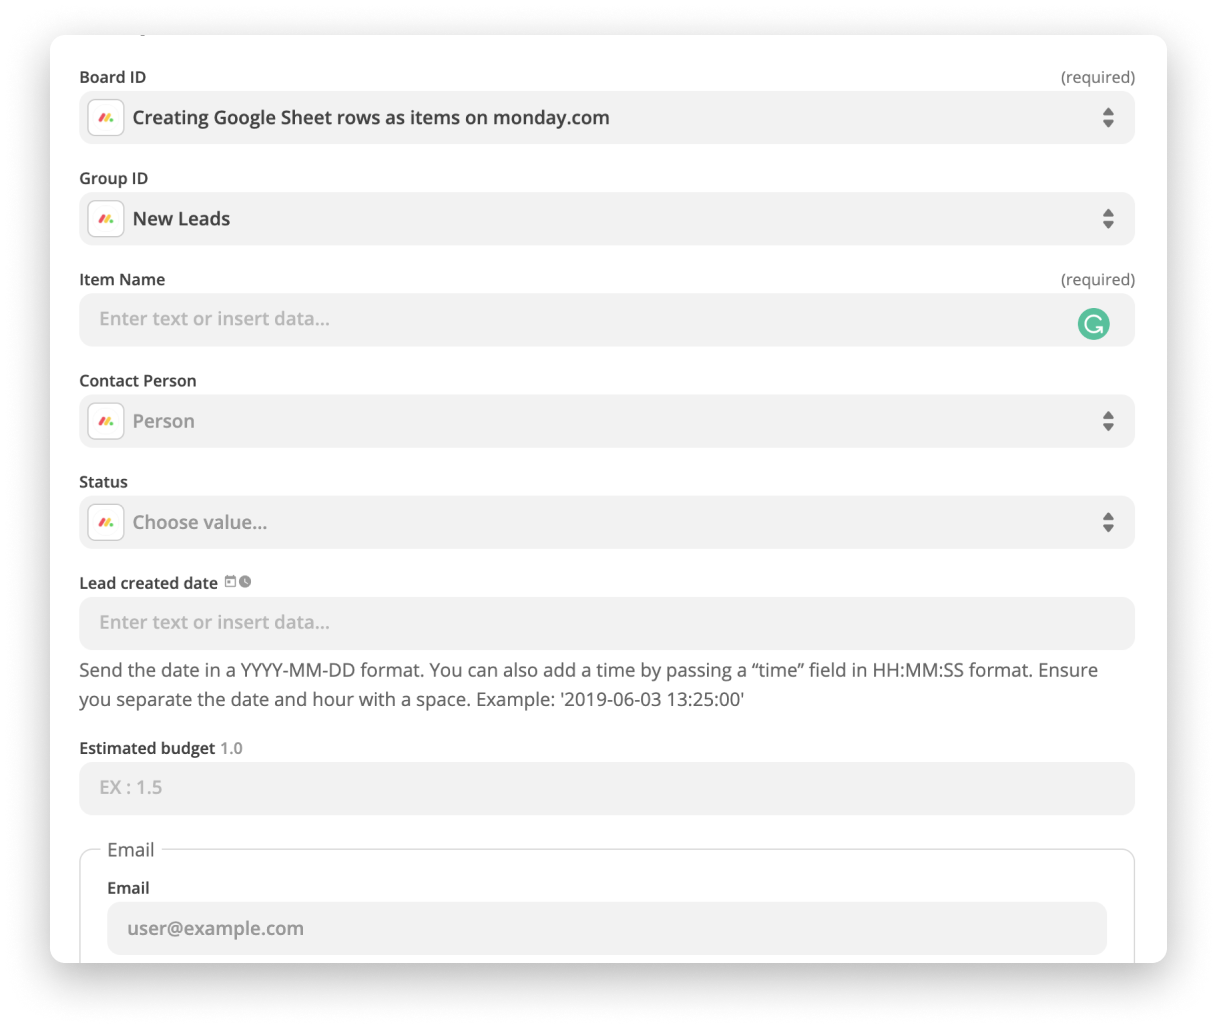
In this example, we'll be taking the "First Name" and "Last Name" columns from our Google Sheet and utilizing that as our Item Name:
In our example, this particular Google Sheet will store all of the contacts for a specific member of our team. Thus, we can select that monday.com user as the People column value in Zapier directly:

If you'd like, you can also select multiple users to assign to the item at once. If the user you are looking to assign doesn't appear as an option, you can also enter their monday.com User ID, which will appear as the last part of their Profile URL
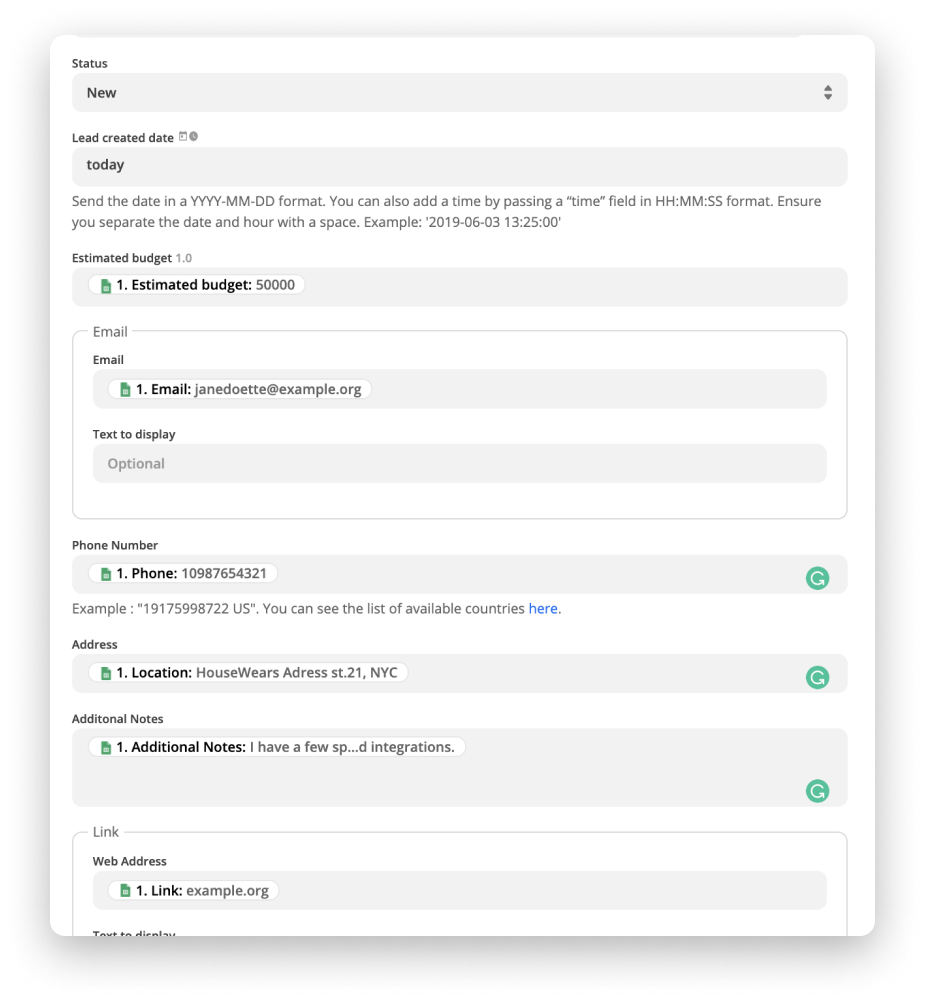
Now that we've given one column value a shot, why not go one step further and map out other monday.com columns to be populated with the data from our Google Sheets?
You can set up other column values within the board with Google Sheet data by simply mapping out the values, for example:
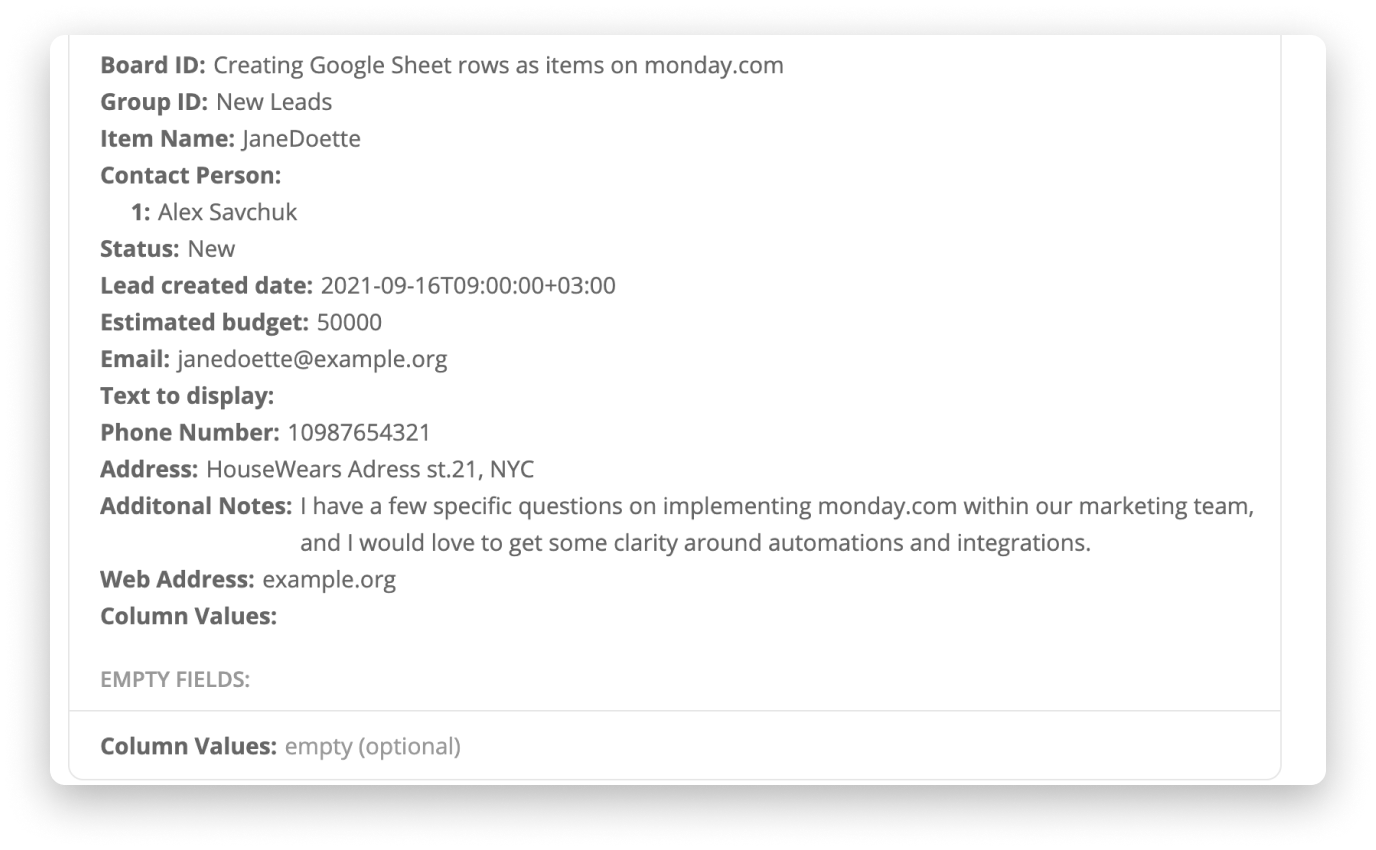
Once you are happy with the mapping of Google Sheet data to the relevant columns on your monday.com board, you can click the blue "Continue" button at the bottom. This will allow you to see how your data looks before you run the test:
Then, Zapier will attempt to create the Item on our board. Let's see how that will work!
After a drum roll 🥁... our end result looks pretty neat!
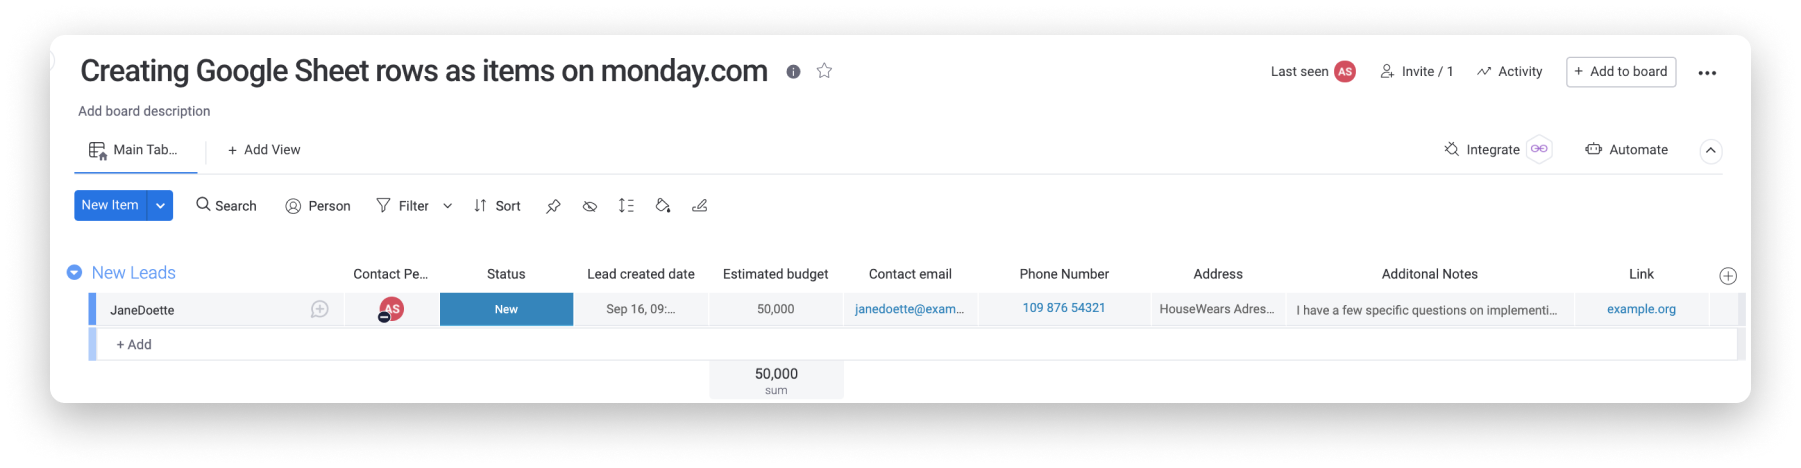
Woohoo! You've now successfully created a zap that automatically transfers data from Google Sheets to monday.com.
What is the column values section for?
Now, we support text updates for most columns, so you can simply type in the relevant info.
That said, some of the more advanced column types, like the Connect Boards or Dependency Columns, will require you to use the Column Values section. Those column types require a specific data structure in order to be filled with data.
Who's JSON? Actually, this acronym stands for JavaScript Object Notation. JSON is a format used for transporting data. The formatting is different for every column type within monday.com, so you'll need. to make sure you are using the correct structure.You can find examples of the JSON formatting for our those column types in this article: Zapier JSON Formatting Examples.
In the screenshot below, the "text" directly under Column Values in the left-hand side of the section refers to the column ID. This column ID will be different for every single column on your board, regardless of its type. For example, if you have two Text Columns, one ID may be "text" and the other might be "text1". Every Text Column will have a different, unique column ID.
Here's an example of using JSON formatting to populate a Location column:

If you need help building custom integrations, we also have an option for paid assistance through our network of certified monday.com partners. If you're interested, please fill out this form and someone will be in touch shortly!
If you have any questions, please reach out to our team right here. We’re available 24/7 and happy to help.
Comments