


When creating a new Zapier integration that utilizes monday.com to either create a new item or fill in column values, some columns will require the data you are sending to be set within a JSON format in order to pass through correctly. Keep reading to find more!
What Zapier Actions is this relevant for?
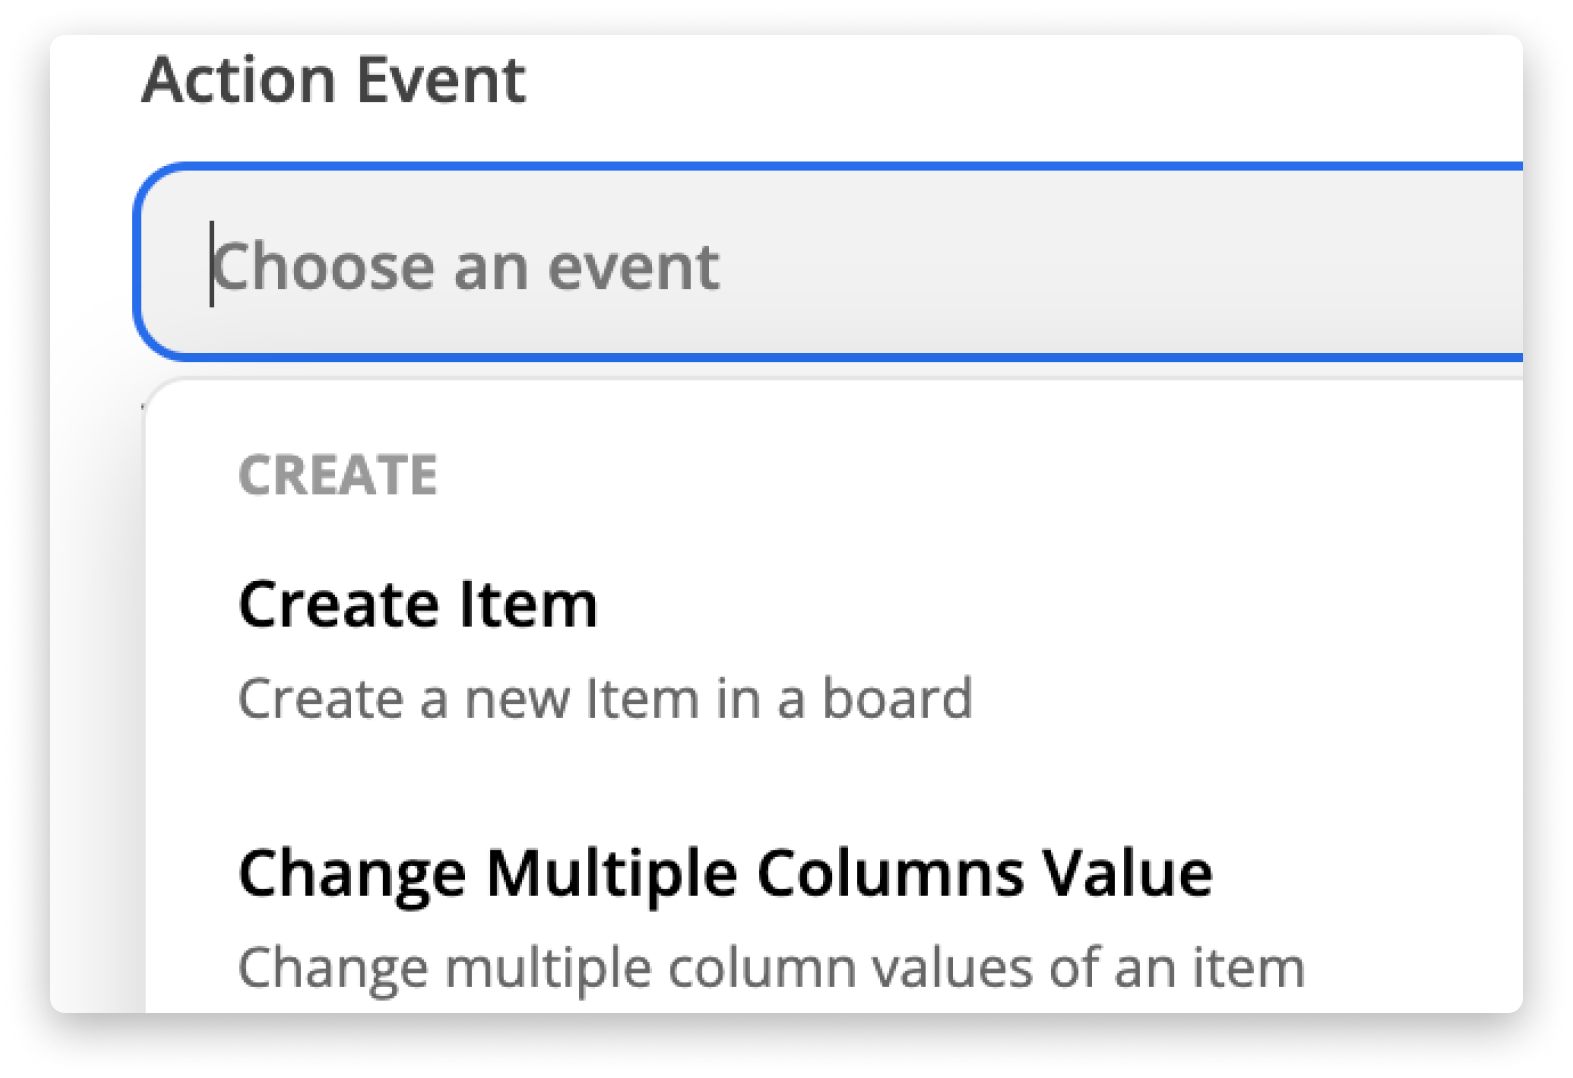
Using JSON formatting is only necessary for actions that would update an existing item's values, or that would create a new item on a monday.com board:
How does it work?
The majority of columns in monday.com can be updated using plain text, without JSON formatting. However, in certain use cases, you may need to send column values in JSON format.
Every column in monday.com holds a different kind of data, so it also has a different required JSON format to pass the relevant data to your monday.com board. Some of the most popular column choices, like Status, Dropdown, or Date, will be handled by Zapier automatically. For those columns, you can simply paste your data from a different platform as it is, without applying special JSON formatting.
Here are the column types where you can use normal text in the Zapier integration:
- Status
- Dropdown
- Date
- Timeline
- Link
- Phone
- Numbers
- Text
- Long Text
- Location (you will need to use latitude and longitude coordinates)
You can find the full column types reference here.
How to place the correct data in the correct column?
That's a great question! That's where the column ID comes into play.
When sending data to a specific column on the board, you will need to specify the column ID. This is how the platform will understand which specific column on your board to store the data in, as each column has a unique per board. If you aren't sure where to get the Column ID, the following guide outlines how you can see this within your monday.com board - Where to find board, item, and column IDs
So far, here's what we have covered:
- When creating a new item, or updating an existing item's data, some columns will require you to use JSON formatting so our platform can store the values correctly
-
You need to specify the Column ID when inserting your values to store the data in the correct column. Click on your profile picture, open the monday.labs section and activate Developers Mode to see Column IDs in the column menu
-
You can keep reading this article for more examples, or check our API documentation.
Keep on reading to find out specific examples of how to apply JSON formatting to keep your data flowing to monday.com 📶
How to apply JSON formatting to column values
When setting a column value within the "Create a New Item in monday.com" or the "Change Multiple Column Values" actions, some columns will require you to use JSON formatting to store your data.
You can find a list of the columns and the format of data they expect to receive below:
- Connect Boards with a single item: {"item_ids":[1360856860]}
- Connect Boards with multiple items: {"item_ids":[1360856860,1360856957]}
- Dependency column with a single item: {"item_ids" : [1587277166]}
- Dependency column with multiple dependent items: {"item_ids" : [1587277166,1587277190]}
- Tags column with a single tag: {"tag_ids" : [295026]}
- Tags column with multiple tags: {"tag_ids" : [295026,295064]}
- Country column: {"countryCode":"US","countryName":"United States"}
- countryCode key uses ISO Alpha-2 country codes;
-
World Clock: {"timezone":"Europe/London"}
-
You can find the list of available timezones here.
-
- Week: {"week":{"startDate":"2019-06-10","endDate":"2019-06-16"}}
- Send the start and end dates in a YYYY-MM-DD format. The dates must be 7 days apart (inclusive of the first and last date) and start at the beginning of the work week defined in the account settings.
- Hour: {"hour":13,"minute":0}
- Make sure you remove any leading zeroes from the data you send (ie, send the number 9 instead of 09).
- Rating: {"rating":5}
- Checkbox: {"checked":"true"}
Below is an example showing the formatting for updating the columns types listed above:
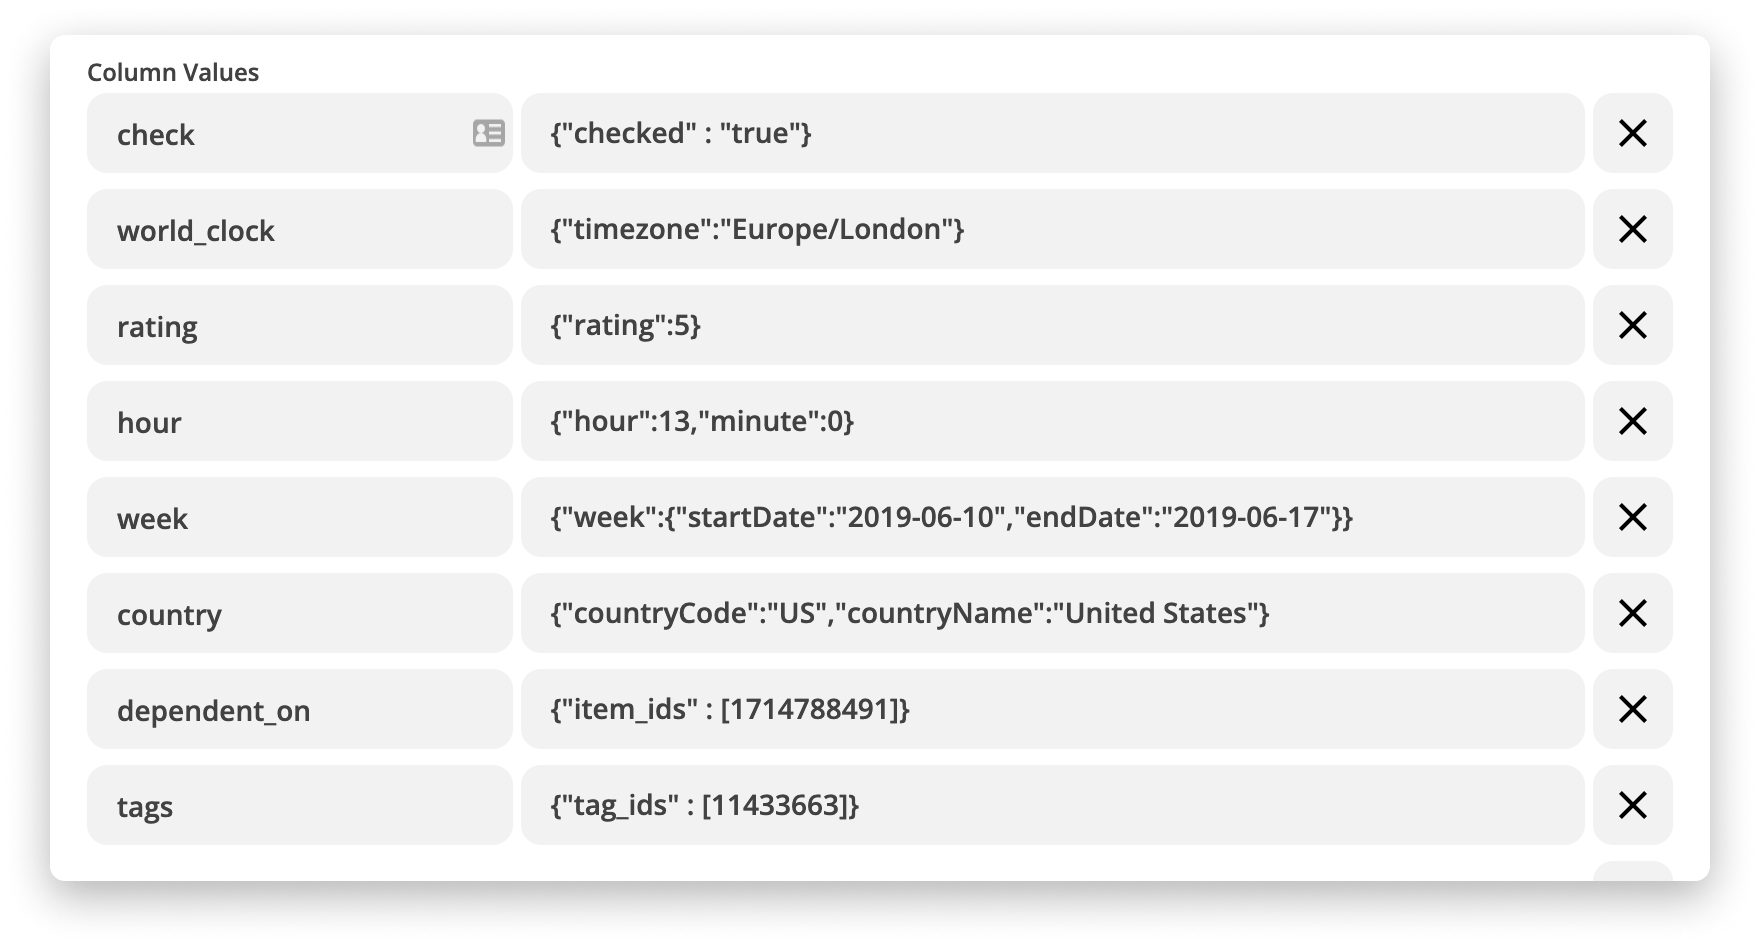
In the left field, place the column IDs. In the right field, place the corresponding value in JSON format (see the list of JSON format by column type in the previous section).
And here are our results:

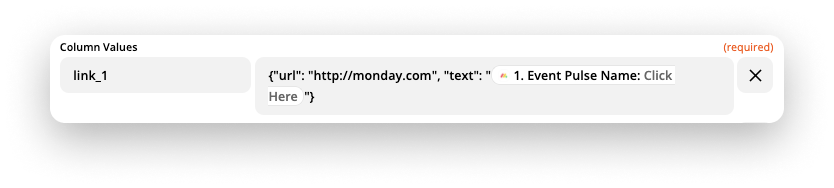
Below is an example showing the formatting for updating a Connect Boards Column, so we can breakdown a little further:

So, how does this work?
In the left field, we input the column ID
- In the right field, we inserted the corresponding value in JSON format. For a Connect Boards column, this would include using {"item_ids": to describe what type of data is sent, and then an Item ID (in my case, 1192176644) the platform should connect to. As the Connect Boards column allows you to create a relation to multiple items at once, your Item IDs should be sent in an array in brackets. Taking those parts into account, we arrive at: {"item_ids":[1192176644]}
That's it! Now, you can apply JSON formatting to your monday.com column values for Zapier actions like a Pro.
Dynamically putting data inside JSON values
You can also pull data dynamically from previous steps of the Zap, and place them inside the column JSON value, e.g.:
If you have any questions, please reach out to our team right here. We’re available 24/7 and happy to help.
Comments