


Do you find your boards are filled with so much data but it's hard to pull out some key takeaways? Looking for a visual representation of all your textual data collected through your forms and surveys? Look no further. With the Word Cloud, you can turn your textual data from your board into meaningful visualizations allowing you to gain in-depth analysis and convey crucial information when necessary.
How does it work?
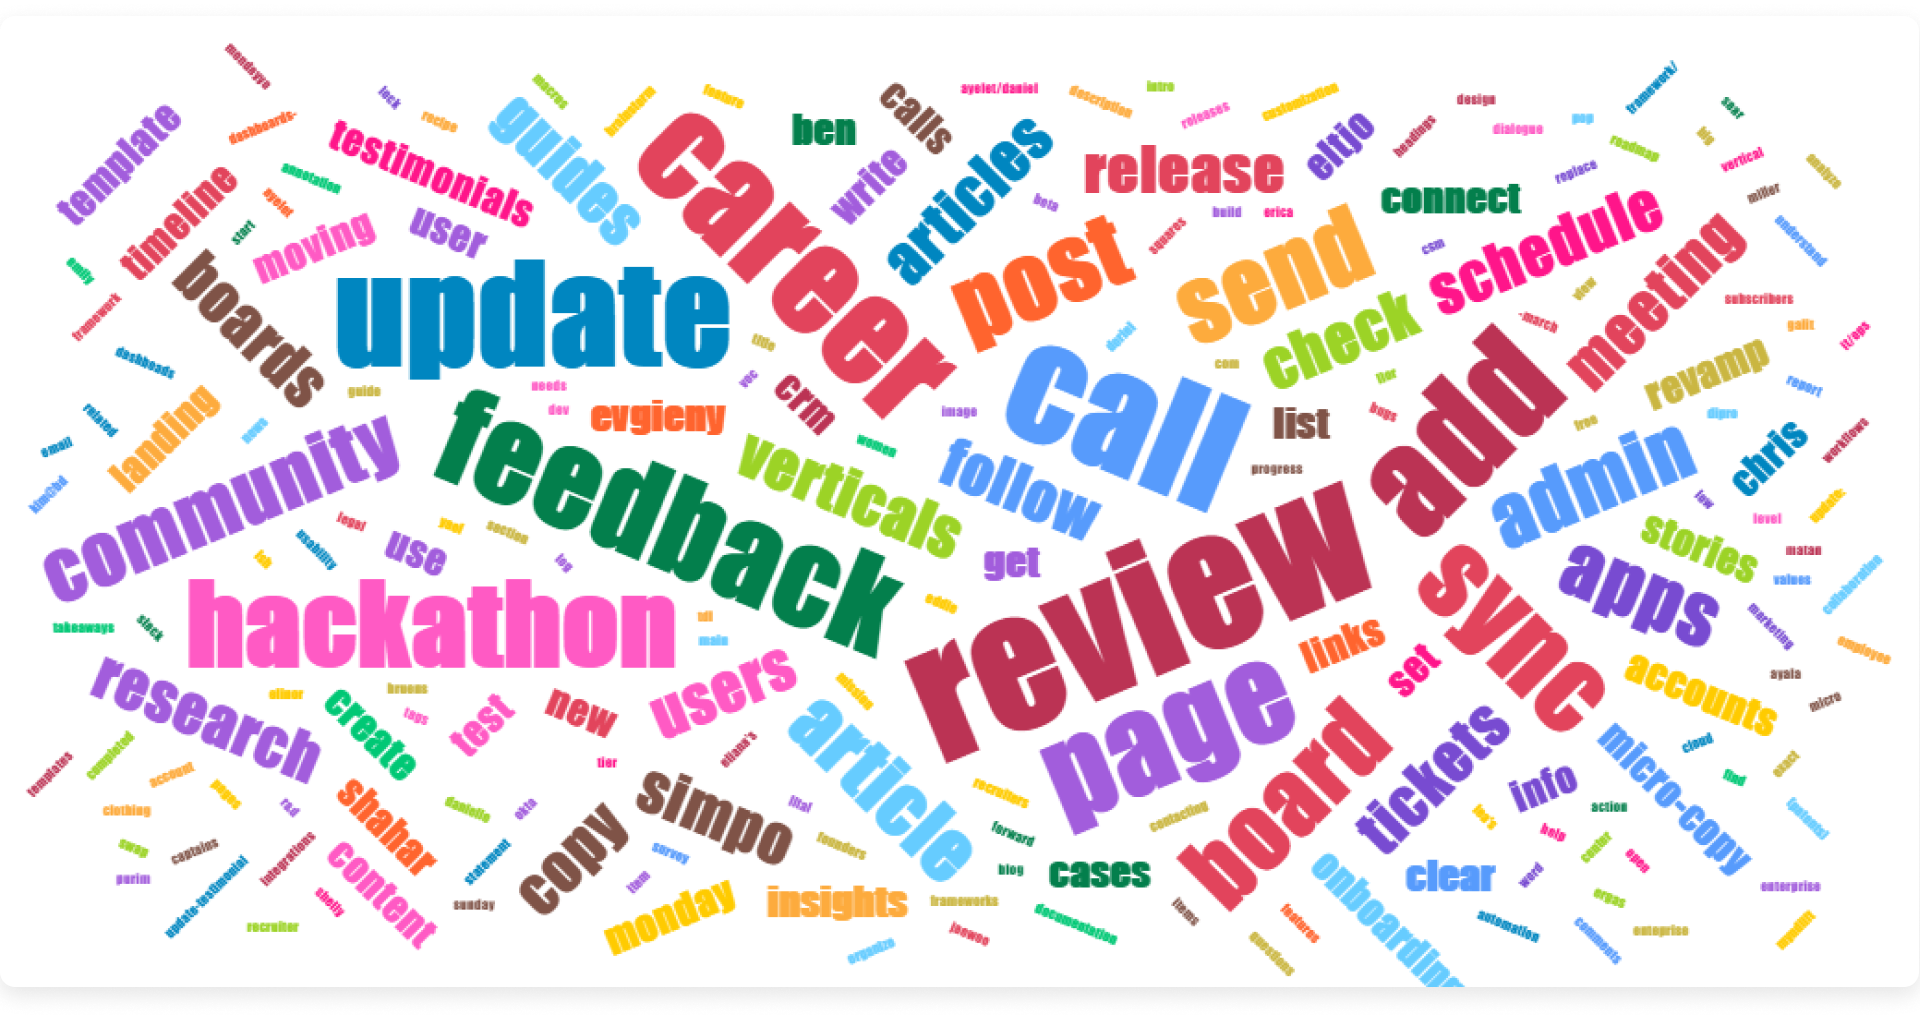
The word cloud helps turn databases of textual information into insights by depicting the key terms from your texts in a stunning visual representation. The bolder and bigger the terms, the more these terms appear on your board. With just a quick glance over your word cloud, you'll be able to gain some key takeways and insights!
How to add it to your board and dashboard?
Board View
To add the word cloud view to your board, click on the arrow next to the button "Main Table" located on the top left of your board. Click on "Apps" which will take you to the Apps views center.
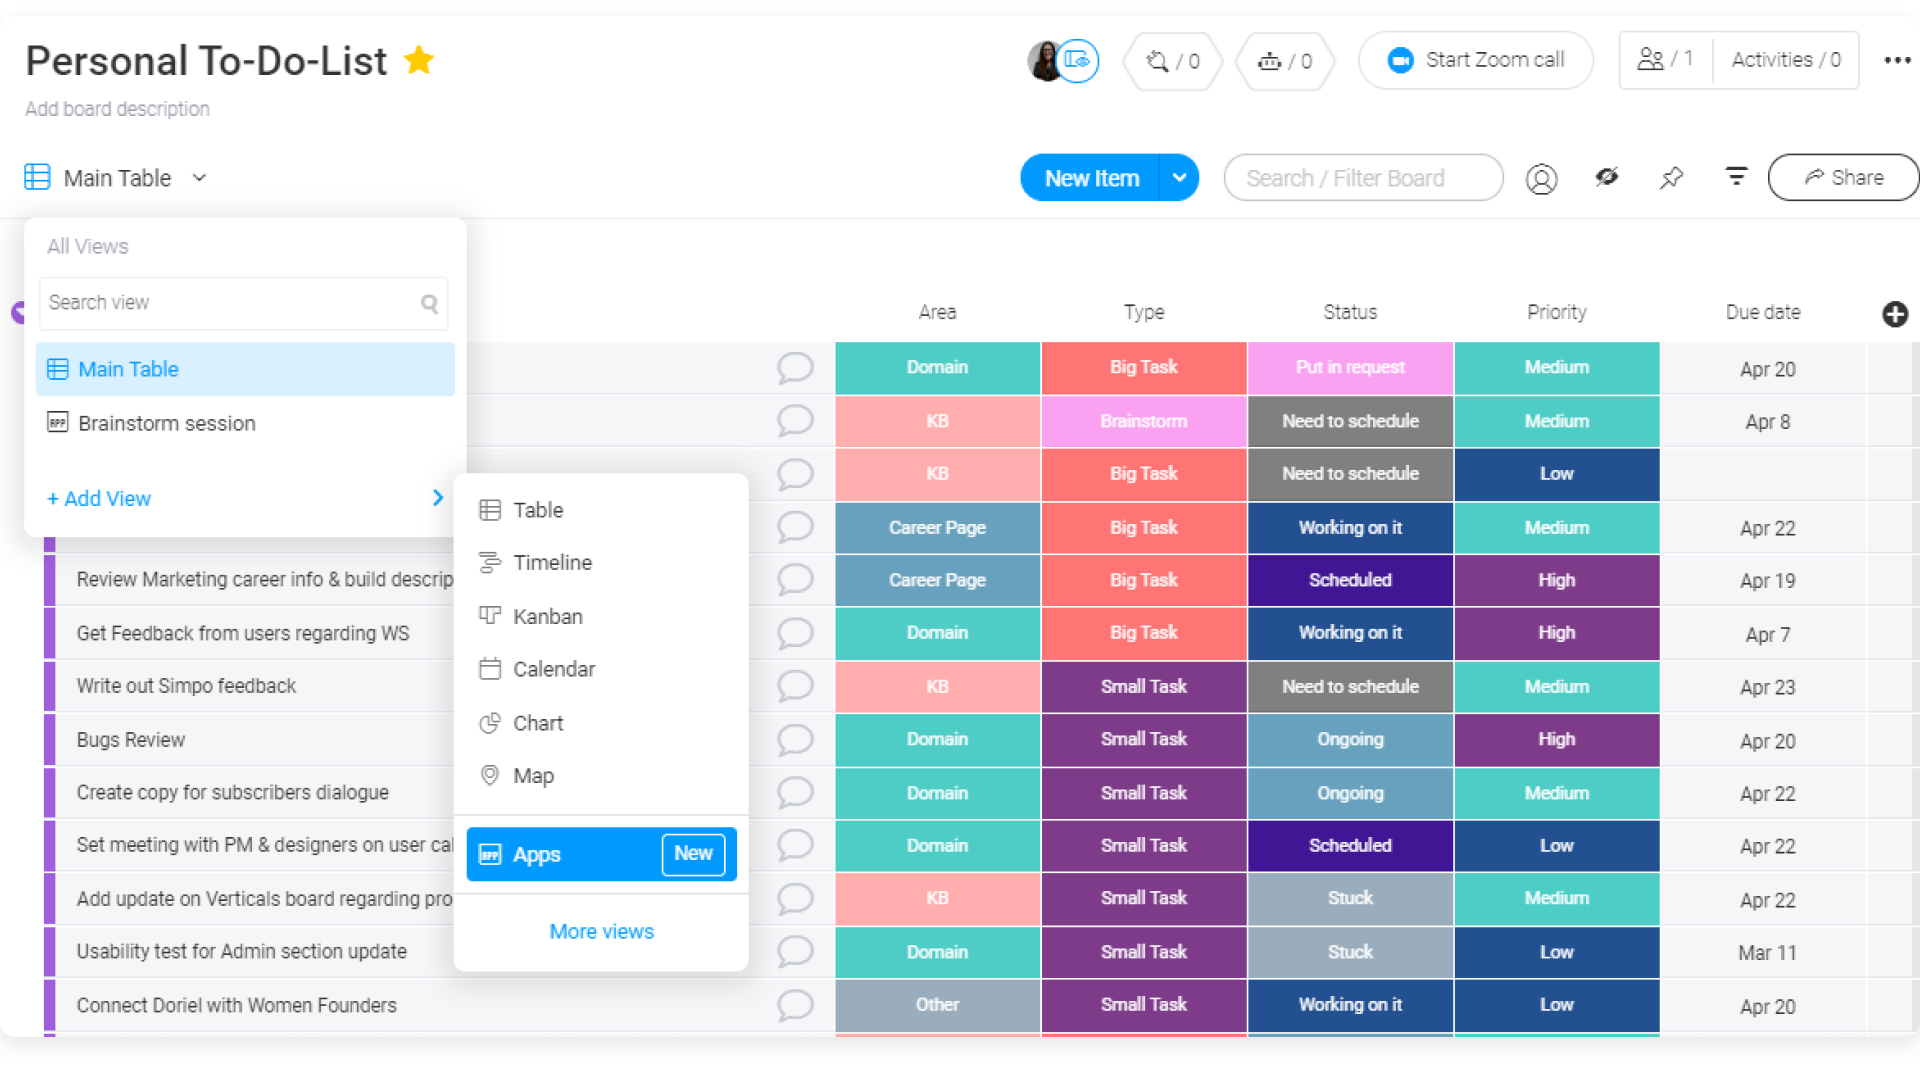
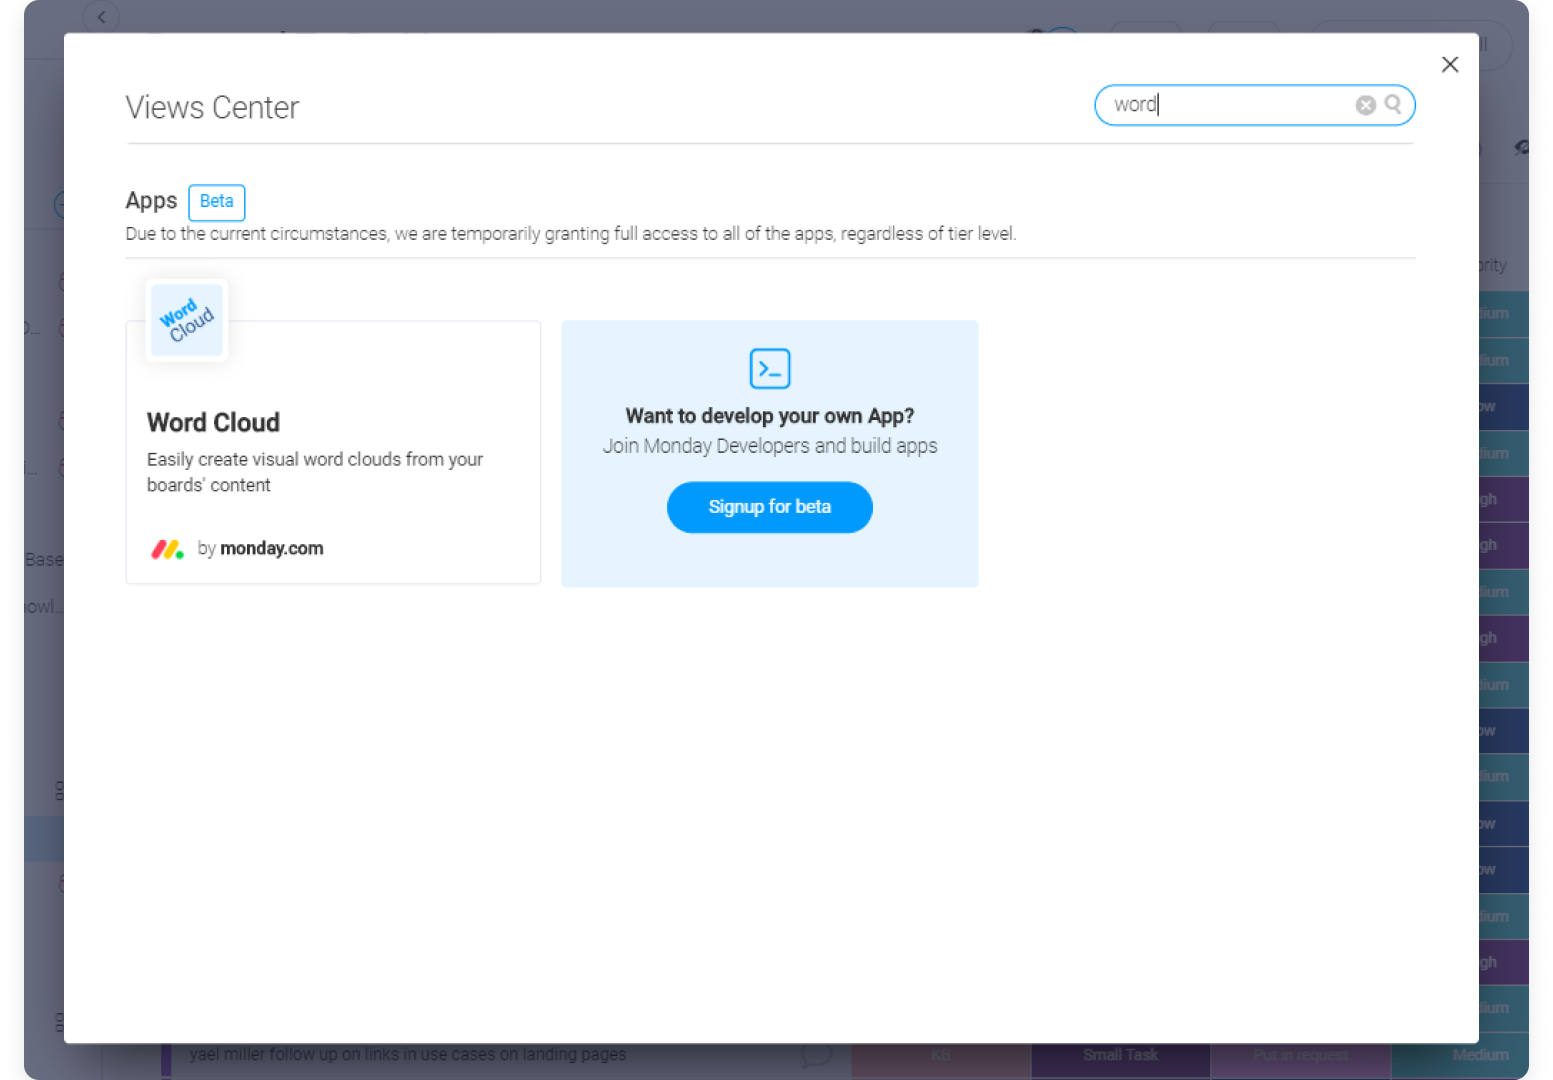
In the views center, search for "Word Cloud" and add it to your board.
Dashboard Widget
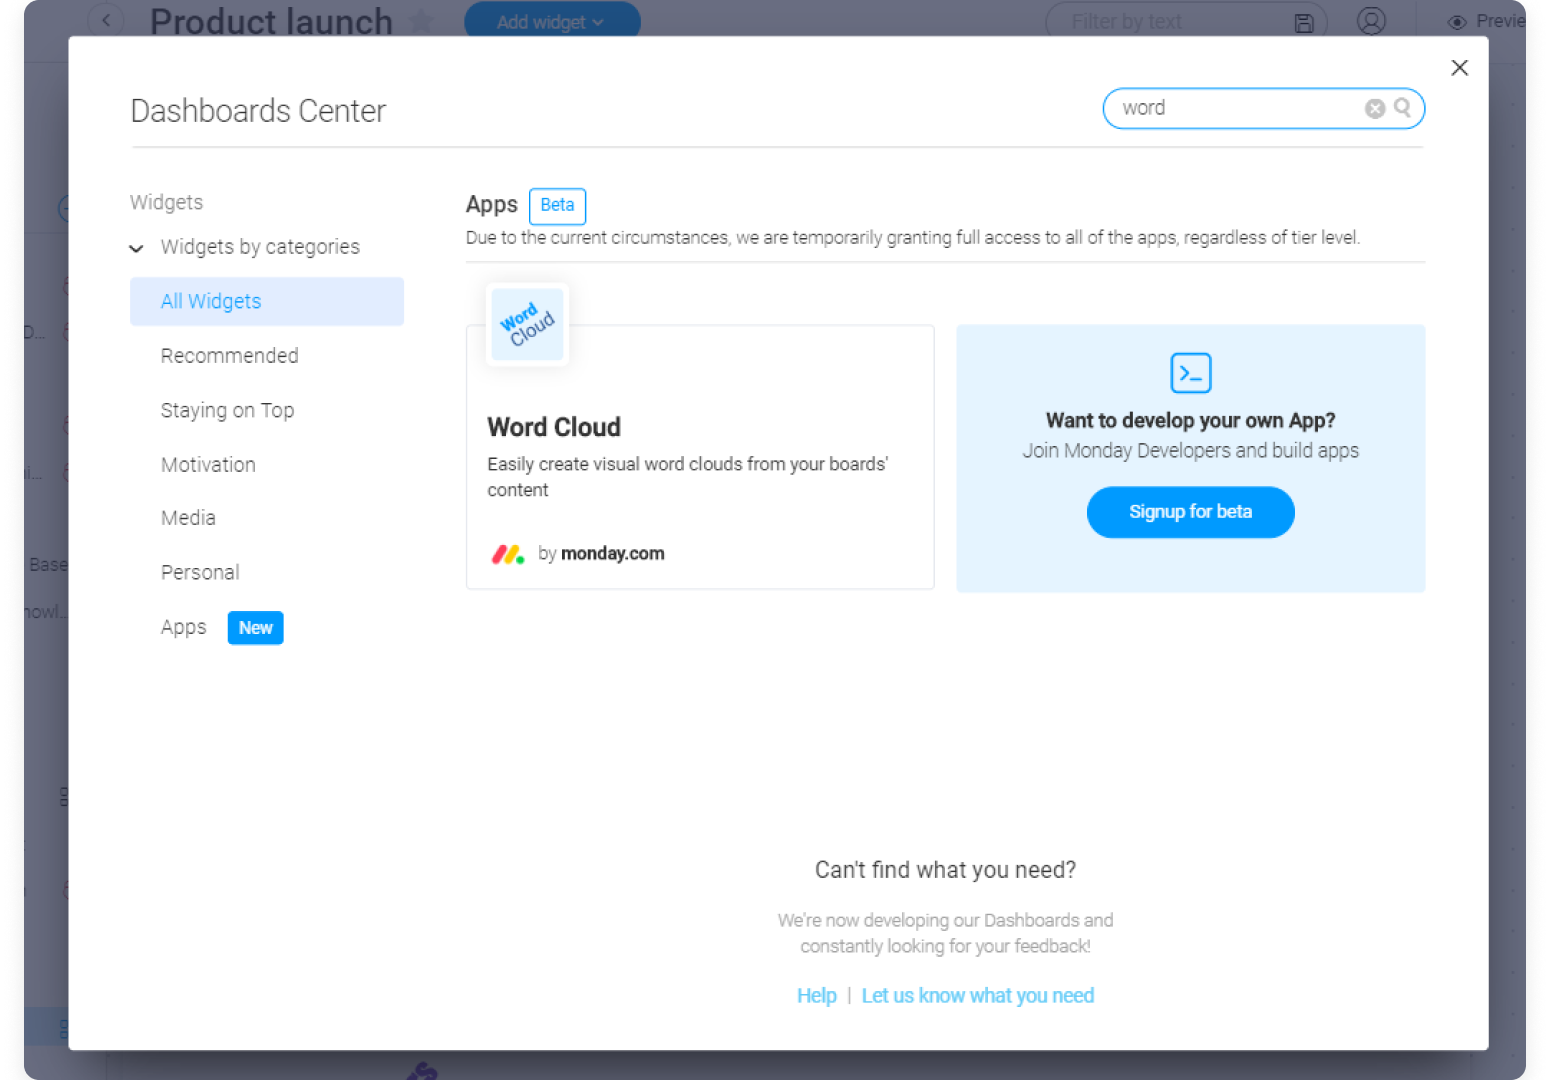
To add the word cloud to your dashboard, click on the "Add widget" button on the top right of your dashboard. Click on "More" which will take you to the widgets center.
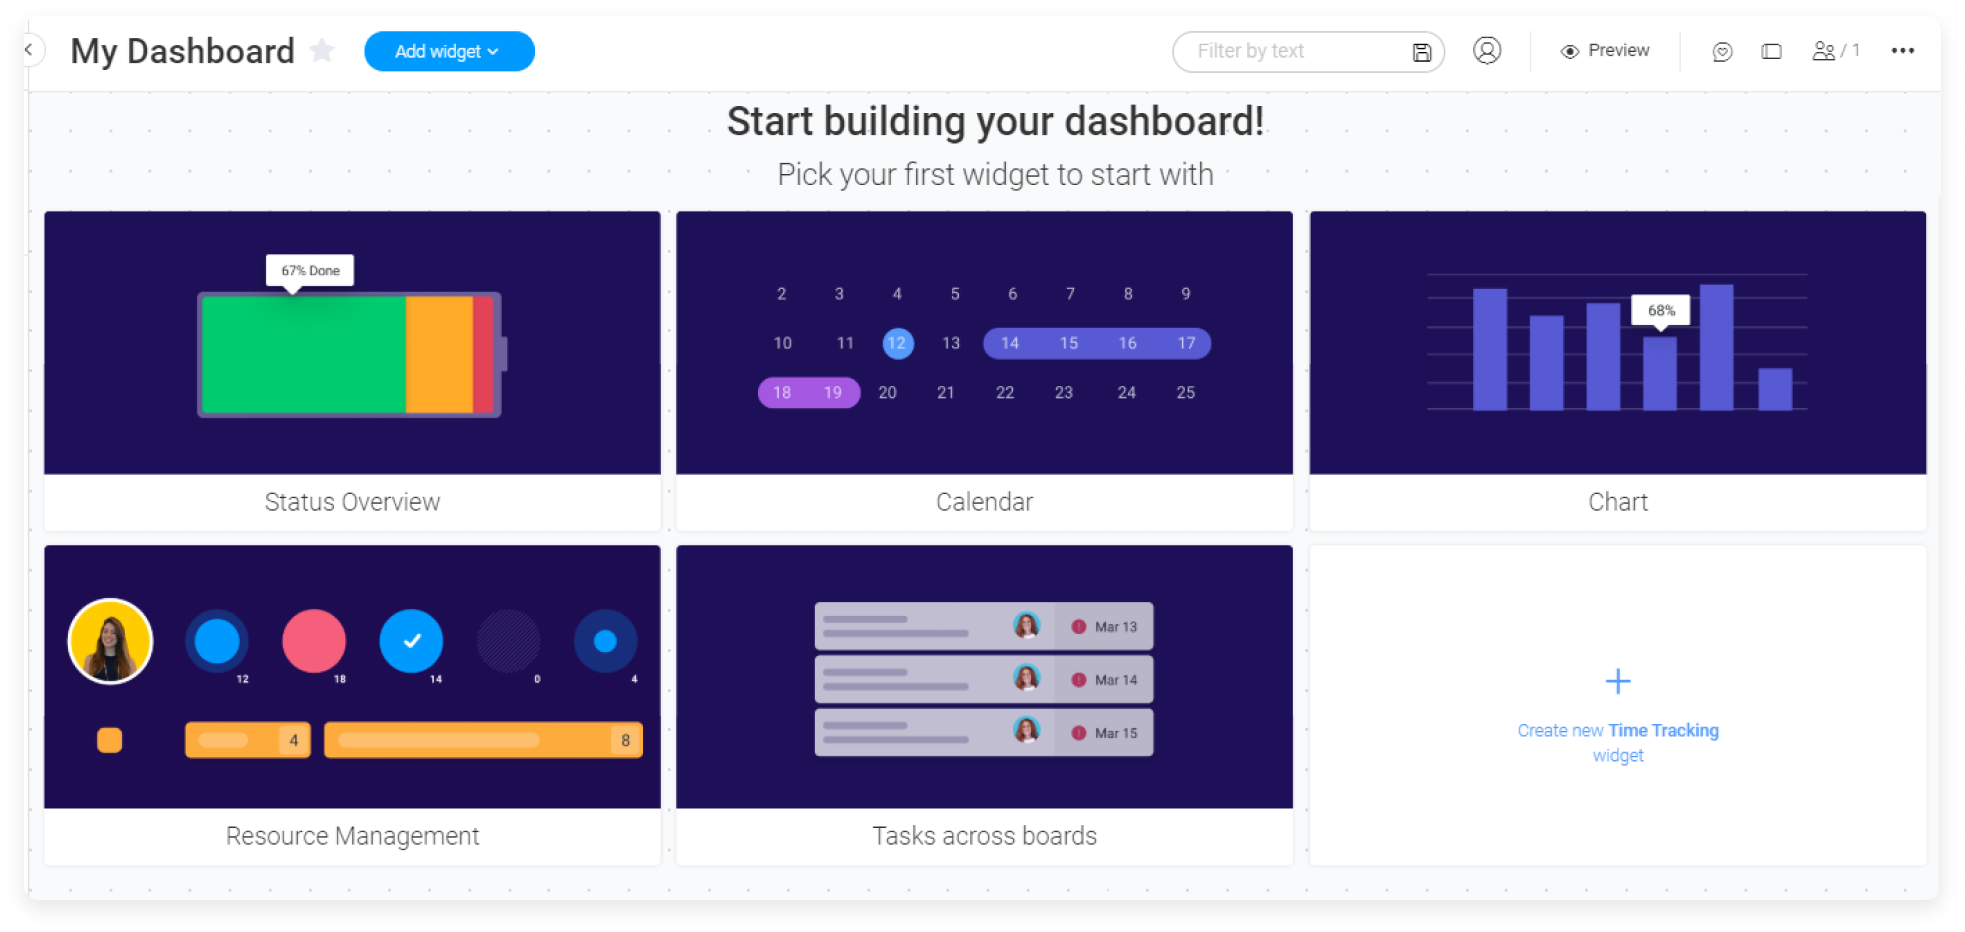
In the widgets center, search for "Word Cloud" and add it to your dashboard.
Once done, your word cloud will pop up on your screen, which you can then start custromizing to suit your needs.
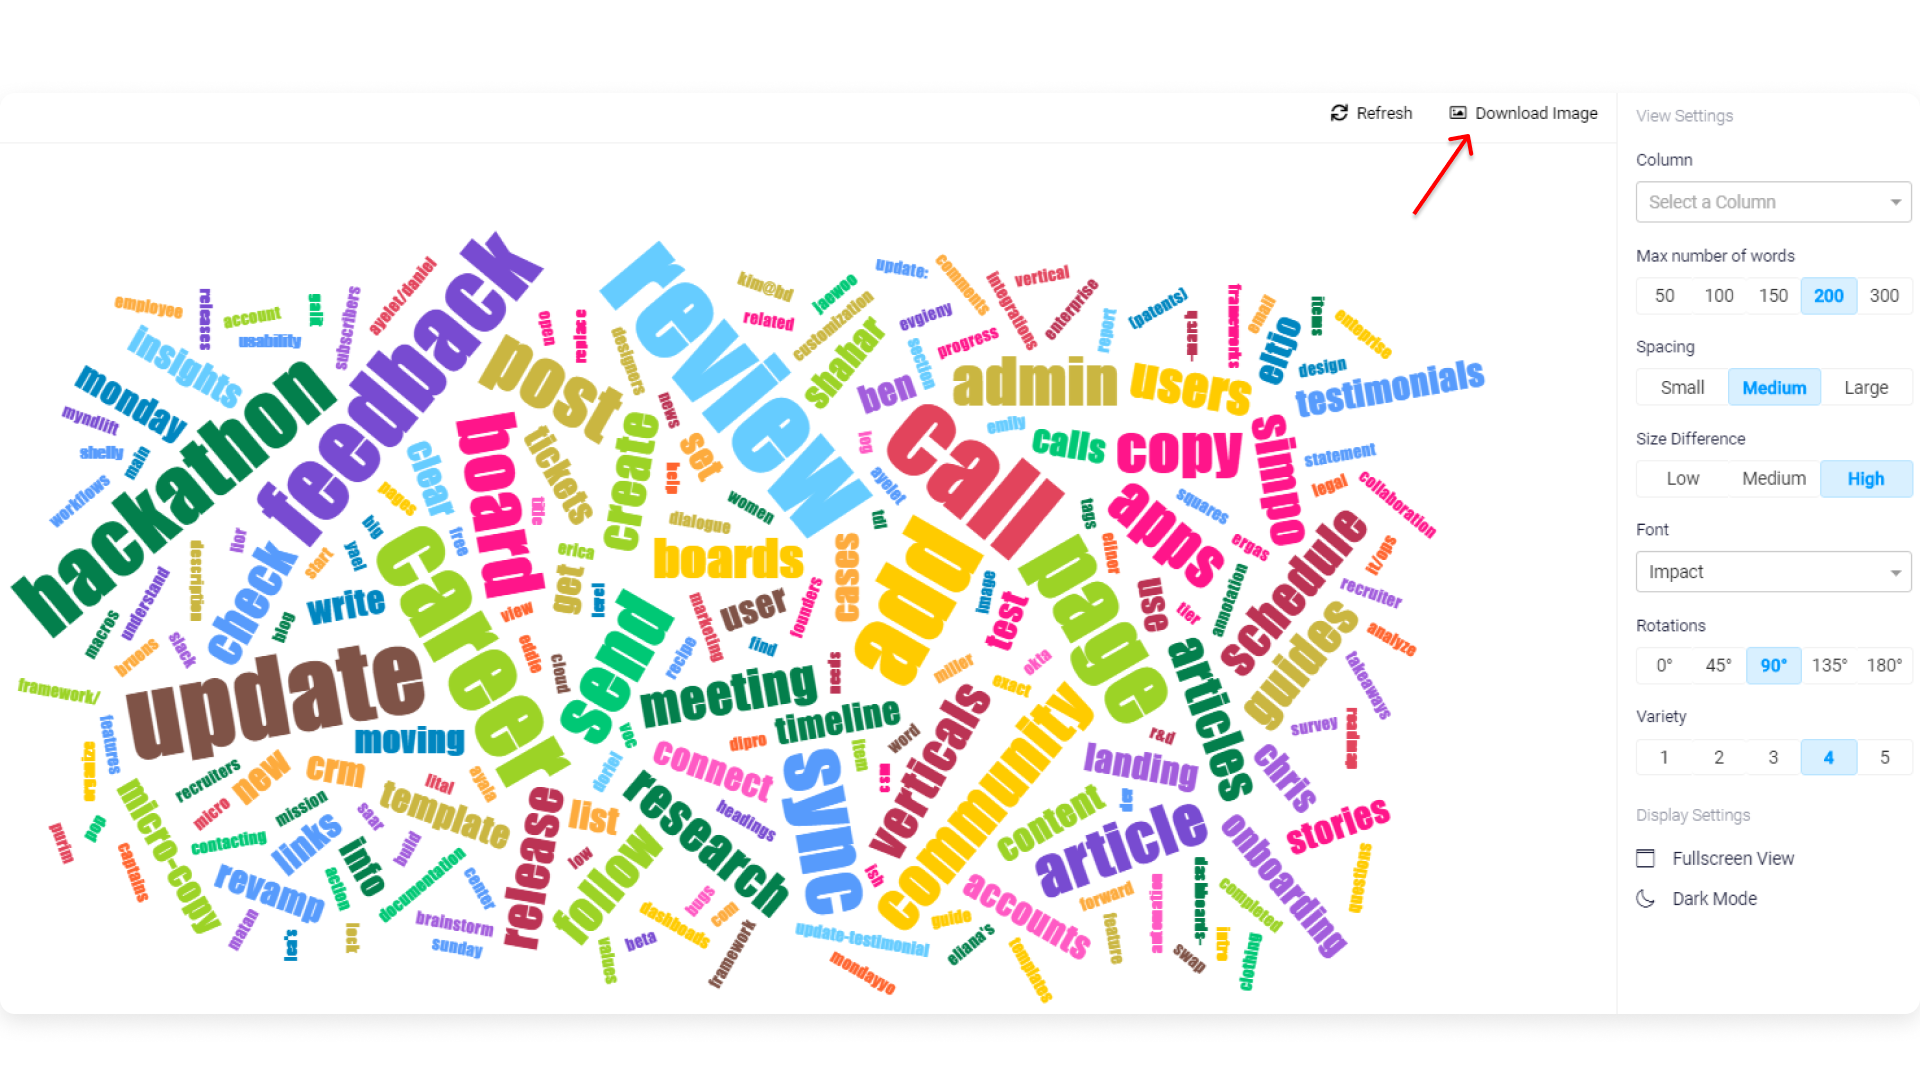
How to customize it?
With the help of these settings, you can ensure that not only does your word cloud allow you to better analyze your data and see trends, it also allows you to play around to create the beautiful visual representation you're looking for.
Step 1: Select the columns you want to analyze
By default, your word cloud will pull data from your item names. You can customize this to highlight important textual data from any of your other columns on your board.
For the word cloud widget, you will need to select which column to analyze, from each board you've connected.

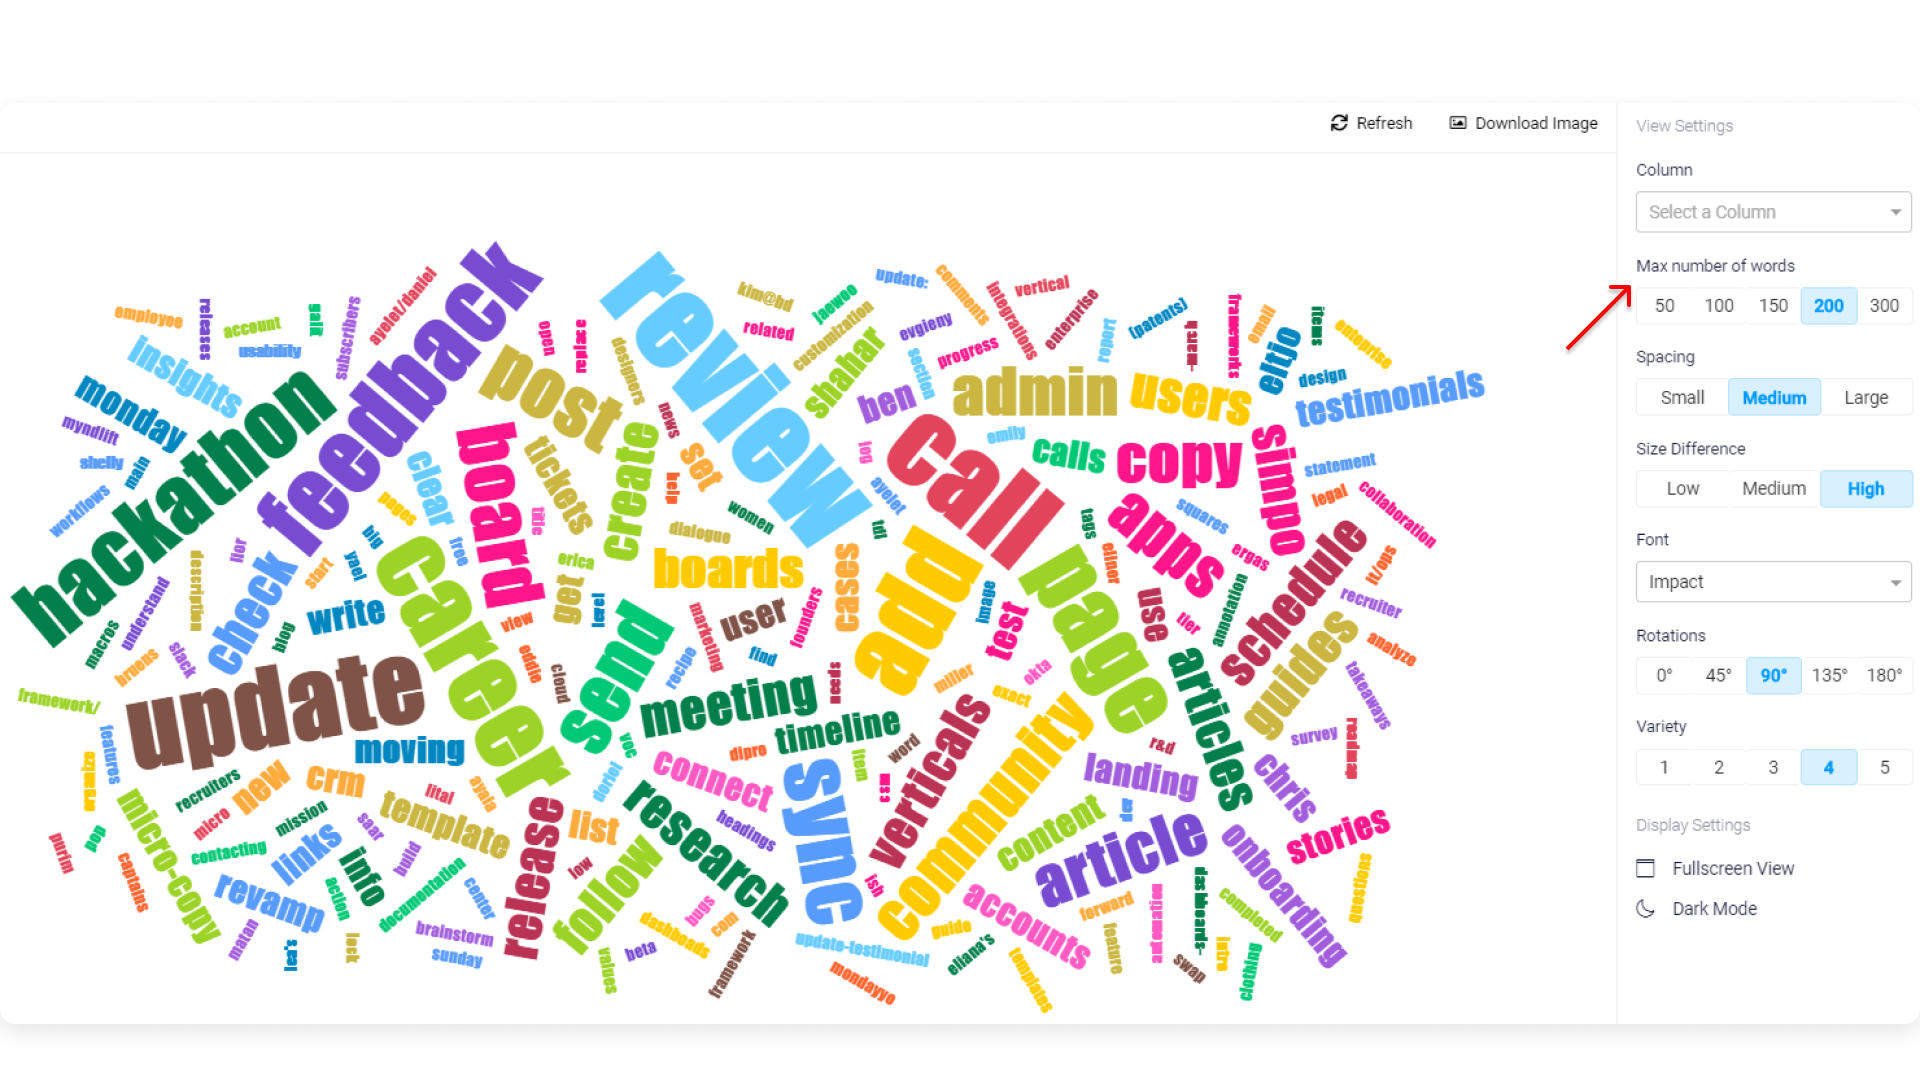
Step 2: Choose the maximum number of words
With this setting, you can select exactly how many words you want your word cloud to include.
Step 3: Select the spacing
Whether you want the words to be packed tightly together or further apart, your word cloud can do it all.

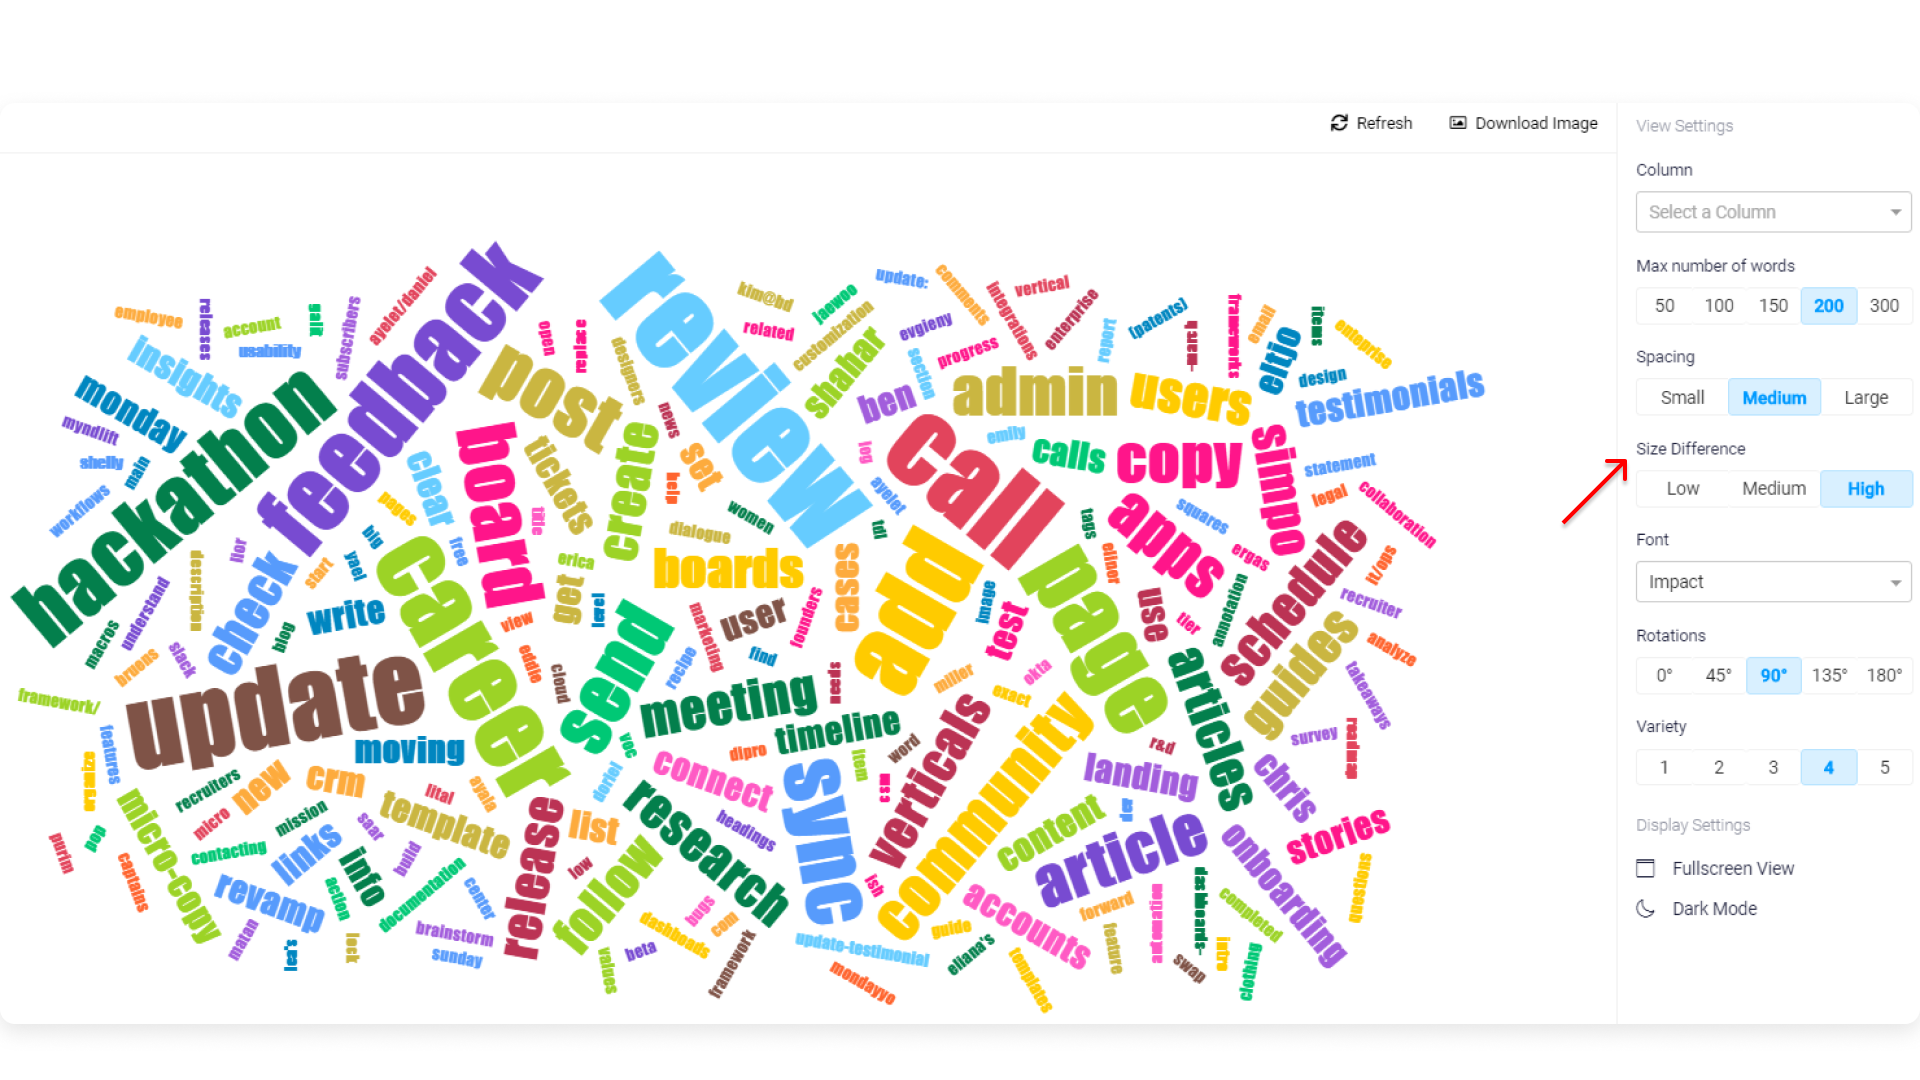
Step 4: Select the size difference between words
Sometimes you might want certain words to stand out bolder while other times not as much. Here, you can select how big a difference you want between your words on the word cloud.
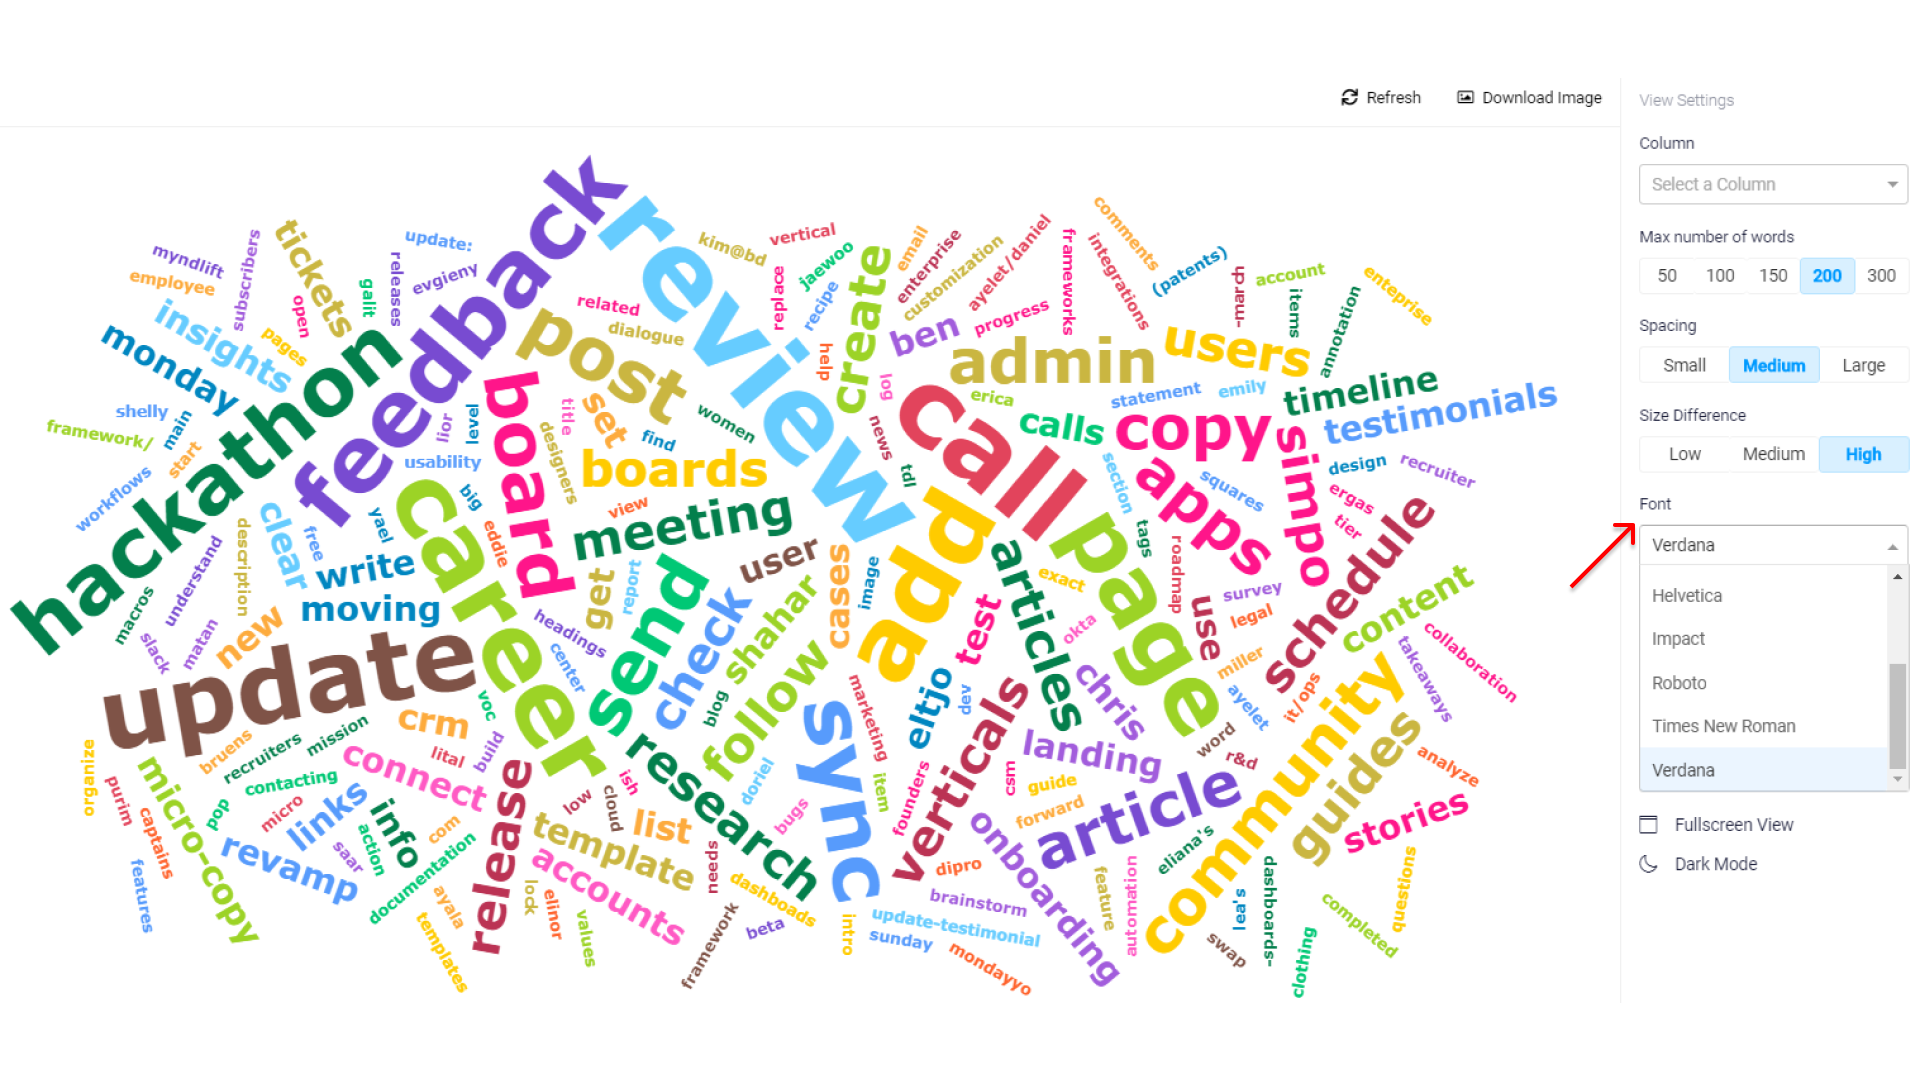
Step 5: Choose your font
You can decide between multiple different fonts on your word cloud to suit all your presentations!
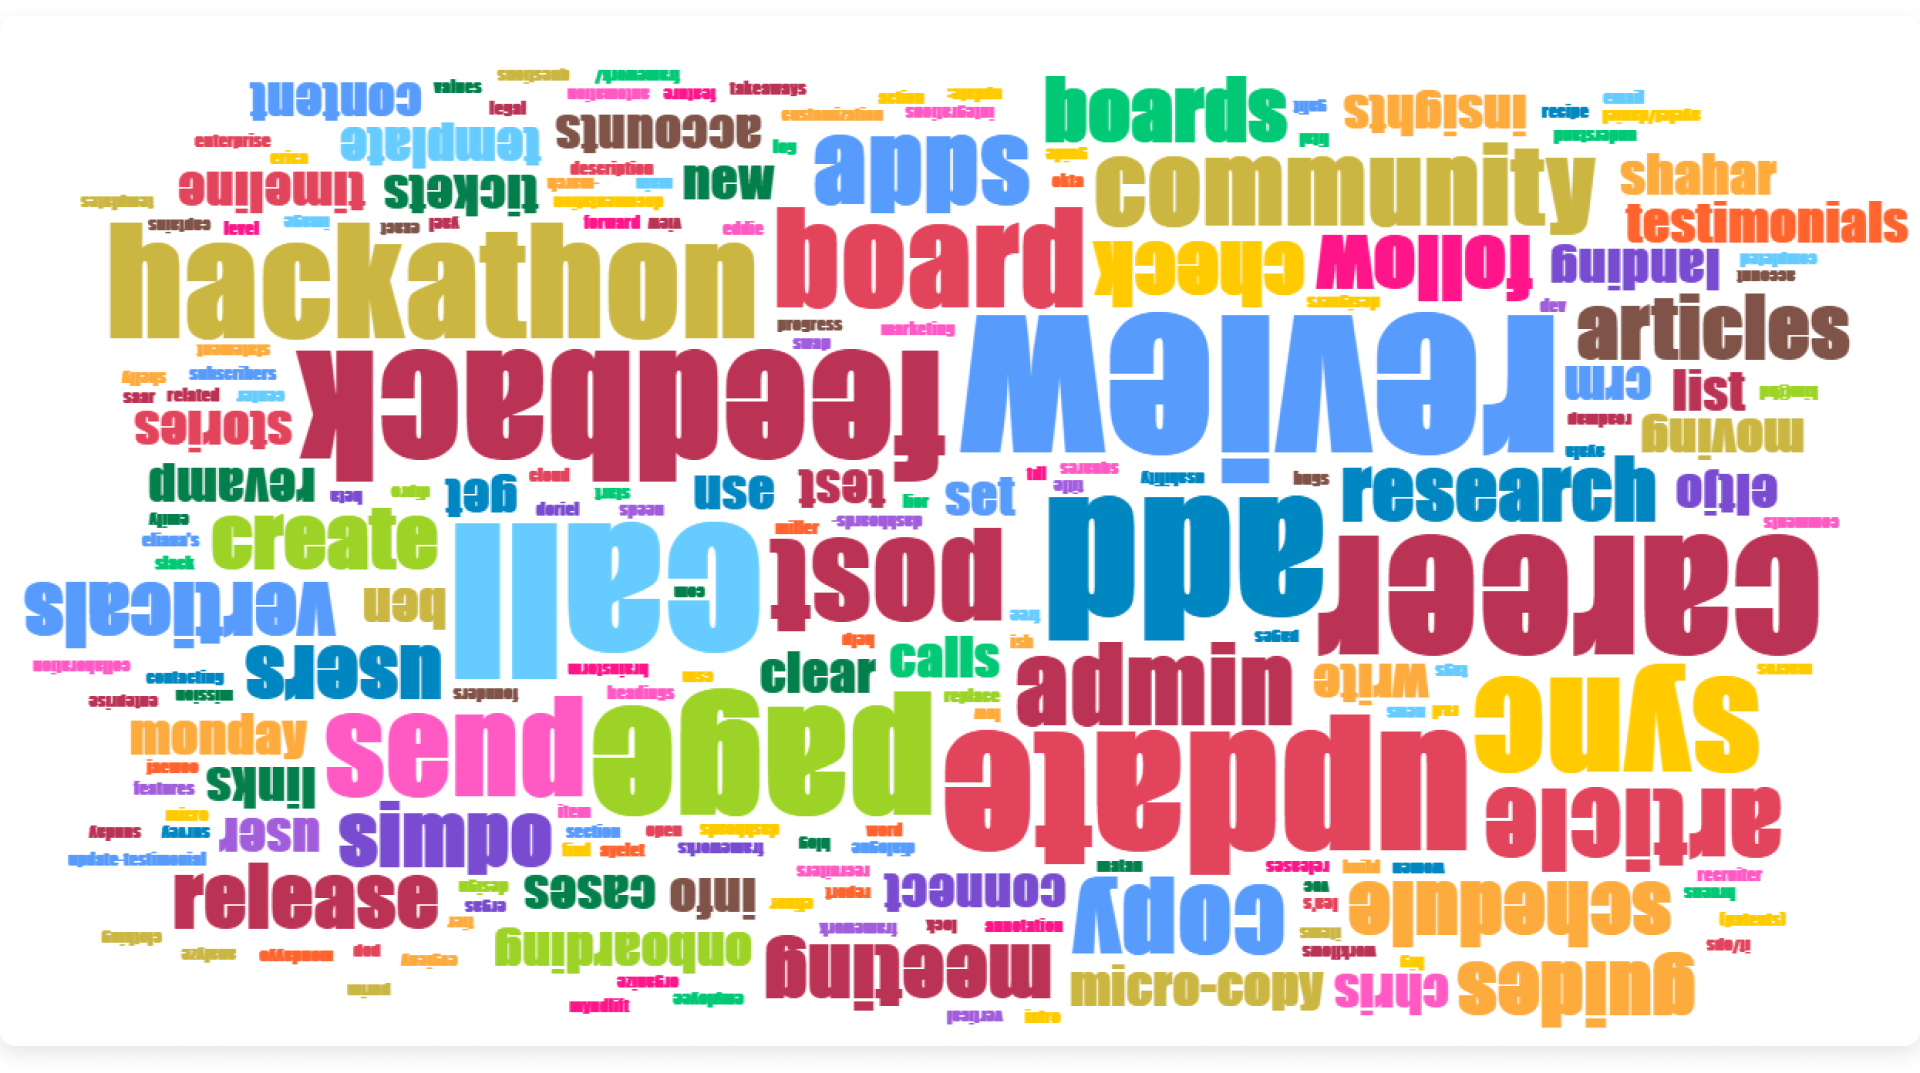
Step 6: Flip your words just the right amount
You can determine to what degree you'd like to rotate the text on your word cloud to fit your exact design needs.
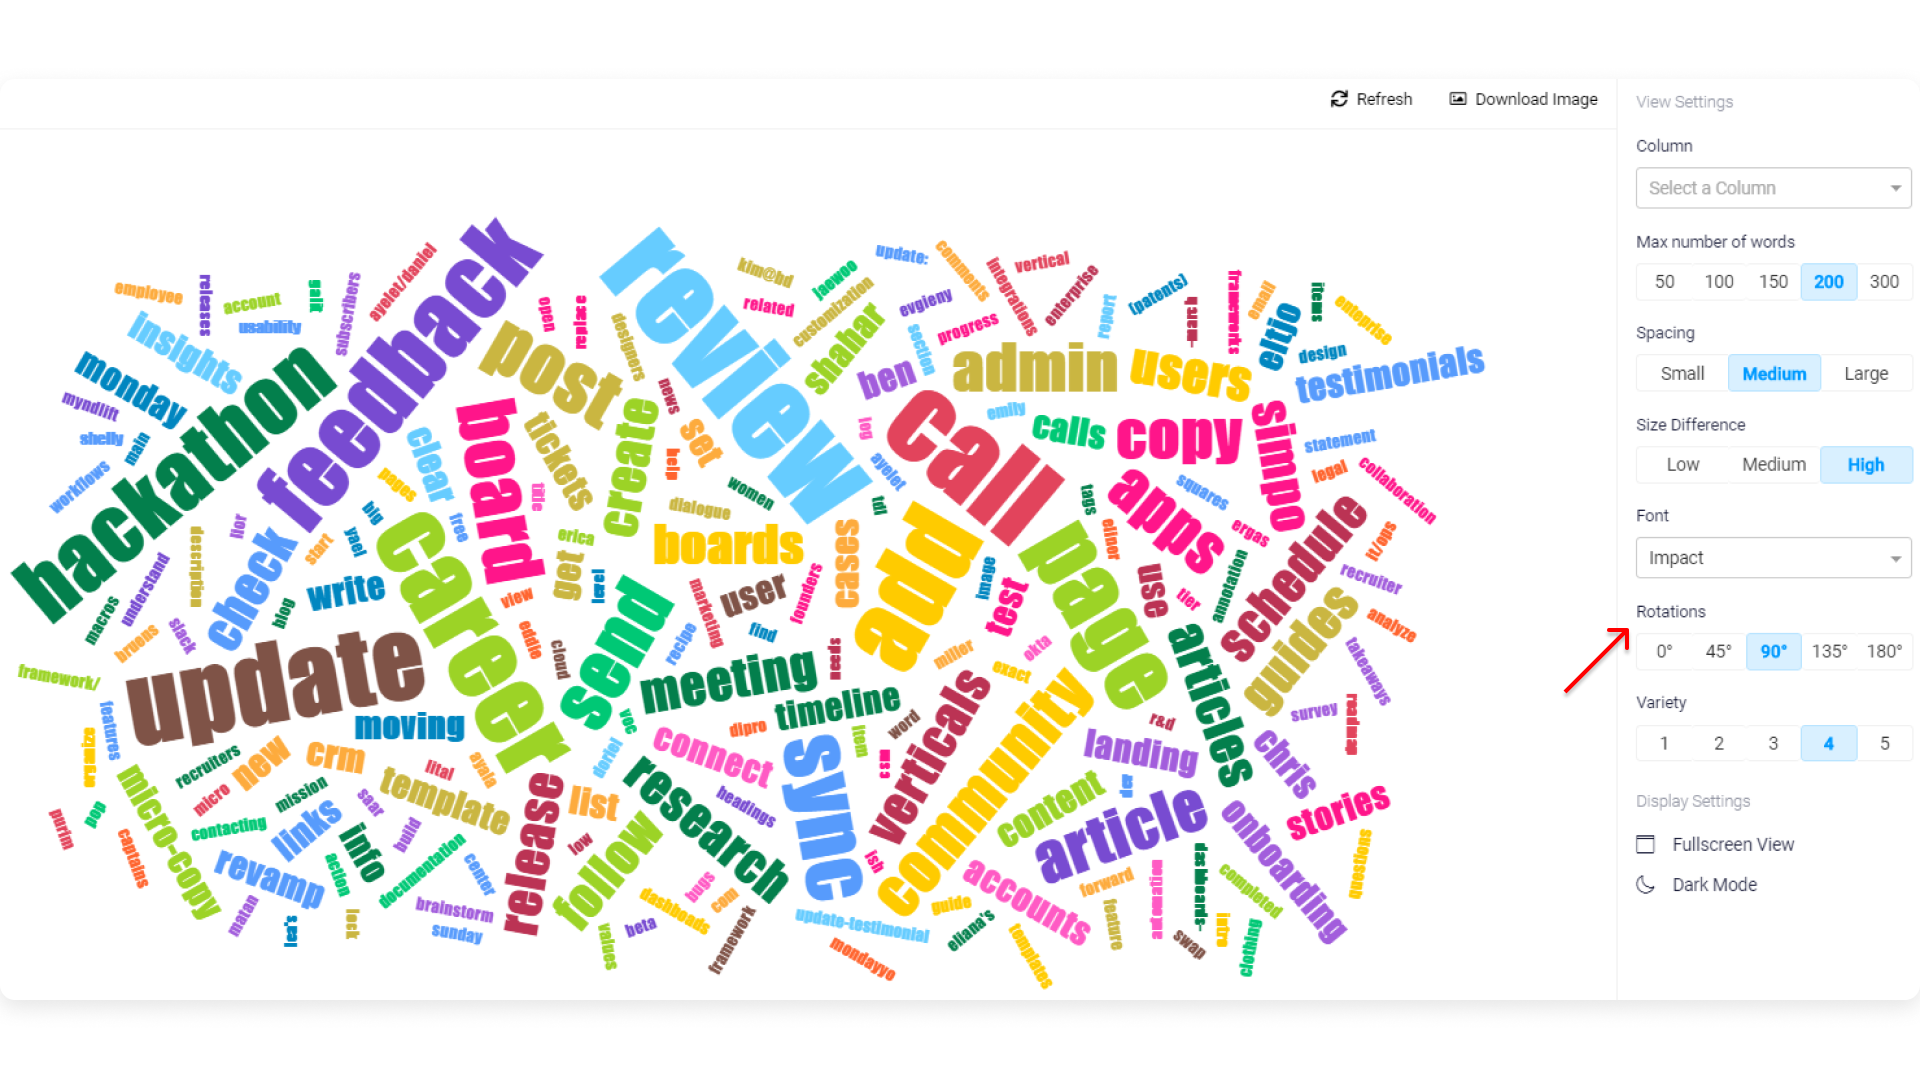
0 degrees will ensure all words are aligned straight up, while 180 degrees will have them exactly flipped over.
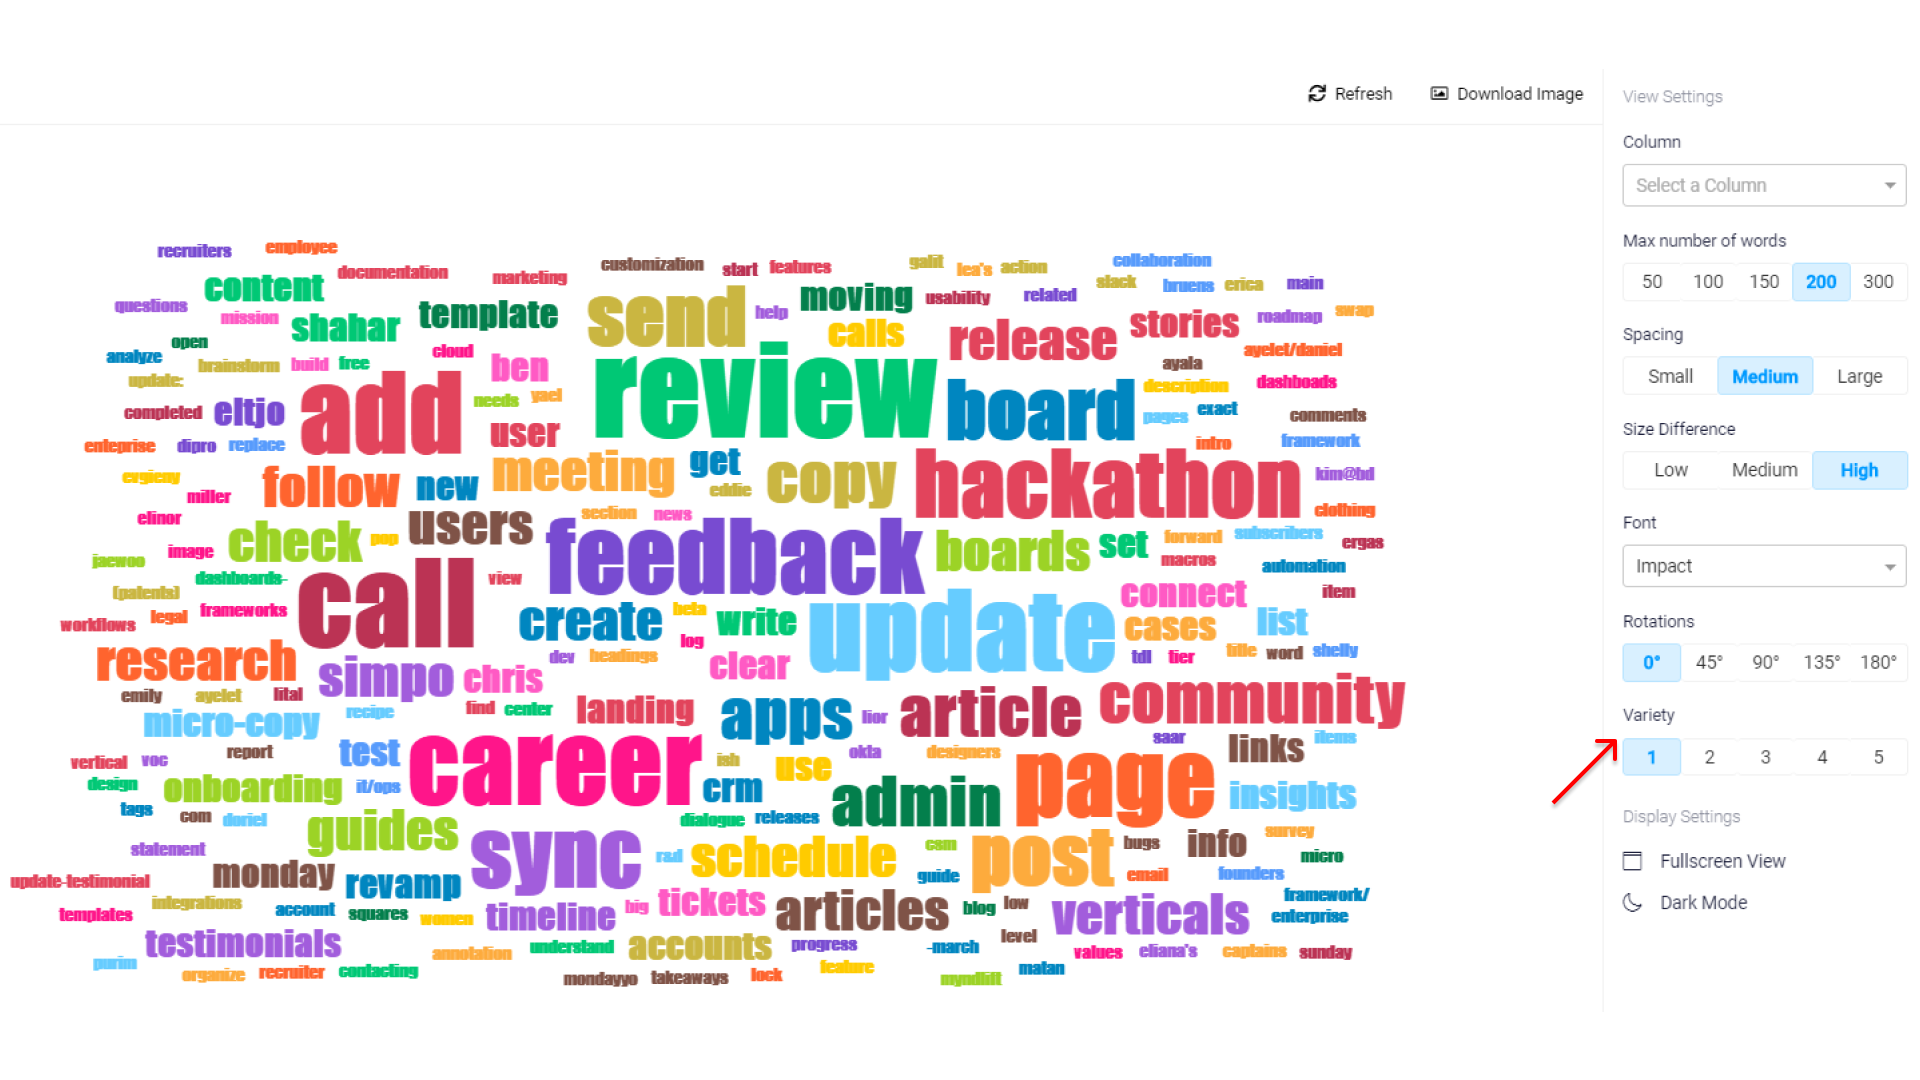
Step 7: Select your rotation variety
Don't want all words to appear rotated to the same degree? This is the place to set it up.
1= no variety; 5 = maximum variety
Step 8: Find your favorite version!
Want to check out a different version of your word cloud using the same settings? Simply click on the refresh button on the top right of the view and your word cloud will automatically display a different combination of colors and angles, using the exact same settings as before!

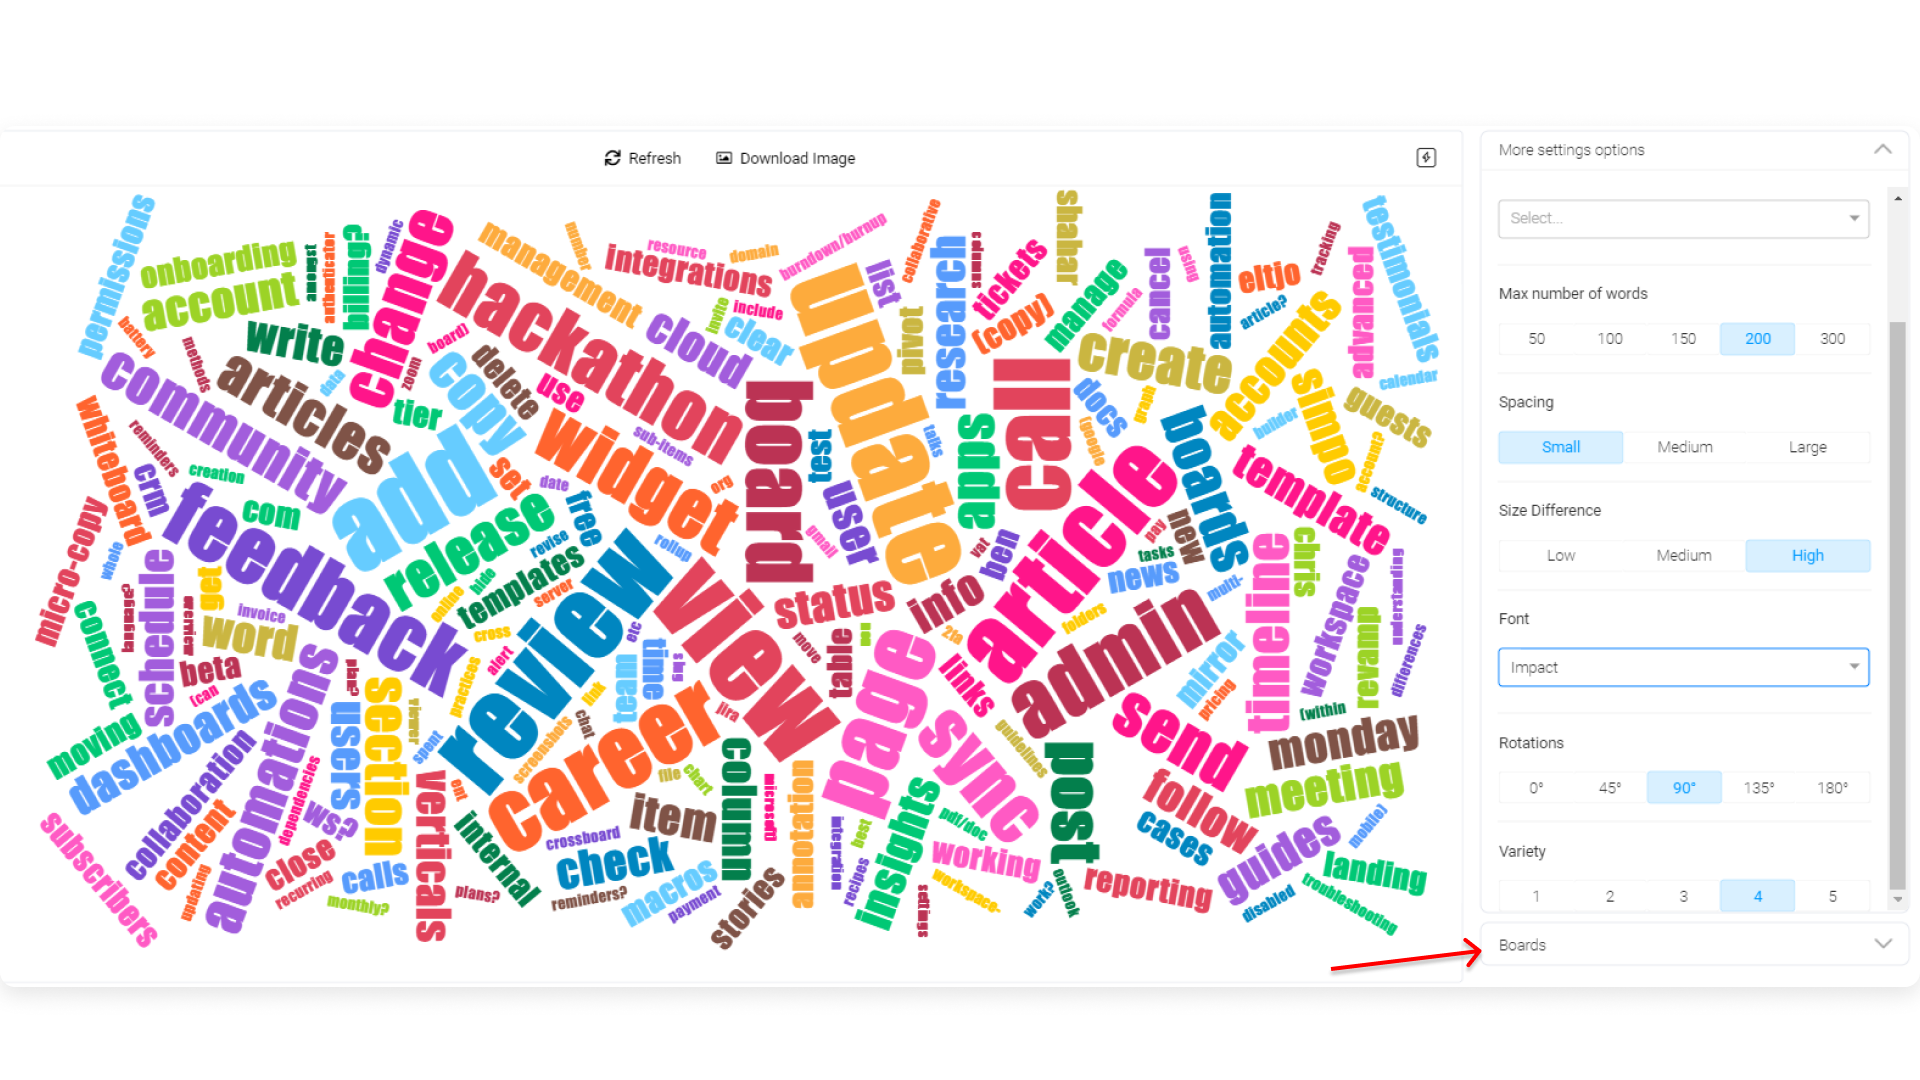
Step 9: Add or remove connected boards!
The word cloud widget allows you to connect multiple boards together to analyze textual data from across your account and pull out important takeaways.
You can select which boards to analyze, by using the following setting option:
There you go! You have officially completed the setup for your word cloud. Now let's take a look at what else you can do with it.
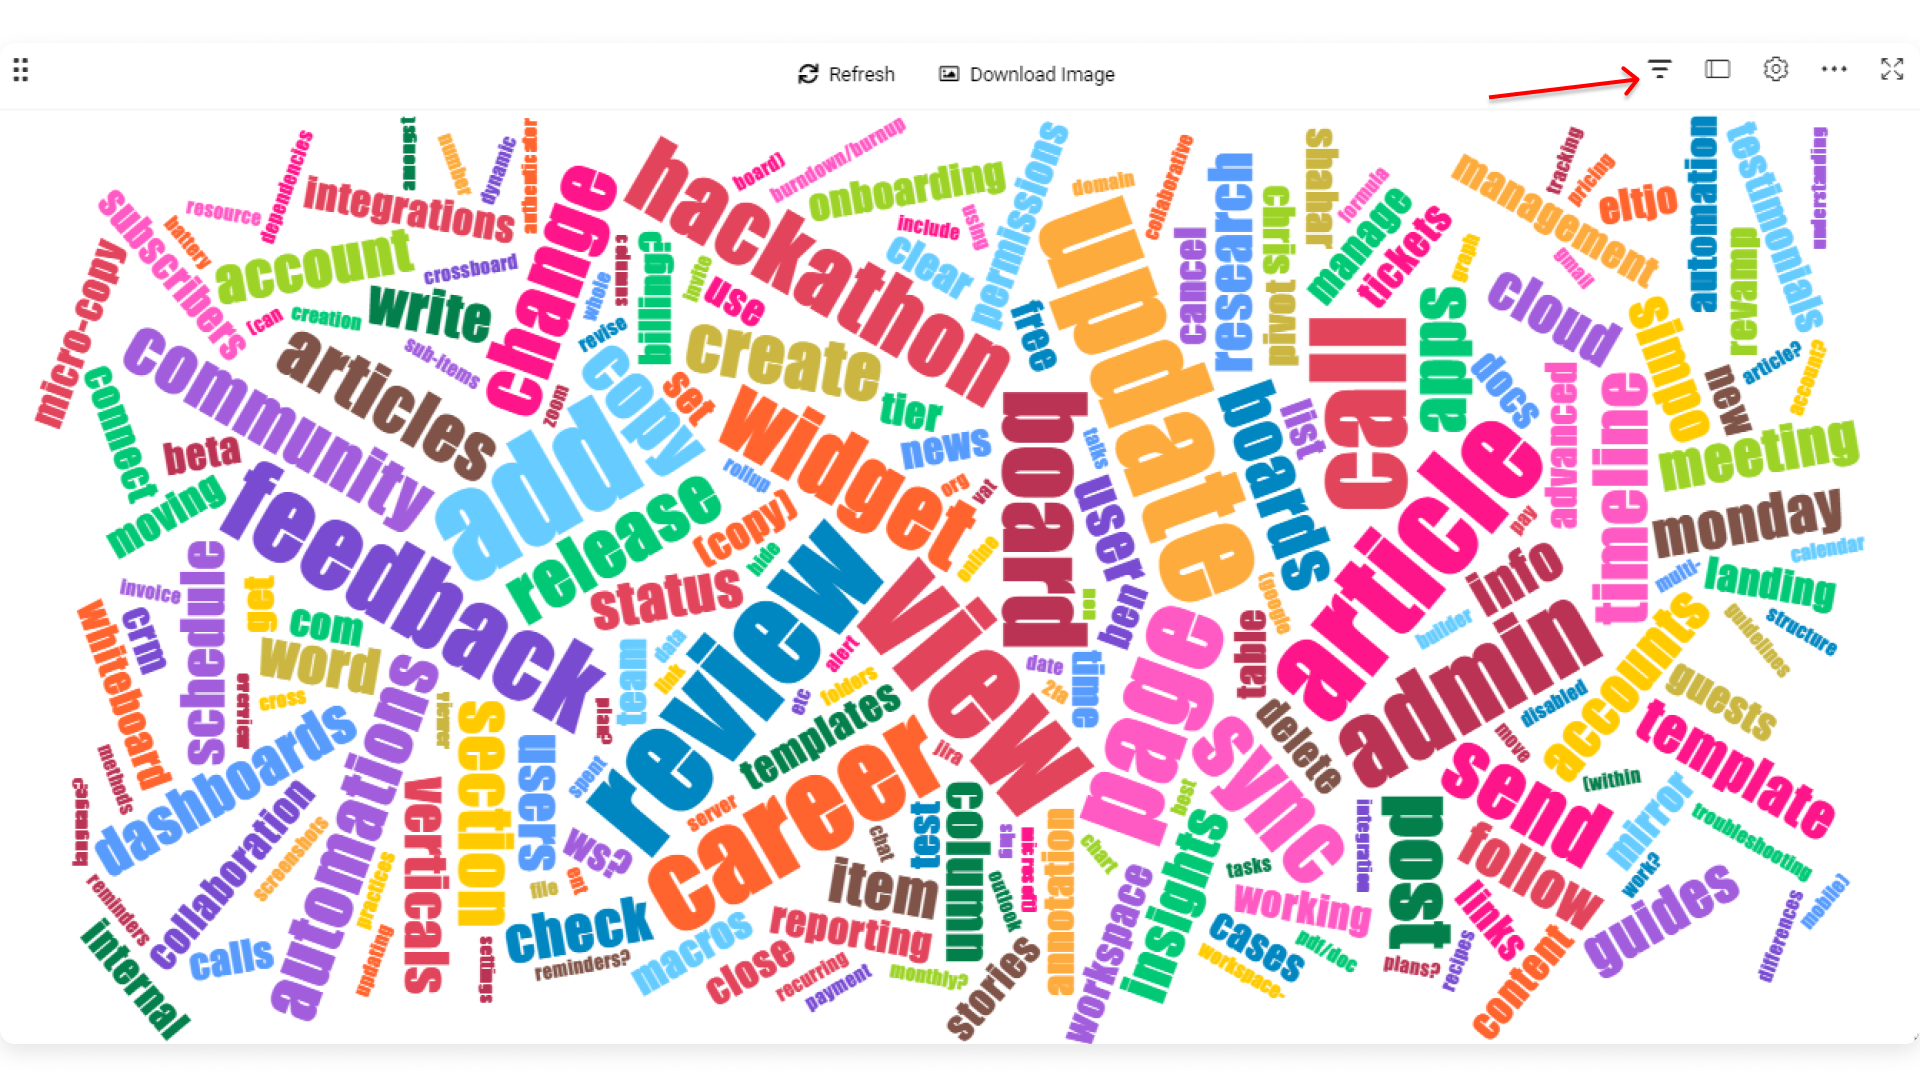
How to filter your word cloud?
You can filter your word cloud by using the board and widget filters. It is a great way to display the exact information you need. Let's say we're interested in seeing only the tasks that are not completed yet. By selecting the relevant groups and status, the filter will narrow down all words that appear on my word cloud too.
Board View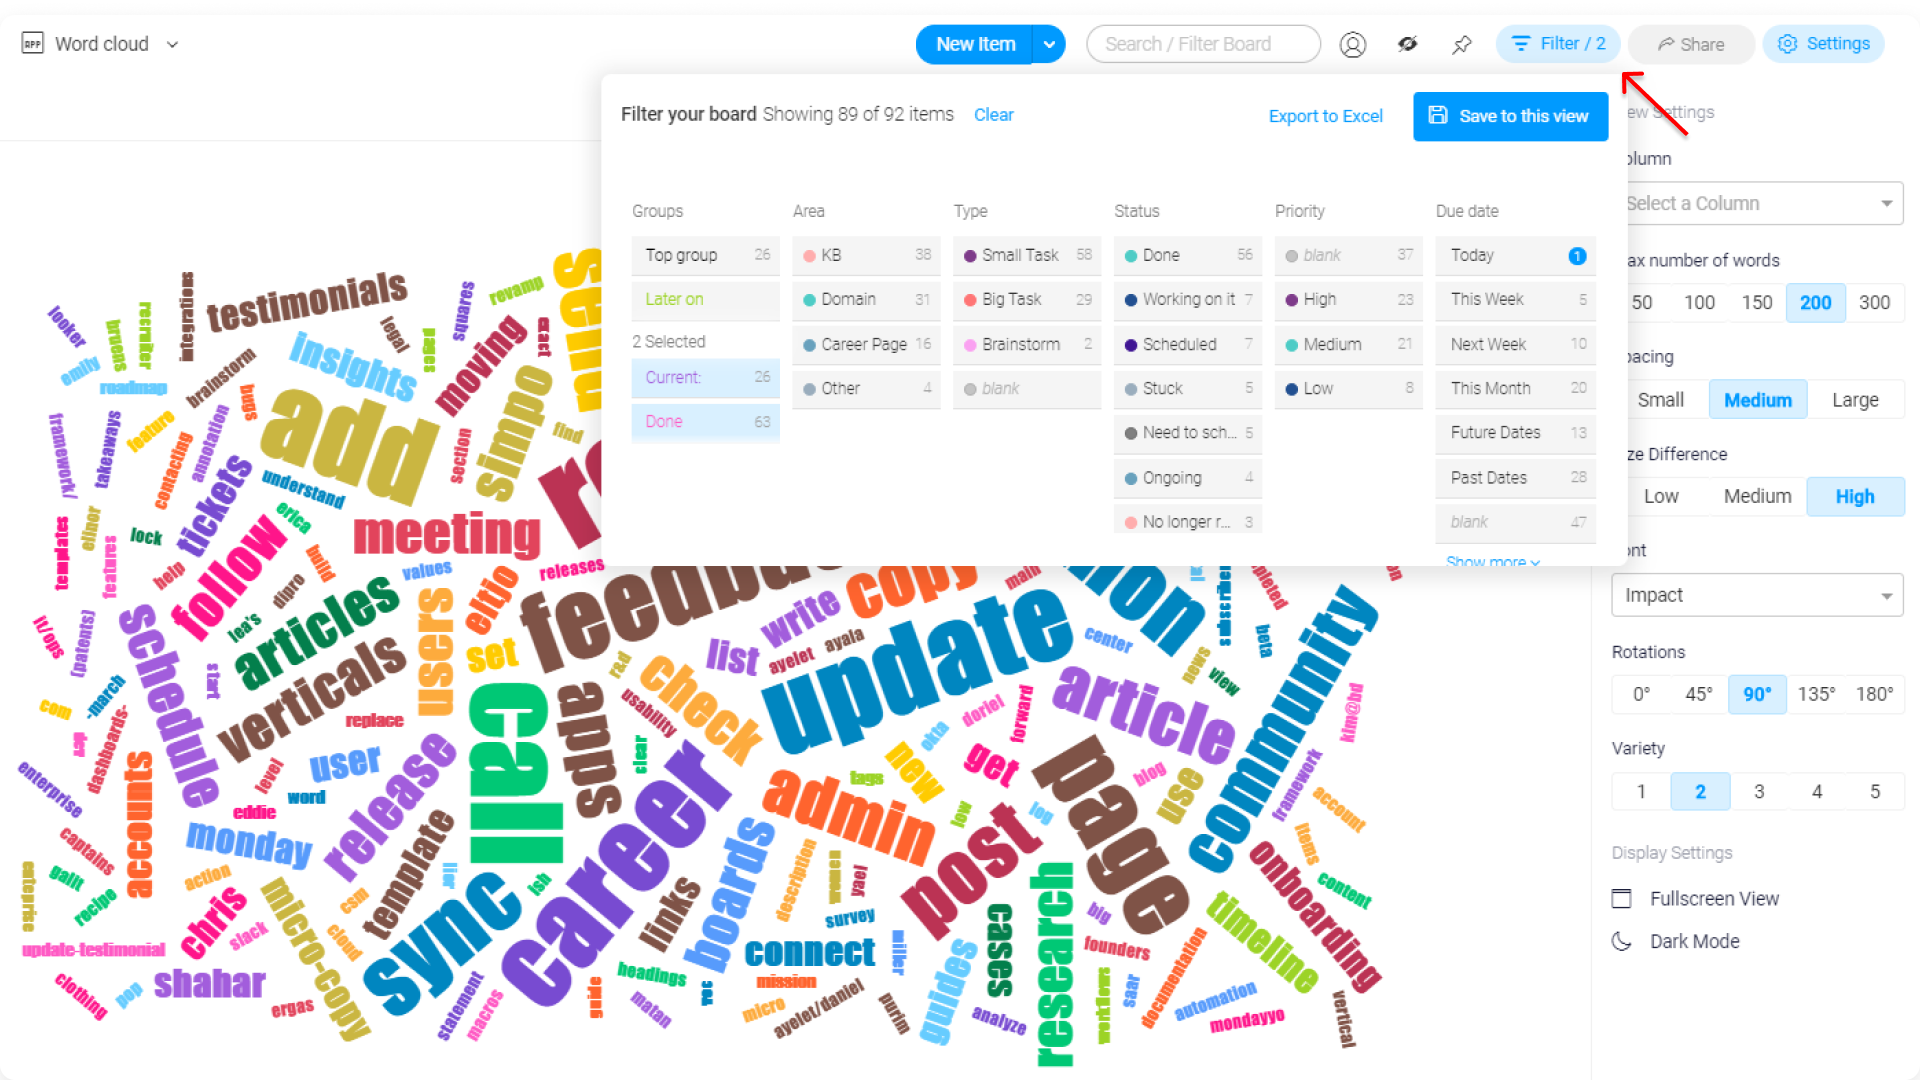
Dashboard Widget
How to Export your view?
Exporting your word cloud view and widget is easy. Simply click on the download icon on the top, and hit download.
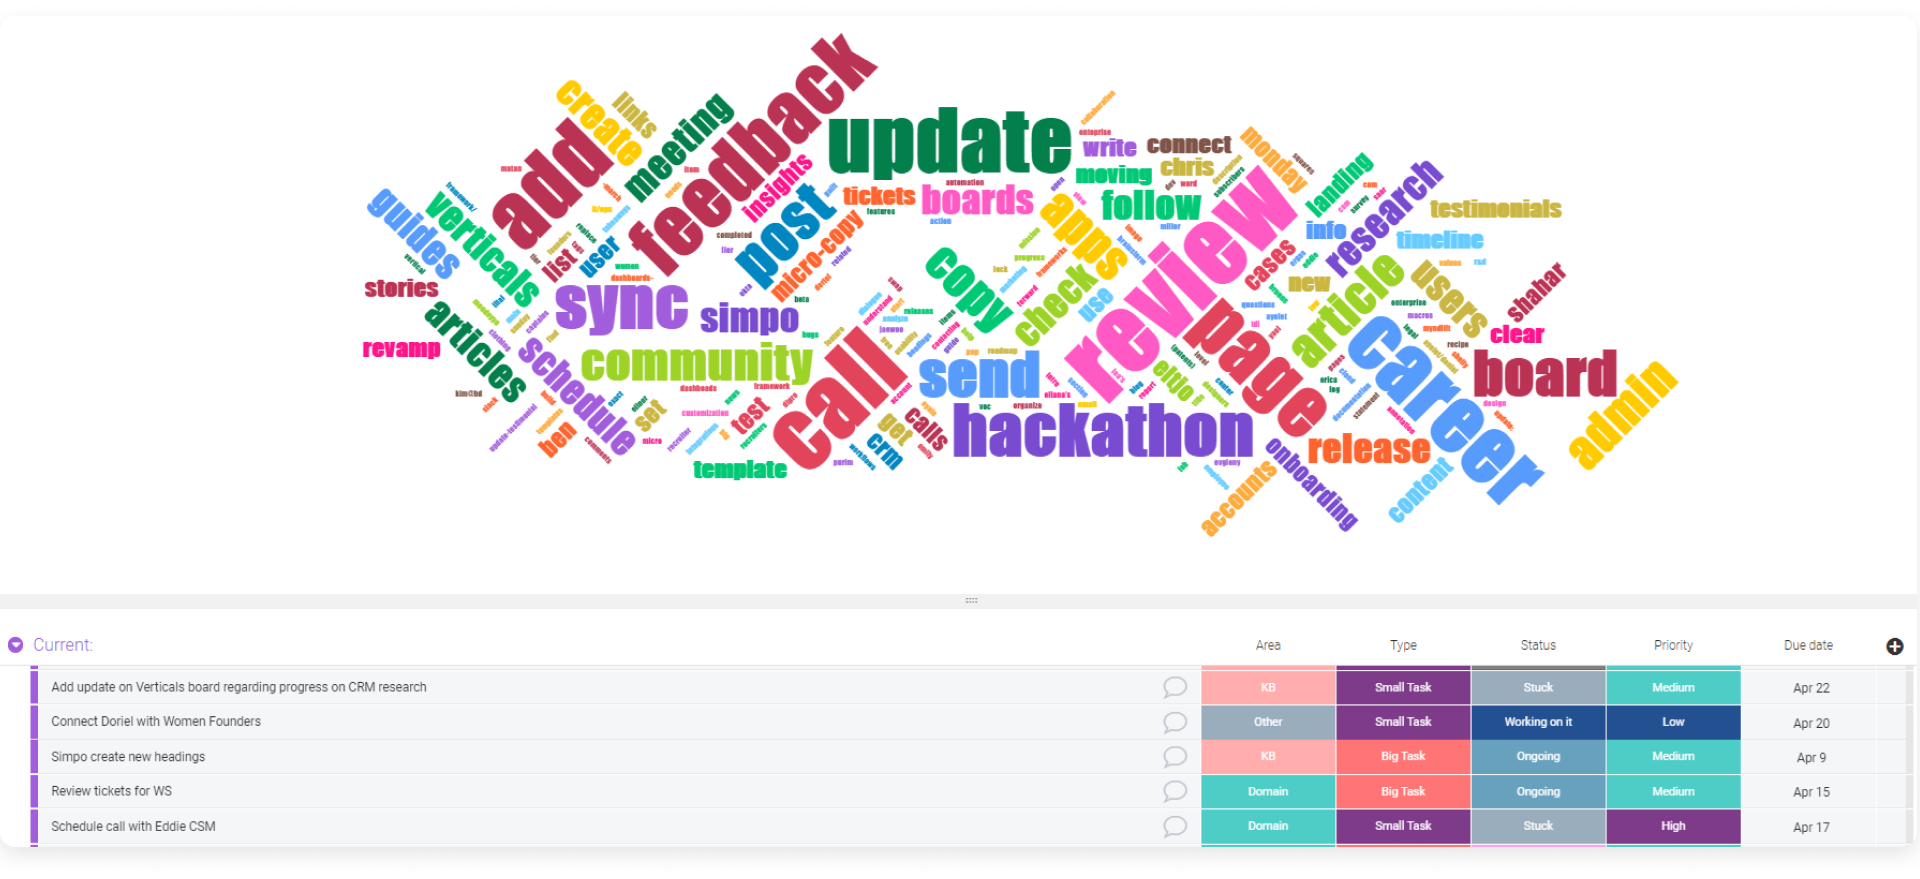
How to change the display settings?
Turn your chart dark or light according to your preferences by selecting the light/dark mode in the display settings.
On the board view, you can also pick whether you want your view to be in full view or split view. By choosing the split view, you will be able to see your word cloud and the board itself on the same view as below:
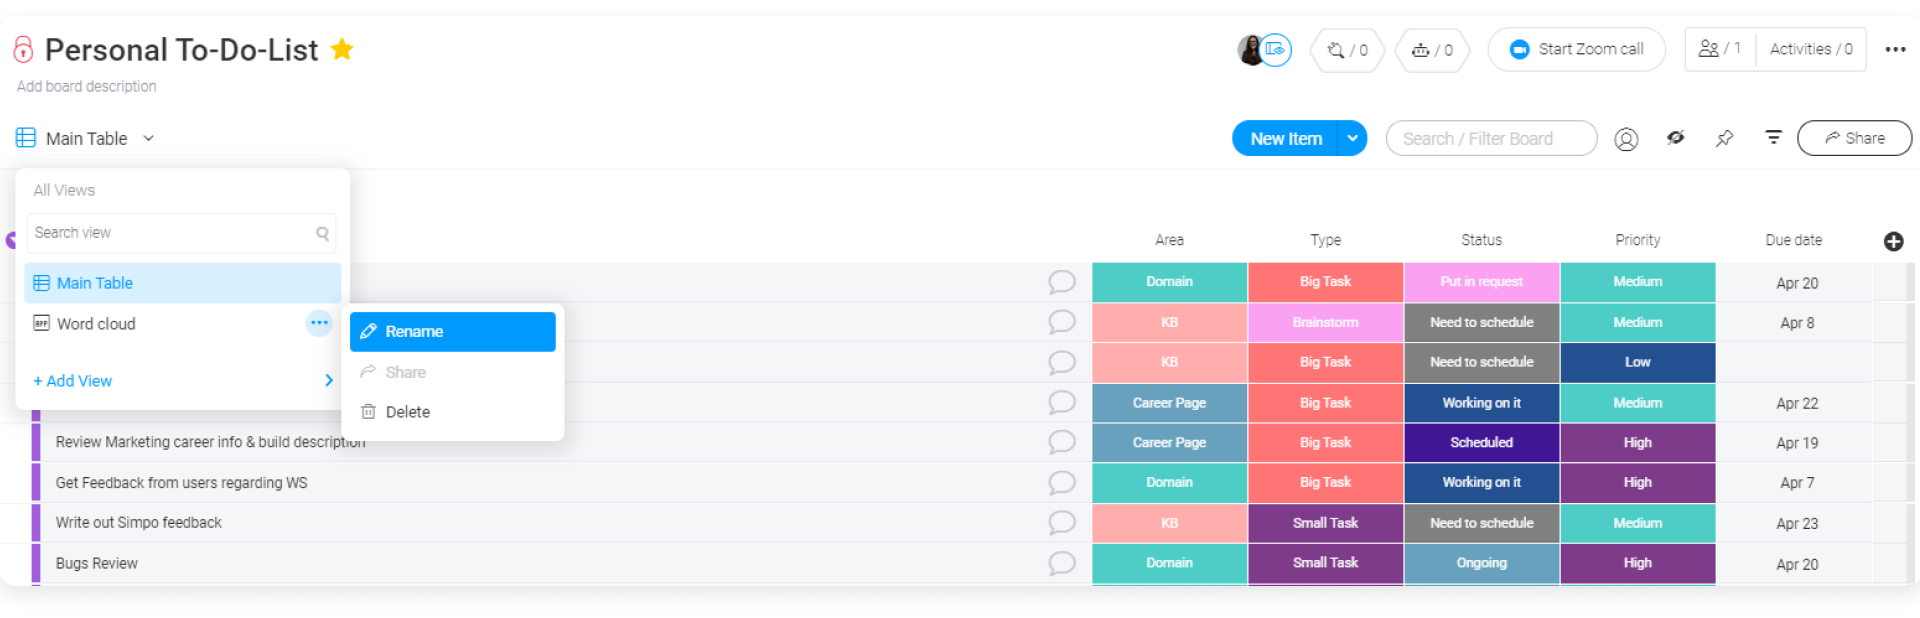
How to rename your word cloud?
You can always rename your word cloud view by going to the "Main Table" button, clicking on the word cloud you've created, then clicking on the 3 dot menu, and "rename". Or by simply clicking within the name of the word cloud itself.
With the help of your word cloud, you can now turn your textual data gathered on your boards into beautiful, visual representations to gain deeper understandings of your data, track trends and highlight all crucial information!
If you have any questions, please reach out to our team right here. We’re available 24/7 and happy to help.
Comments