


Scheduling can be a hassle if you don't have the right tools for the job. Thankfully, monday.com is here to help! In this guide, we'll explore different ways of scheduling employees. However, you can use these methods to schedule anything your heart desires.
Mapping availability
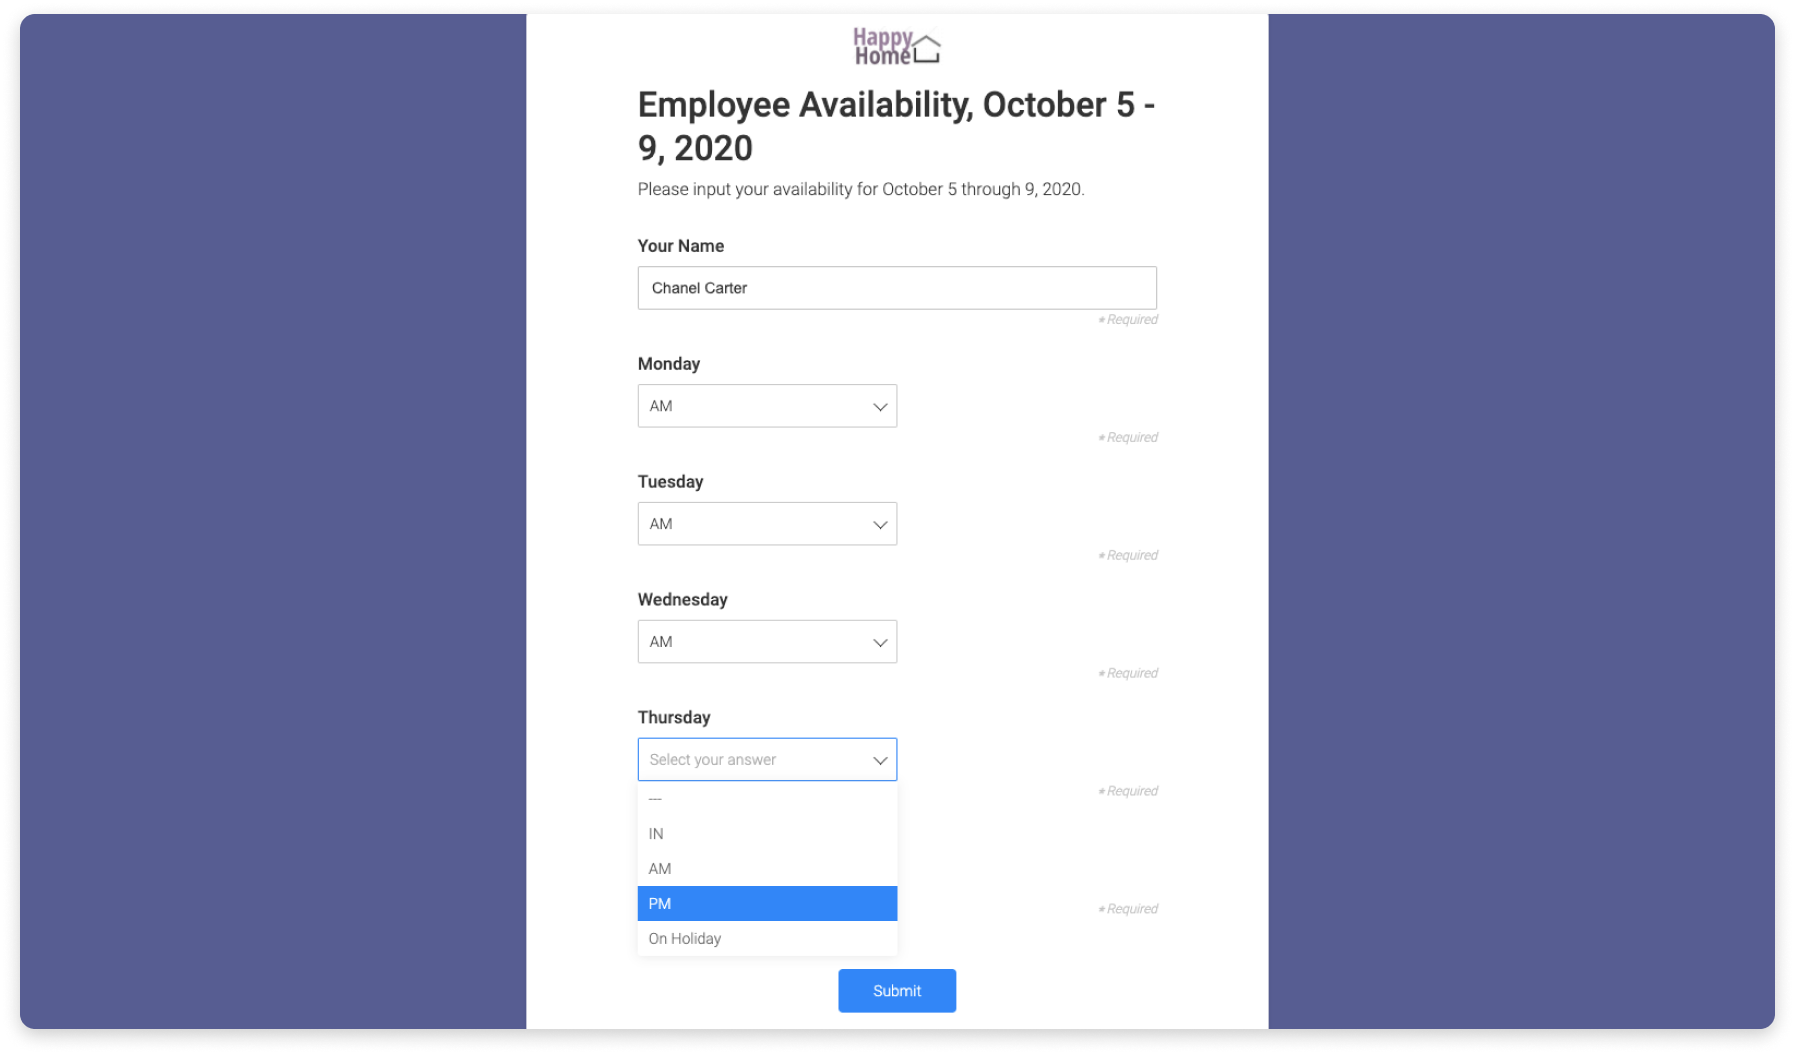
Before you begin building a schedule, you'll need to have an understanding of employee availability. You can build a board (like the one below) to input employee availability so that you always have a quick reference when scheduling.
Setting up the board
For this board, each group is set up to represent a week. Each item is an employee. There are five Status Columns, one for each weekday, with labels that represent how we're tracking availability. In this case, we want to know whether an employee is available all day ("IN"), in the morning ("AM"), in the evening ("PM"), or not at all ("OOO" or "On Holiday").
Utilizing forms
To build the board above, we utilized monday.com Forms. Each employee receives a form where they input their availability and, once the form is submitted, that information is auto-populated in the board. This helps to maintain confidentiality-- an employee will not see another employee's availability.
Shift scheduling
There are many different types of schedules, but a useful example comes in the form of shift scheduling.
Setting up the board
If your employees work in shifts and you need to construct a weekly schedule for them, the visual element of the People Column makes scheduling a breeze. Add a People Column to your board for each shift. In the following example, we have four shifts and one column for paid time off (PTO) or time out of office (OOO):
Each group should represent a week, and each item should be a day of the week. From there, it's easy to assign employees.
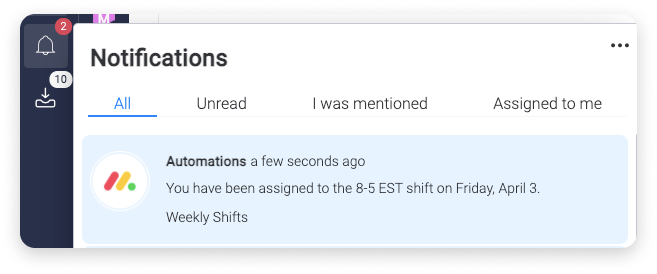
Adding automations
You can build an automation on this board to notify an employee each time they are assigned to a shift. This is an excellent way to keep everyone up-to-date and informed.
Analyzing your schedule
You can add additional columns to the shift scheduling board to track scheduling needs. In this example, we've added a Formula Column called "Total Employees" to count the number of employees assigned for the day. You can find the option to Count the number of assigned people in the dropdown menu for each People Column under "Columns" in the Formula Column menu:
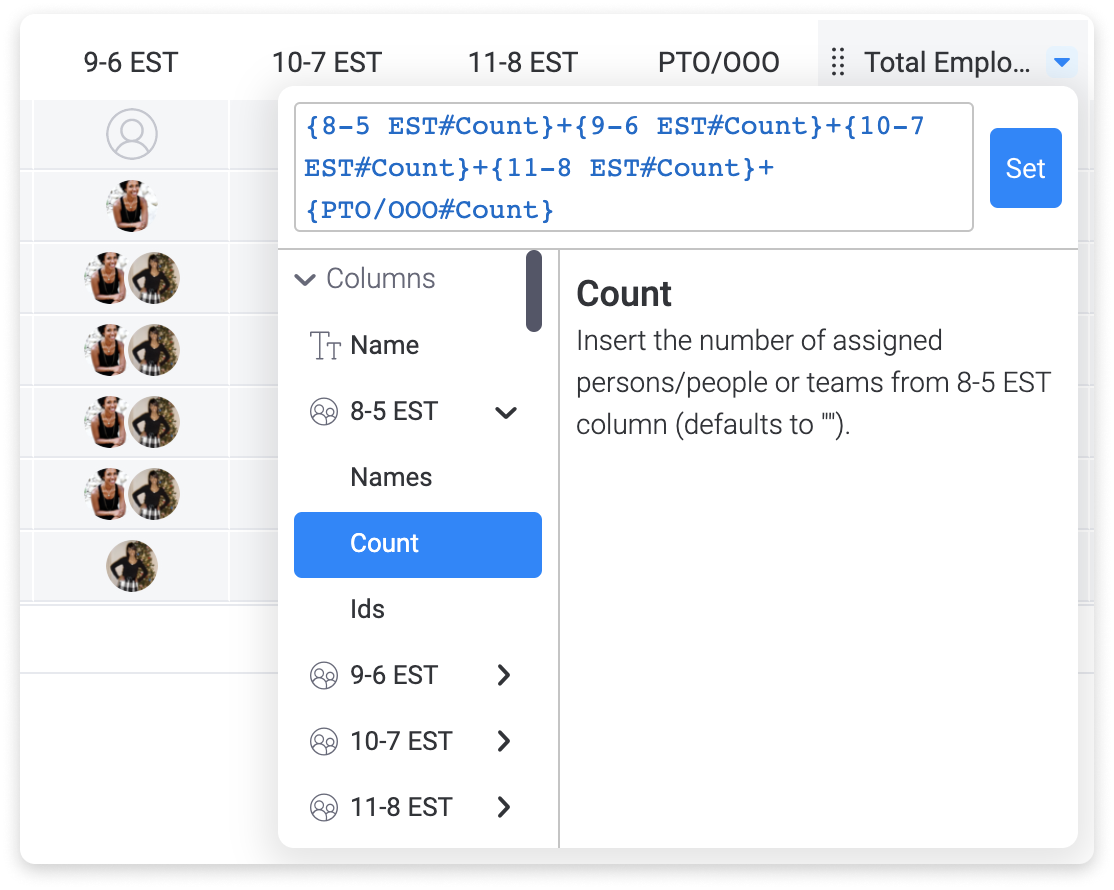
Simply adding the count for each People Column together in one formula will give you the number of employees assigned for the day. The formula we use to add this all up is:
{8-5 EST#Count}+{9-6 EST#Count}+{10-7 EST#Count}+{11-8 EST#Count}+{PTO/OOO#Count}
Now let's look at the other columns on this board:
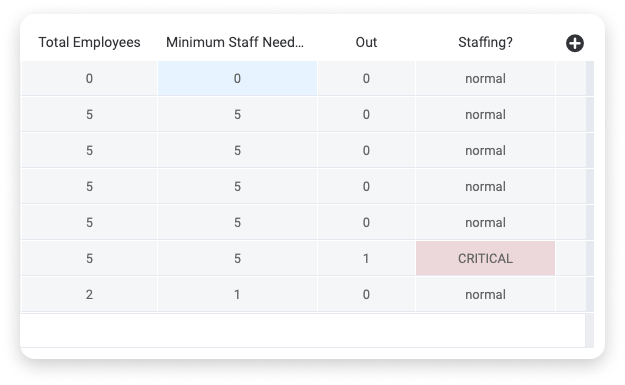
The "Minimum Staff Need" column is a Numbers Column. You can fill in the number of people you need working on that day. The "Out" column is a Formula Column counting the number of people who are assigned in the "PTO/OOO" column. And the "Staffing?" column is another Formula Column using the following formula:
IF(IF(AND(MINUS({Total Employees},{Out})<ADD({Minimum Staff Need},(DIVIDE(MULTIPLY({Minimum Staff Need},10),100))),MINUS({Total Employees},{Out})>{Minimum Staff Need}),"true","false")="true","Check Staffing",IF((MINUS({Total Employees},{Out}))<{Minimum Staff Need},"CRITICAL","normal"))
This formula tells us whether we are appropriately staffed for the day. This column also uses Conditional Coloring to highlight when you need to schedule more employees based on the number you specified in the "Minimum Staff Needed" column and the total number of employees scheduled.
Rotating schedules
If you're looking to schedule out tasks that rotate between team members, using a visual tool like monday.com can help you to make sure the work is distributed fairly.
Setting up the board
The following board displays a rotating schedule for closing a retail store. In this example, there are four essential tasks. The People Columns and Status Columns have a task as their title. Each task must be completed in order for the employees to successfully close the store.
This board is set up so that each group represents a week. The Date Column is in Deadline Mode here; the date is connected to the person responsible for "Lock up" and the status column indicating whether this task is done. When the employees have completed all of the closing tasks, the Progress Tracking Column shows 100%.
Adding automations
You can also set up Due Date Reminders from the Date Column's menu.
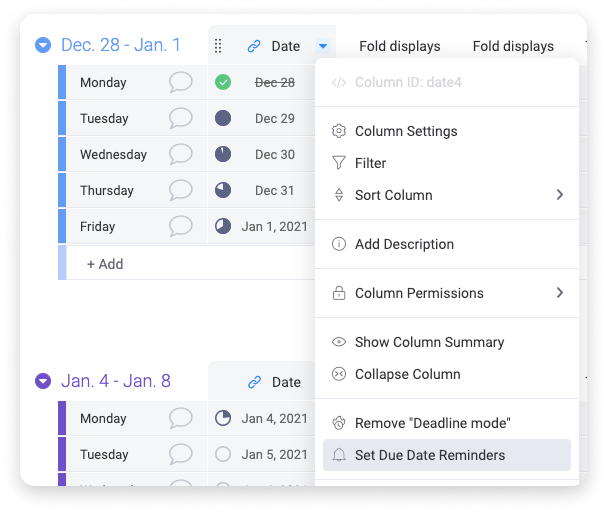
Selecting this option will lead you to set up an automation. We recommend configuring the automation to notify the person responsible for the most important task. In the case of this example, that would be "Lock up" for the night.
These are a few examples of how you can use monday.com to help with your scheduling. If you're interested in learning more about how you can manage your employees with monday.com, we recommend checking out our guide on Resource Management.
If you have any questions, please reach out to our team right here. We’re available 24/7 and happy to help.
Comments